Key Lime Cheesecake Recipe

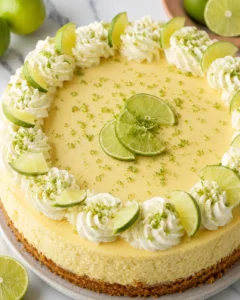
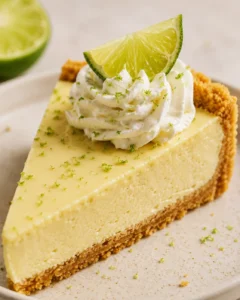
This key lime cheesecake recipe brings together a bright, tangy lime filling, a smooth and creamy cheesecake texture, and a buttery graham cracker crust. The flavor is sweet and rich without losing the fresh lift of lime, and a cloud of whipped cream makes the finished dessert feel especially festive.
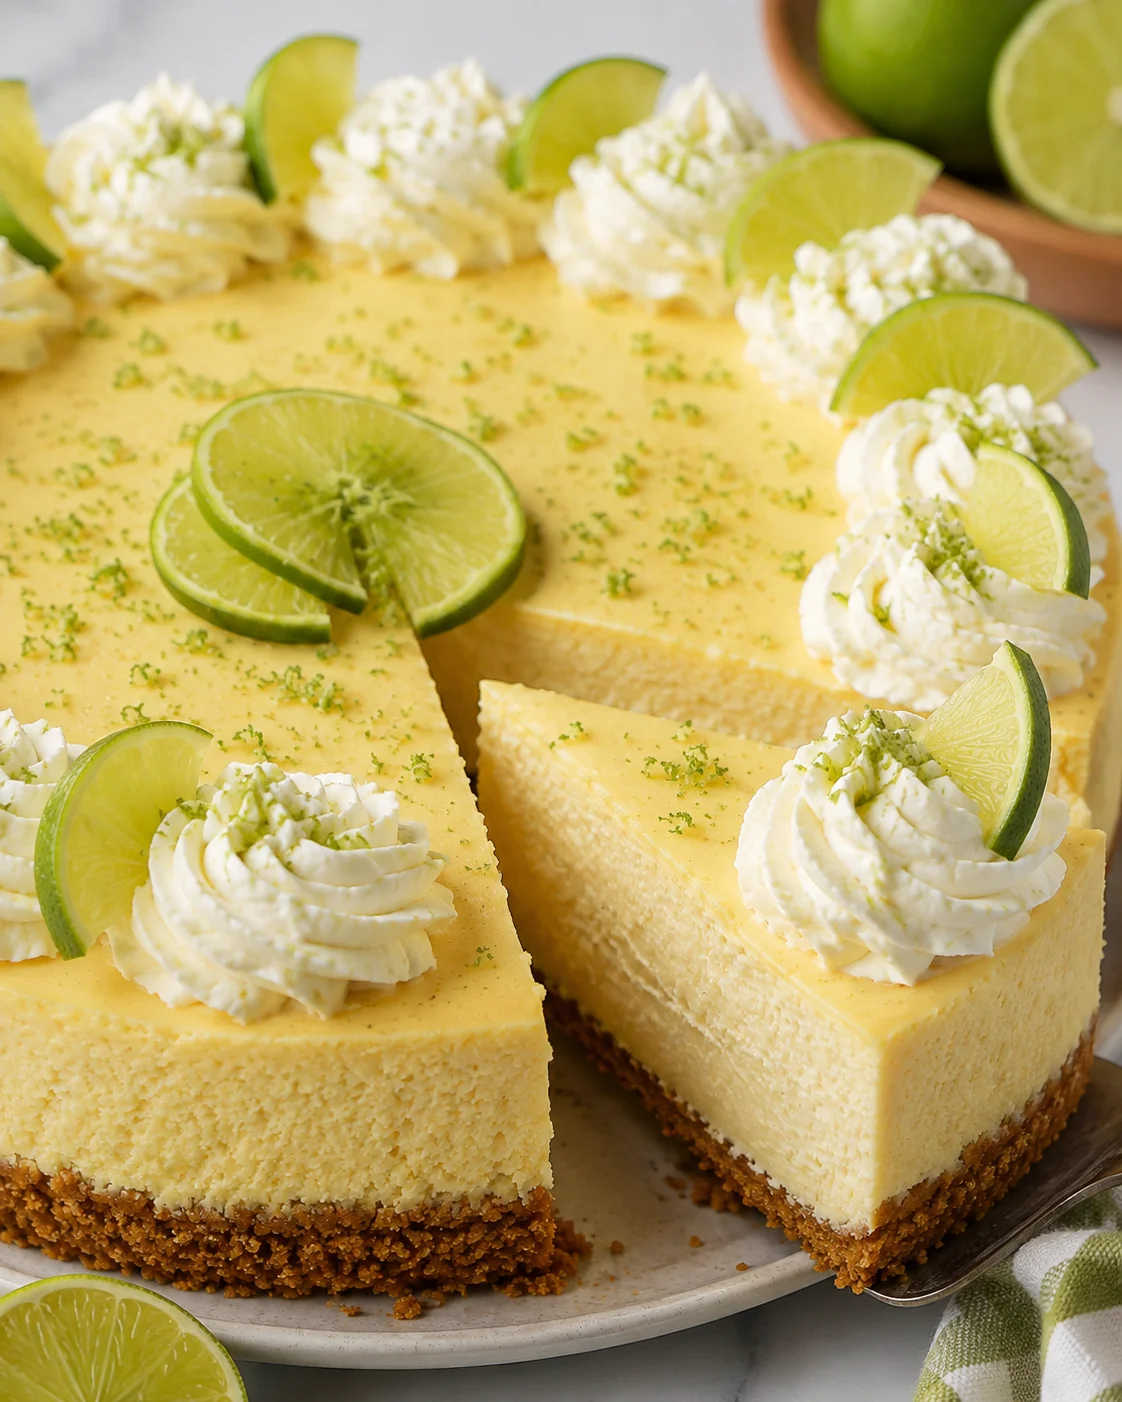
The long chill is part of the plan, not a nuisance. The cheesecake cools gradually, rests overnight, and is at its best 24 hours after making. That makes it a practical dessert for spring and summer gatherings, Easter entertaining, or any occasion when the dessert needs to be finished before guests arrive. It serves 12 to 14 and has a 30-minute preparation time and a 2-hour-20-minute cook time, followed by cooling and chilling.
A water bath, room-temperature ingredients, and a gentle cooling schedule help the cheesecake bake evenly and stay creamy. The stabilized whipped cream option can be piped onto the cooled cheesecake one or two days ahead, so even the topping can be ready before serving.
Why You Will Love This Key Lime Cheesecake Recipe
There are a few moving parts here, but every part has a clear job. The graham cracker crust is baked first so it seals together and does not become soggy when the filling is added. The filling is mixed until smooth before the eggs go in, and then the eggs are incorporated gently to limit extra air. The water bath helps the edges and center bake at a more even pace. Finally, gradual cooling and a full chill give the cheesecake time to set into clean, creamy slices.
- It is bright but still rich. Key lime juice and zest add a fresh, tangy edge to the sweet, dense cheesecake. The result is lush without tasting flat or overly heavy.
- The texture is exceptionally smooth. Very soft cream cheese, room-temperature ingredients, sour cream, and a careful mixing order all support a creamy filling.
- The crust is sturdy. Finely ground graham crackers, melted butter, and firm pressing create a compact base that is easier to slice and transfer.
- The recipe is designed for make-ahead baking. The baked cheesecake can be refrigerated for up to seven days, and stabilized whipped cream can be prepared and piped ahead.
- The water-bath method addresses common cheesecake problems. Waterproofing the springform pan helps keep bath water from soaking into the crust, while the gentle oven and cooling process helps reduce cracking.
- You have options for the lime. Fresh key limes, bottled key lime juice, or a combination of regular lime juice and lemon juice can all provide the needed citrus character.
- The topping is flexible. Use stabilized whipped cream for advance preparation or regular whipped cream just before serving. Raspberries, strawberries, lime wedges, lime zest, and mint are optional finishing touches.
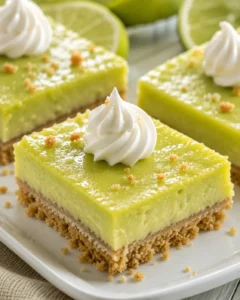
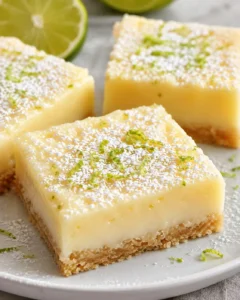
- It works for different equipment setups. A 9-inch springform pan is the preferred choice, but the source also provides guidance for a 10-inch springform pan and for turning the dessert into cheesecake bars in a 9-by-13-inch baking dish.
A creamy center with a gentle lime finish
The filling is not meant to be baked until it is rigid in the middle. When it comes out of the oven, the edges should be firm while a small 2- to 3-inch circle in the center still jiggles slightly. That wobble is an important visual cue. The cheesecake continues to set as it cools and chills, and baking until the center is completely firm can leave the finished dessert dry, heavy, or more likely to shrink and crack.
The lime flavor comes from both juice and zest. Key lime juice is a little more tart than regular lime juice, although the difference can be subtle in a rich cheesecake. If key limes are unavailable, regular lime juice works, and the specified addition of lemon juice brings a brighter acidity closer to the key-lime profile. Regular lime zest can stand in for key lime zest as well.
Ingredients
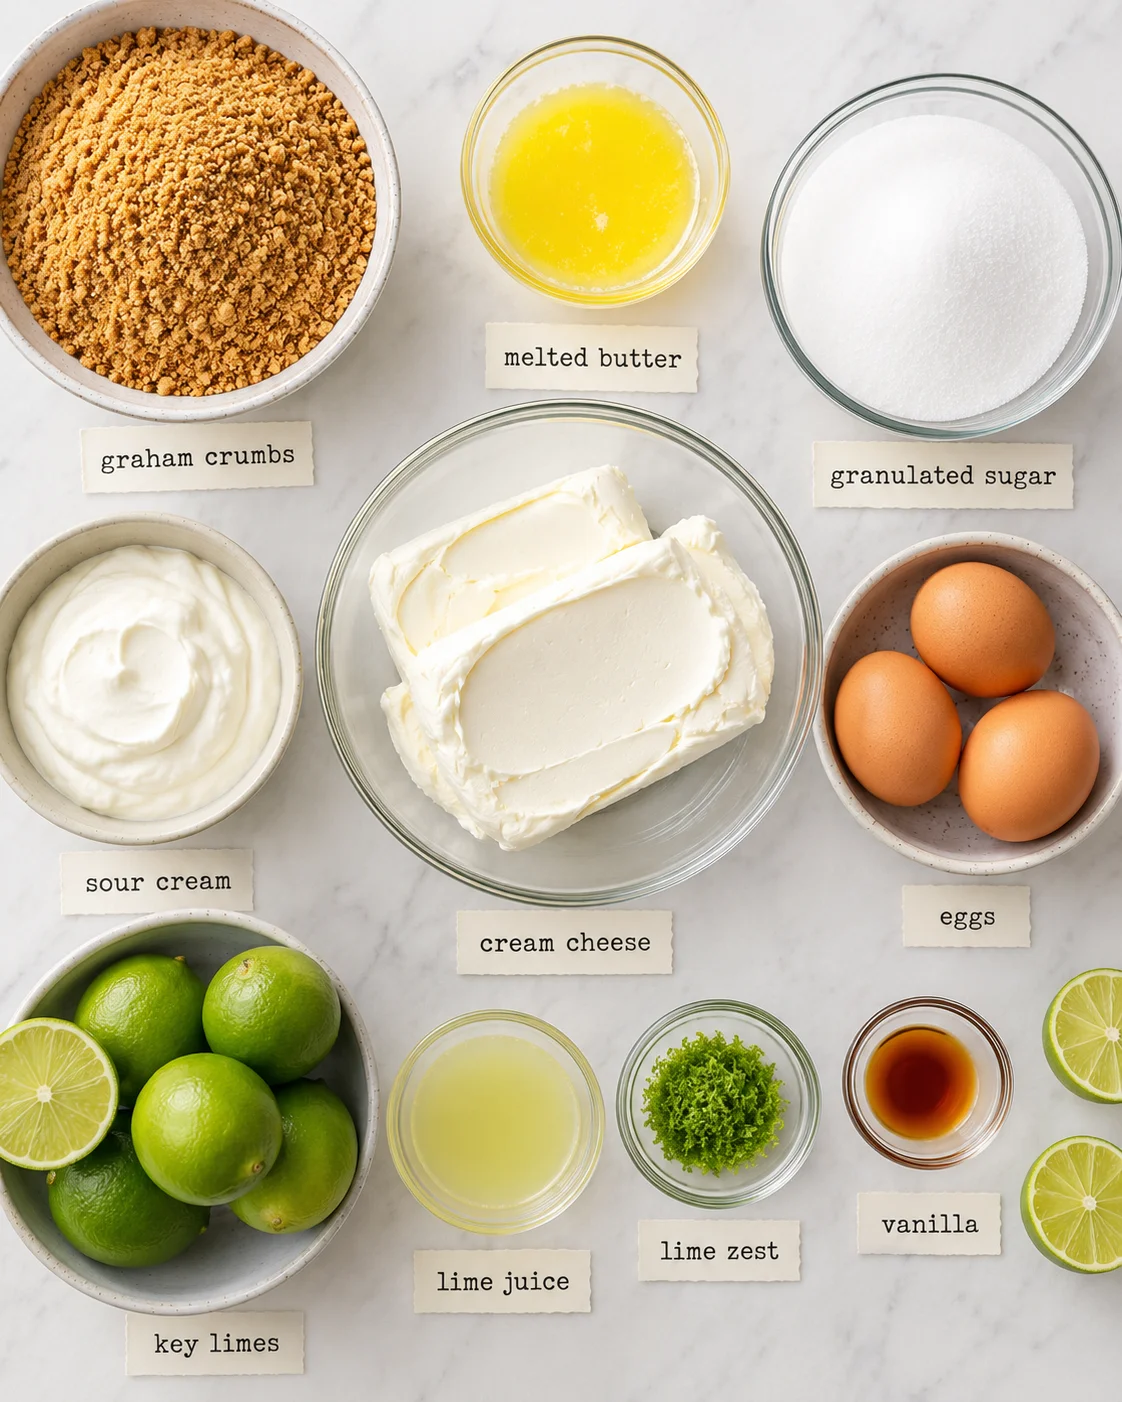
Gather the equipment and ingredients before starting. The filling benefits from soft cream cheese and room-temperature dairy and eggs, while the whipped cream works best with very cold heavy cream. The optional stabilized topping uses a small amount of unflavored gelatin to give the cream structure.
Special equipment
- 1 9-inch round, 2 3/4-inch-high springform pan
- 1 slow cooker liner, optional but recommended
- 18-inch-wide heavy-duty aluminum foil
- 1 large roasting pan
- Parchment paper
- Nonstick cooking spray
- An electric mixer fitted with a paddle attachment for the cheesecake filling
- An electric hand mixer for the whipped cream
- A wire rack
- A large glass liquid measuring cup or pitcher with a spout for adding the boiling water
- A piping bag fitted with a large tip if you are piping the whipped cream
For the graham cracker crust
- 14 full-sheet graham crackers, or 2 scant cups crumbs: Honey graham crackers keep the crust delicious but neutral enough for the key lime filling to lead. The crumbs should be very fine so they bind together well.
- 3 tablespoons granulated sugar: This adds sweetness to the crust.
- 8 tablespoons unsalted butter, melted: Unsalted butter lets you control the salt in the finished crust. Melt it before mixing it with the crumbs.
For the cheesecake filling
- 4 8-ounce packages cream cheese, very soft: Full-fat cream cheese gives the filling its richest flavor and creamiest texture. Lower-fat cream cheese can work, but nonfat cream cheese is not recommended. The cream cheese should be soft enough that a finger can press into it without resistance; otherwise, lumps are likely.
- 1 cup plus 2 tablespoons granulated sugar: This sweetens the filling while allowing the lime flavor to remain noticeable.
- 2 tablespoons cornstarch: Cornstarch helps the filling set. If cornstarch is unavailable, use 3 tablespoons flour.
- 1 cup full-fat sour cream, at room temperature: Sour cream contributes smoothness, creaminess, and moisture. Its flavor is not meant to stand out in the baked cheesecake.
- 1/2 cup key lime juice, at room temperature: Bottled or fresh juice is suitable. Regular lime juice can be used, or use 6 tablespoons regular Persian lime juice plus 2 tablespoons lemon juice for a closer approximation to key lime juice.
- 1 teaspoon key lime zest: Regular lime zest is an acceptable alternative.
- 1 1/2 teaspoons vanilla extract: Quality vanilla extract is recommended for the best flavor.
- 4 large eggs, at room temperature: Room-temperature eggs combine more easily with the softened filling.
- 1 large egg yolk, at room temperature: The extra yolk contributes additional creaminess. The four eggs plus one yolk mean five eggs total.
For the optional stabilized whipped cream
- 1 teaspoon unflavored gelatin: Gelatin is what changes ordinary whipped cream into stabilized whipped cream. It is commonly sold near gelatin desserts and pudding.
- 1 1/2 tablespoons cold water: The water hydrates the gelatin before it is warmed.
- 1 cup cold heavy whipping cream: Use heavy cream or heavy whipping cream. No other cream substitution is specified for this topping. Keep it refrigerated until you are ready to whip it.
- 3 tablespoons powdered sugar: Powdered sugar works well with the gelatin and is preferred here over granulated sugar.
- 1 teaspoon vanilla extract
Optional garnishes
Finish the cheesecake with fresh raspberries, sliced strawberries, lime wedges, lime zest, or fresh mint. Use any combination you like, or leave the top with only the whipped cream.
Instructions
Plan the stages in order: prepare the oven and water, line the pan, make and bake the crust, waterproof the pan, mix the filling, bake the cheesecake in its water bath, cool it gradually, and chill it overnight. The whipped cream can be made while the cheesecake is cooling or later, depending on whether you are using the stabilized or traditional version.
1. Prepare the oven and pan
- Preheat the oven to 325 degrees F.
- Begin boiling a large pot of water for the water bath. About 4 quarts is a useful amount to start with, although you may not need all of it.
- Line the bottom of a 9-inch springform pan with parchment paper. Lightly grease the inside of the entire pan with nonstick cooking spray. The parchment makes it easier to transfer the chilled cheesecake later, and greasing the sides helps the cake release as it cools and contracts.
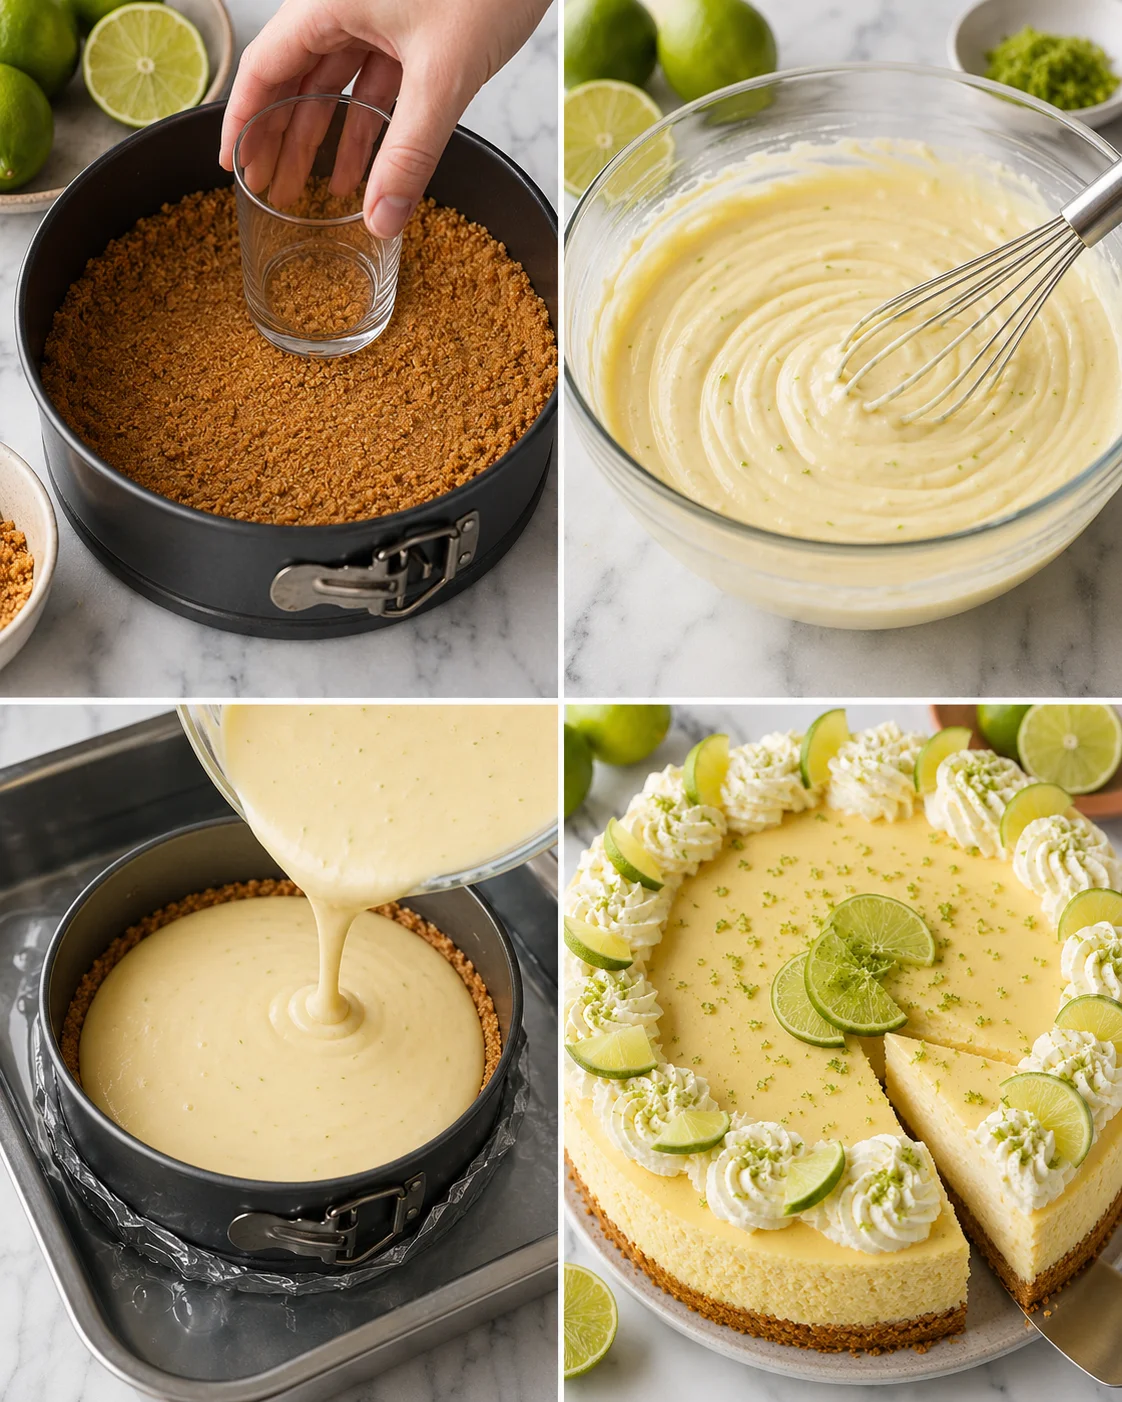
Take a moment to check that the springform latch is closed securely. The springform is tall enough for the filling and can be unclamped after chilling so the cheesecake can be removed without trying to turn it out of a deep cake pan.
2. Make and bake the graham cracker crust
- Add the graham crackers to a food processor and pulse until the crumbs are very fine. If you do not have a food processor, place the crackers in a sealable bag and crush them with a rolling pin or the side of a can.
- Add the melted butter and granulated sugar to the food processor and pulse until the crumbs are evenly moistened. Without a food processor, stir the crumbs, butter, and sugar together in a bowl until no dry pockets remain.
- Transfer the moistened crumbs to the greased springform pan. Press them firmly across the bottom in one even layer. The flat bottom of a small bowl or measuring cup is useful for compacting the crust without leaving loose areas.
- Bake the crust at 325 degrees F for 10 minutes.
- Set the crust on a wire rack and let it cool completely. You can prepare the filling while it cools, but do not pour the filling onto a hot crust.
The pre-bake gives the crumbs time to bind and seal together. Cooling is equally useful: adding the filling to a hot crust can make the base softer, while a completely cooled crust provides a firmer foundation for the cheesecake mixture.
3. Waterproof the springform pan
The water bath surrounds the springform pan during baking, so the outside of the pan needs protection. A springform pan can allow water to seep through its base and soak into the crust if it is not wrapped carefully.
- Place two large 18-by-18-inch pieces of heavy-duty aluminum foil on a flat surface, arranged underneath the pan in the shape of a plus sign.
- Set the springform pan in the center and gently fold the foil up around the sides. Fold carefully so you do not create holes in the foil.
- For the second layer, place the foil-lined pan in the center of a slow cooker liner or large oven roasting bag. Bring the bag up toward the top of the pan, gather the extra material to one side, and tie it in a knot.
The liner or roasting bag is optional, but it is highly recommended as an additional barrier. If you skip it, use two more layers of foil around the springform pan. The goal is to keep the boiling water outside the pan and away from the crust.
4. Mix the cheesecake filling
- Add the very soft cream cheese to the bowl of an electric mixer fitted with the paddle attachment. Beat on medium speed until it is light and fluffy, about 4 minutes. Do not shorten this step.
- Add the granulated sugar and cornstarch. Beat on medium speed for 5 additional minutes. The extended mixing time helps create a smooth base before the eggs are introduced.
- Add the room-temperature sour cream, key lime juice, lime zest, and vanilla extract. Beat until blended.
- Add the four eggs one at a time, followed by the egg yolk. After each addition, beat only until it is combined. Once the eggs are in the bowl, avoid extended mixing because overbeating can add air, cause cracks, and make the cheesecake deflate.
- Pour the filling over the completely cooled crust.
- Gently drop the pan on the counter a few times to release large air bubbles. Keep the motion controlled so the pan stays upright and the crust remains even.
Soft cream cheese is the starting point for a lump-free filling. If the cream cheese is still firm, the mixer must work harder to smooth it, and small pieces can remain in the batter. Room-temperature sour cream, juice, and eggs also blend more easily, which helps you mix the eggs as little as possible.
5. Set up the water bath
- Place the waterproofed springform pan inside the large roasting pan.
- Place the roasting pan in the preheated oven before adding the water if lifting the filled pan would be awkward or risky.
- Using a glass liquid measuring cup or pitcher with a spout, carefully pour the boiling water into a corner of the roasting pan. Add it slowly and keep the stream low so water does not splash onto the cheesecake.
- Continue adding water until it reaches halfway up the side of the springform pan.
A water bath insulates the outer edge of the cheesecake so it does not bake far ahead of the center. This supports an even, creamy bake and is one of the main techniques for reducing cracks.
6. Bake the cheesecake
- Bake the cheesecake at 325 degrees F for 65 to 85 minutes.
- Do not open the oven door before 65 minutes. Opening the door creates a draft and drops the oven temperature, which can contribute to large cracks or a sinking center.
- At the 65-minute mark, check the cheesecake through the oven window if possible. The edges should be firm, while a small 2- to 3-inch circle in the center should still wobble slightly when the pan is gently shaken.
- If the center circle is larger than a few inches or moves too freely, continue baking and check again as needed.
The cooking time can vary with differences in ovens, pans, and mixing. Do not use a completely rigid center as the only sign of doneness. A cheesecake that has no wiggle at all may be overbaked by the time it cools, and overbaking can make the filling shrink, crack, and lose its creamy quality.
7. Cool the cheesecake gradually
- Turn off the oven and crack the oven door open. Leave the cheesecake in the oven for 60 minutes.
- Remove the roasting pan from the oven and take the cheesecake out of the water bath. Place it on a wire rack.
- Fill a large glass with hot water. Dip a thin-bladed knife into the water, or run the knife under hot water until it is very warm. Wipe the knife dry.
- Run the hot knife around the edge of the cheesecake to loosen it from the springform pan. The cheesecake contracts slightly as it cools, and loosening the edge helps keep it from pulling against the pan and cracking.
- Unclamp the springform pan.
- Continue cooling the cheesecake on the counter for 2 to 3 hours, or until it is completely cool.
- Cover the cheesecake with foil or place it in a cake caddy with a lid. Refrigerate overnight, with 24 hours providing the preferred chill.
Gradual cooling matters because a sudden change from a hot oven to a cold refrigerator can encourage cracks. The cheesecake will continue to set as it chills, and the extended rest lets the flavor become more rounded and the slices become easier to cut.
8. Make stabilized or traditional whipped cream
You can use stabilized whipped cream or regular whipped cream. The process is similar, but stabilized cream includes a short gelatin step. Stabilized cream is useful when the cheesecake must be completely assembled in advance; traditional whipped cream should be added just before serving.
For stabilized whipped cream
- Add 1 teaspoon unflavored gelatin to a microwave-safe bowl.
- Pour 1 1/2 tablespoons cold water over the gelatin. Let the mixture stand for 5 minutes.
- Microwave the gelatin mixture for 10 seconds. Stir, then set it aside to cool slightly.
- Add the cold heavy whipping cream, powdered sugar, and vanilla extract to a large mixing bowl. An especially cold bowl and beaters can help the cream thicken more quickly and increase its volume; chilling them for about 15 minutes is useful but not essential.
- Whip with an electric hand mixer just until soft peaks form. A soft peak folds over when the beaters are lifted.
- Turn the mixer to low and slowly pour in the cooled gelatin mixture.
- Mix until the gelatin is well combined, then increase the speed to medium. Continue mixing until stiff peaks form. Stiff peaks stand upright when the beaters are lifted.
- Transfer the whipped cream to a piping bag fitted with a large tip. Pipe it onto the room-temperature cheesecake before refrigeration or at any time after the cheesecake has cooled.
Let the gelatin cool before adding it so it is not too hot for the cream, but do not let it sit until it hardens. If it does harden, microwave it again for 10 seconds. Stop mixing as soon as stiff peaks form; over-whipping can make the cream grainy. If it is only beginning to look grainy, a few tablespoons of fresh cream can sometimes be gently mixed in by hand with a wire whisk. Separated whipped cream cannot be repaired.
For traditional whipped cream
- Omit the gelatin and cold water.
- Add the cold heavy cream, powdered sugar, and vanilla to a mixing bowl.
- Whip until the cream forms the desired peaks, stopping before it becomes grainy.
- Top the cheesecake just before serving.
Traditional whipped cream is a good choice when the topping will be added at the last minute. If you want to pipe the cream a day or two ahead, use the stabilized method instead.
9. Garnish and slice
Pipe the whipped cream around the edge or layer it over the entire top. Add fresh raspberries, sliced strawberries, lime wedges, lime zest, or mint if desired.
- Fill a large glass with hot water.
- Dip the knife into the water before each cut.
- Wipe the knife clean with a paper towel.
- Make the next cut, then repeat the warm, wipe, and slice sequence for clean pieces.
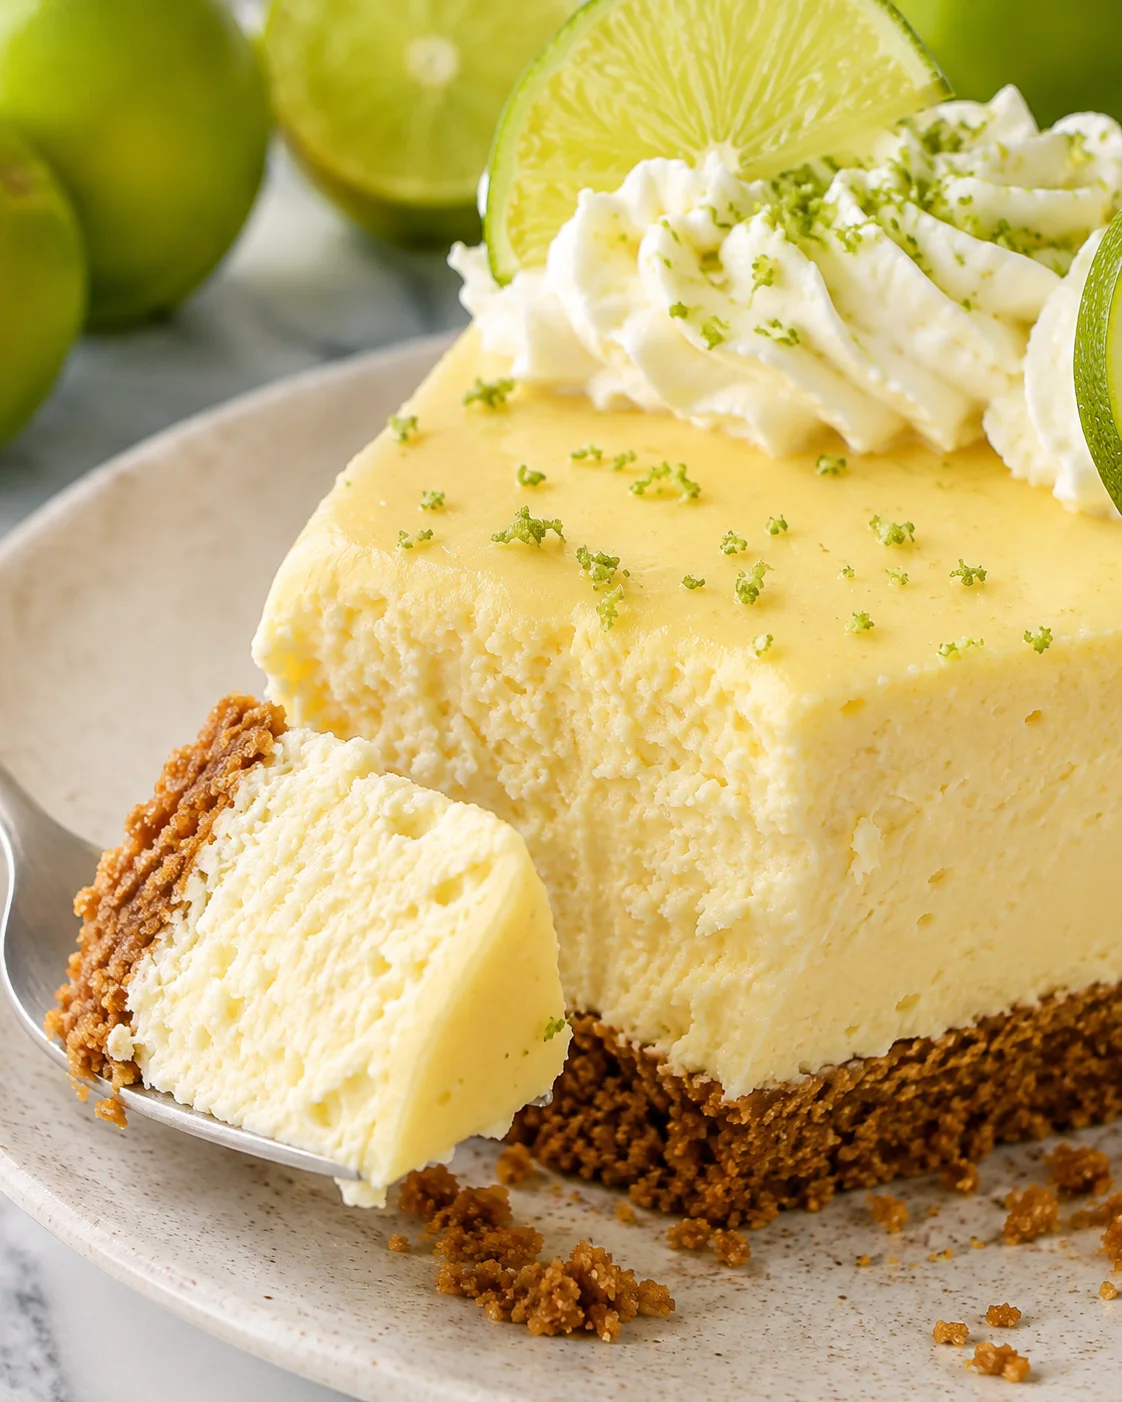
A hot knife glides through the chilled cheesecake and keeps the lime filling from dragging across the cut surface. Serve the slices cold, with the whipped topping and any chosen garnish.
Tips for Success
Soften the cream cheese without scorching it
Very soft cream cheese is one of the most useful safeguards against lumps. For the microwave method, cube the cream cheese and place it on a microwave-safe plate. Microwave for 30 seconds, then continue in 15-second intervals, flipping or stirring the cubes between intervals. Watch it closely so it softens without overheating or scorching.
There is also a counter-and-microwave approach. Cube the cream cheese, microwave it for a few short intervals using the same cautious pattern, and then let it sit at room temperature for 30 minutes to finish softening. This gives it a head start without relying on a long microwave session.
Bring the eggs to room temperature quickly
Place the eggs in a bowl of warm water, not hot water, and let them sit for 10 to 20 minutes. Room-temperature eggs, sour cream, lime juice, and softened cream cheese combine more smoothly. When the mixture is already smooth, the eggs need less beating, and that helps limit the air that can contribute to cracks and deflation.
Use a springform pan and line its base
A 9-inch, 2 3/4-inch-high springform pan is deep enough for the cheesecake and opens at the sides so the dessert can be removed and sliced. A cake pan is not recommended because it is not deep enough and makes removal difficult. Line the base with parchment so the chilled cheesecake can slide more easily onto a platter.
Choose a safe roasting-pan setup
The roasting pan needs to be large enough to hold the springform pan and the water bath around it. If a large roasting pan is not available, a large disposable foil pan can be used. Because disposable pans can be flimsy and may buckle under the weight of the water, double-stack two pans. Use oven mitts and two hands when removing the pans from the oven.
Make fine, compact crust crumbs
Fine crumbs create more contact between the pieces and help the crust hold together after baking. Whether you use a food processor, rolling pin, or the side of a can, continue until the pieces are quite small. After adding butter and sugar, press the mixture firmly into the pan with the bottom of a small bowl or measuring cup. A compact crust is less likely to crumble when the cheesecake is sliced.
Protect against water-bath leaks
Two large foil squares arranged in a plus sign provide the first waterproofing layer. Fold the foil gently up the sides of the pan so it remains intact. The slow cooker liner or large baking bag adds another barrier and is optional but highly recommended. If the liner is omitted, use two additional foil layers. Never allow the foil to develop holes while wrapping the pan.
Do not rush the mixer stages
Beat the cream cheese for about 4 minutes before adding the sugar and cornstarch, then beat that mixture for another 5 minutes. These times are not decorative; they give the mixer time to create the smooth base that the filling needs. Once the eggs are added, change your approach and mix only until each one disappears into the batter.
Keep the oven door closed
Do not open the oven before the first 65 minutes of baking. A draft can reduce the oven temperature and disturb the cheesecake as it sets. Check for doneness only after the earliest stated baking time, looking for firm edges and a small, slight wobble in the middle.
Understand the center wobble
The center should not look liquid, but it should not be rigid either. A small 2- to 3-inch circle that jiggles slightly when the pan is gently shaken is the target. If the moving area is larger, bake longer. If the entire cake is firm with no wiggle, it has likely gone too far. The cheesecake sets further during the 60 minutes in the turned-off oven, the counter cooling, and the overnight refrigerator chill.
Cool in stages
Leave the baked cheesecake in the switched-off oven with the door cracked for 60 minutes. Then transfer it to a wire rack, loosen the edge with a hot knife, unclamp the pan, and let it cool on the counter for 2 to 3 hours. Only refrigerate after it is completely cooled. These gradual temperature changes help reduce cracks and protect the creamy texture.
Handle gelatin at the right temperature
After microwaving the hydrated gelatin for 10 seconds, stir it and let it cool slightly. It should be fluid enough to pour but not hot. If it sits too long and hardens, microwave it again for 10 seconds. Adding it slowly while the mixer is on low helps it distribute through the soft-peak cream.
Stop whipping at stiff peaks
Stiff peaks stand straight up when the beaters are lifted. Stop at that stage because continued mixing can make the whipped cream grainy. A small amount of fresh cream may help a cream that is just turning grainy, but a fully separated mixture cannot be fixed.
What to do if the cheesecake cracks
A crack does not prevent the dessert from being served. Cover the top with whipped cream, add raspberries or strawberries, or pipe the topping around the edge and across the surface. For future bakes, focus on the water bath, room-temperature ingredients, minimal egg mixing, a closed oven door, the correct wobble, and gradual cooling.
Variations and Substitutions
Cheesecake filling is a precise mixture, so the safest changes are to the crust, citrus choice, whipped topping, and garnish. Keep the filling quantities and method as written unless an option is specifically described below.
Lime juice choices
Use fresh key lime juice or bottled key lime juice. Bottled key lime juice is often found near regular lime juice and can be useful when fresh key limes are out of season. Traditional lime juice is also acceptable. For a closer approximation to key lime juice, use 6 tablespoons regular Persian lime juice plus 2 tablespoons lemon juice. Regular lime zest can replace key lime zest.
Fresh key limes are small. The source notes that it took about 20 key limes to make 1/2 cup juice and roughly 10 minutes to juice them. A citrus press can help, and pressing each half again with your fingers while it is still in the juicer can recover juice from the compact fruit. Strain freshly squeezed juice through a fine-mesh sieve to remove small seeds.
Crust options
For a gluten-free crust, use your favorite gluten-free cookies or gluten-free graham crackers. You can also replace the graham crackers with a scant 2 cups of another cookie crumb to create a shortbread crust, vanilla wafer crust, or vanilla Oreo crust.
For shortbread or vanilla wafers, combine the crumbs with the sugar and butter according to the crust method. For vanilla Oreos, combine the crumbs with the sugar but reduce the butter to 4 tablespoons because the Oreo filling provides a similar binding effect.
Whipped topping and fruit
Pipe whipped cream only around the edge, or cover the full top. Use stabilized whipped cream when you want to assemble ahead, or use traditional whipped cream immediately before serving. Add raspberries or strawberries, or cover the cheesecake with raspberries for a raspberry key lime cheesecake. A layer of whipped topping beneath the fruit is another source-supported option.
Alternative pans
A 10-inch springform pan can be used, but the baking time should be reduced and checked earlier. Without a springform pan, use a 9-by-13-inch baking dish to make key lime cheesecake bars. Bake the bars at 325 degrees F for approximately 45 to 55 minutes, watching for the appropriate set. A cake pan is not recommended because it is not deep enough and makes the cheesecake difficult to remove.
Storage, Make-Ahead, and Freezing
Make the components ahead
- Crust: Bake and cool the crust, then cover it with foil up to 24 hours before adding the filling. It does not need to be refrigerated during that short make-ahead window.
- Cheesecake filling: Beat the filling ingredients together, cover the mixture, and chill it for up to 48 hours. Before layering it onto the cooled crust and baking, give the filling a whisk.
- Stabilized whipped cream: Whip the cream, transfer it to a piping bag, and store it in the refrigerator for 1 to 2 days before using.
- Complete cheesecake: Assemble, bake, cool, chill, and garnish the cheesecake ahead of serving. Stabilized whipped cream can be piped onto the room-temperature cheesecake before it goes into the refrigerator or added after chilling.
Refrigerate the cheesecake
Cover the key lime cheesecake and store it in the refrigerator. It is at its prime 24 to 48 hours after making and is good for up to 7 days. A cake container is especially useful because it protects the whipped cream while keeping the cover from touching the topping. If you do not have a cake container, use a large inverted bowl or tent the dessert with foil.
Freeze the cheesecake
- Cool the cheesecake completely and refrigerate it for at least 8 hours.
- Place the chilled cheesecake on a baking pan and freeze it uncovered until firm.
- Remove the firm cheesecake from the freezer. Wrap it in plastic wrap, then heavy-duty aluminum foil, and finally place it in a large heavy-duty freezer bag.
- Freeze for up to 2 months.
- To thaw, move the wrapped cheesecake from the freezer to the refrigerator and let it thaw overnight.
- Add whipped cream after thawing, then garnish and serve.
The freezer instructions keep the cheesecake protected through the longer storage period. Chilling before freezing helps it firm up, while thawing overnight in the refrigerator gives it time to return to a sliceable texture.
Serving Suggestions
Serve chilled slices with stabilized or traditional whipped cream. Lime wedges, a little lime zest, fresh raspberries, sliced strawberries, and mint make simple garnishes that echo the bright citrus flavor. For a cleaner presentation, warm and wipe the knife between every slice so each piece has a neat edge.
This dessert suits spring and summer get-togethers, Easter entertaining, and other gatherings where a make-ahead dessert is helpful. Because the cheesecake is best after a long chill and keeps for up to seven days in the refrigerator, it can be prepared well before the meal instead of competing with last-minute cooking.
FAQ
Can I use regular lime juice instead of key lime juice?
Yes. Key lime juice and regular lime juice taste very similar, although key lime juice is slightly more tart. The difference may not be very noticeable in a rich cheesecake. For a closer key-lime flavor, use 6 tablespoons regular Persian lime juice plus 2 tablespoons lemon juice. Bottled key lime juice is also an option when fresh key limes are unavailable.
Can I use bottled lime juice?
Yes. Bottled key lime juice or bottled traditional lime juice can be used. Fresh key lime juice is an option when you have access to key limes, while bottled juice is convenient when the fruit is not in season. Keep the juice at room temperature when adding it to the filling.
How many key limes do I need for 1/2 cup juice?
The source notes that about 20 small key limes produced 1/2 cup juice. They can take about 10 minutes to juice. A citrus press is useful, and pressing the halves again while they are still in the juicer can help extract more liquid. Strain the juice through a fine-mesh sieve to remove seeds.
Can I use lower-fat cream cheese or skip the sour cream?
Lower-fat cream cheese can work, but full-fat cream cheese provides more flavor and creaminess. Nonfat cream cheese is not recommended. Sour cream contributes smoothness, creaminess, and moisture, and its flavor should not be prominent in the finished cheesecake, so it is an important part of the filling rather than an optional garnish.
Why did my cheesecake crack?
Several steps help prevent cracks: use a water bath, start with room-temperature eggs and dairy, avoid overbeating after the eggs are added, grease the springform pan, keep the oven door closed before the first 65 minutes, stop baking while the center still has a small wobble, and cool the cheesecake gradually. Overbaking can cause the filling to shrink and crack. If a crack does appear, cover the top with whipped cream and/or raspberries.
Why is my cheesecake lumpy?
Firm cream cheese is the most likely problem. Soften it until a finger can press into it, using brief microwave intervals or a combination of microwave and room-temperature resting. Beat the cream cheese for about 4 minutes before adding sugar and cornstarch, then beat that mixture for another 5 minutes. Room-temperature sour cream, juice, eggs, and cream cheese also blend more easily.
Can I make the whipped cream ahead?
Yes, use stabilized whipped cream for advance preparation. Hydrate 1 teaspoon gelatin with 1 1/2 tablespoons cold water for 5 minutes, microwave it for 10 seconds, stir, and let it cool slightly. Whip 1 cup cold heavy cream with 3 tablespoons powdered sugar and 1 teaspoon vanilla to soft peaks, then slowly add the gelatin on low speed and finish at medium speed until stiff peaks form. Store the whipped cream in a piping bag in the refrigerator for 1 to 2 days. Use traditional whipped cream just before serving.
How long should the cheesecake chill?
Chill it overnight, with 24 hours preferred. The source notes that the cheesecake may be served after as little as 12 hours of chilling, but a full 24 hours gives the flavors more time to build and the filling more time to become firm and sliceable. Keep the covered cheesecake refrigerated and use it within 7 days.
Can I bake this as cheesecake bars?
If you do not have a springform pan, use a 9-by-13-inch baking dish and make key lime cheesecake bars. Bake at 325 degrees F for approximately 45 to 55 minutes. A cake pan is not recommended because it is not deep enough for this filling and makes the cheesecake difficult to remove.
Can I freeze key lime cheesecake?
Yes. Cool it completely, refrigerate it for at least 8 hours, freeze it uncovered on a baking pan until firm, then wrap it in plastic wrap, heavy-duty aluminum foil, and a large heavy-duty freezer bag. Freeze for up to 2 months. Thaw overnight in the refrigerator and add the whipped cream after thawing.
What if I do not have a roasting pan?
A large disposable foil pan can be used in its place. Double-stack two disposable pans because they can buckle under the weight of the water. Use oven mitts and two hands when moving the pan from the oven. The roasting pan or substitute needs to hold the springform pan and enough boiling water to reach halfway up its side.
A Simple Baking-Day Game Plan
This cheesecake is easiest to manage when the work is divided into stages instead of treated as one long project. Start by reading through the method and setting out the springform pan, foil, roasting pan, parchment, mixer, and wire rack. Measure the ingredients, soften the cream cheese, and bring the sour cream, lime juice, eggs, and egg yolk to room temperature. Keep the heavy cream cold if you are making the topping the same day.
Begin with the oven and the boiling water because the crust and water bath both use 325 degrees F. While the water heats, line and grease the springform pan. Pulse the graham crackers until fine, add the melted butter and sugar, and press the crumbs into a compact layer. The 10-minute crust bake gives you a useful window to finish preparing the filling ingredients, but the crust itself needs to cool completely before the filling is poured over it.
While the crust cools, wrap the springform pan. Doing this before the filling is ready keeps the filled pan from sitting while you search for foil or a liner. The two foil squares should be large enough to come up the sides, and the folds should be gentle so the foil does not tear. If you are using the slow cooker liner or roasting bag, tie the gathered excess to one side rather than allowing it to drape into the water bath.
The filling has two distinct mixing phases. First, give the cream cheese the full 4 minutes of beating, then beat the sugar and cornstarch with it for the additional 5 minutes. This is the time to build a smooth base. After the sour cream, juice, zest, and vanilla are blended in, slow down for the eggs. Add each egg and then the yolk separately, mixing only until combined. This change from thorough mixing to restrained mixing is important: smooth cream cheese needs enough beating, while eggs need as little extra air as possible.
Once the filling is in the pan, remove large air bubbles, set the pan in the roasting pan, and place the roasting pan in the oven before adding the boiling water if that is safer for your setup. Pour the water slowly into a corner until it reaches halfway up the springform pan. Keep the oven closed until at least 65 minutes have passed. At that point, judge the cake by the edge and center rather than by the clock alone.
After baking, the cheesecake still needs several stages before it is ready to serve. The 60-minute rest in the turned-off oven is followed by 2 to 3 hours on a wire rack. Loosen the edge with a hot knife during the counter-cooling stage, then unclamp the pan. Once the cheesecake is completely cool, cover it and refrigerate it overnight. The long chill is what changes a softly baked center into a cleanly sliceable dessert.
Troubleshooting by Symptom
The crust is loose or crumbly
Use very fine graham cracker crumbs and make sure the butter and sugar moisten them evenly. Press the crumbs firmly into the pan with the bottom of a small bowl or measuring cup. The crust is baked for 10 minutes at 325 degrees F, and it should cool completely before the filling is added. Coarse crumbs, a light press, or adding filling while the crust is hot can all make the base less cohesive.
The crust is wet
Check the waterproofing before the cheesecake enters the water bath. Use two 18-by-18-inch foil squares arranged in a plus sign, fold them carefully up the sides, and add the optional slow cooker liner or large oven roasting bag. If the bag is not used, add two more foil layers. Water should be poured into the roasting pan only after the springform pan is positioned, and it should be added slowly in a corner so it does not splash.
The filling has lumps
Start with cream cheese that is very soft. Cube it and soften it carefully in the microwave at 30-second intervals followed by 15-second intervals, or give it a short microwave head start and let it sit at room temperature for 30 minutes. Beat the cream cheese until light and fluffy before adding the sugar and cornstarch. Room-temperature sour cream, lime juice, eggs, and egg yolk also make it easier for the ingredients to blend without leaving firm pockets.
The cheesecake has a large wet-looking center
A small 2- to 3-inch wobble in the center is expected, but a larger moving area needs more baking. Check after the earliest 65-minute point and continue as needed within the 65- to 85-minute range. The edge should be firm. Remember that the cake continues to set during the hour in the turned-off oven and the overnight refrigerator chill, so the center should not be baked until it is completely rigid.
The cheesecake is dry or heavy
Dryness can result from baking until the center is firm rather than slightly wobbly. It can also be associated with overbaking. Use the edge-and-center cue, keep the oven door closed during the early bake, and allow the gradual cooling stages to do their work. The sour cream, room-temperature ingredients, and extra egg yolk are part of the creamy texture of this filling and should be kept in the stated amounts.
The cheesecake cracked or sank
Cracks can be connected to overbeaten eggs, a water bath that was skipped, opening the oven door too early, overbaking, or a sudden temperature change. Add the eggs one at a time and beat only until combined. Use the water bath, keep the door closed before 65 minutes, bake until the edges are firm and the center still has a slight wobble, then cool first in the turned-off oven and afterward on the counter. If a crack remains, cover it with whipped cream and fruit.
The whipped cream will not hold a peak
For the most stable result, use very cold heavy whipping cream and powdered sugar, and chill the bowl and beaters for about 15 minutes if desired. For stabilized cream, hydrate the gelatin in cold water for 5 minutes, microwave it for 10 seconds, stir it, and let it cool slightly. Add it slowly at low speed after soft peaks form, then increase to medium and stop at stiff peaks. Gelatin that is too hot can be a problem, while gelatin that sits until solid should be microwaved for another 10 seconds. Over-whipping can make the cream grainy, so stop as soon as the peaks stand upright.
The slices look messy
Make sure the cheesecake has chilled overnight before slicing. Dip a thin knife in hot water before each cut, wipe it dry, and repeat. The warm blade moves through the cold, creamy filling more cleanly. A cake container or inverted bowl can protect the topping while the cheesecake is refrigerated, and a light foil tent can be used when those containers are not available.
What Makes the Make-Ahead Method Work
The make-ahead plan is not limited to the finished cheesecake. The crust can be baked, cooled, and covered up to 24 hours before the filling is added. The prepared filling can be covered and chilled for up to 48 hours; whisk it before spreading it over the cooled crust and baking. The baked cheesecake can then cool and chill on its own schedule, while stabilized whipped cream can be prepared and stored in a piping bag for 1 to 2 days.
That flexibility lets you choose the point at which the work is most convenient. If the dessert is for the next day, bake the cheesecake, cool it gradually, and refrigerate it overnight. If the event is farther away, finish the cheesecake and keep it covered in the refrigerator for up to 7 days, or freeze it using the layered wrapping method for up to 2 months. Add traditional whipped cream close to serving, or use stabilized whipped cream when you want the entire dessert assembled in advance.
The same staging also makes the recipe less intimidating for a first cheesecake project. The crust is a simple crumb mixture, the filling is mixed in one main mixer bowl, and the water bath and cooling schedule provide observable cues at each important stage. There is no need to rush from one step to the next: the crust cools while the filling is prepared, the cheesecake cools while the topping is made, and the refrigerator handles the final setting.
With the crust baked and cooled, the pan carefully waterproofed, and the cheesecake given the full cooling and chilling time, this key lime cheesecake is ready to slice into a smooth, creamy dessert with a bright citrus finish.
PrintA bright, tangy key lime cheesecake with a smooth, creamy texture and buttery graham cracker crust, topped with whipped cream and optional garnishes like raspberries and lime zest.
- Total Time: Min 24 hours (including chilling overnight)
- Yield: 12 to 14 servings
Ingredients
- For the graham cracker crust: 14 full-sheet graham crackers (or 2 scant cups finely ground crumbs), 3 tablespoons granulated sugar, 8 tablespoons unsalted butter, melted
- For the cheesecake filling: 4 (8-ounce) packages full-fat cream cheese, very soft; 1 cup plus 2 tablespoons granulated sugar; 2 tablespoons cornstarch (or 3 tablespoons flour as substitute); 1 cup full-fat sour cream, at room temperature; 1/2 cup key lime juice, at room temperature (or 6 tablespoons regular Persian lime juice plus 2 tablespoons lemon juice as substitute); 1 teaspoon key lime zest (or regular lime zest as substitute); 1 1/2 teaspoons vanilla extract; 4 large eggs, at room temperature; 1 large egg yolk, at room temperature
- For the optional stabilized whipped cream: 1 teaspoon unflavored gelatin; 1 1/2 tablespoons cold water; 1 cup cold heavy whipping cream; 3 tablespoons powdered sugar; 1 teaspoon vanilla extract
- Optional garnishes: fresh raspberries, sliced strawberries, lime wedges, lime zest, fresh mint
Instructions
- Preheat oven to 325°F (163°C). Boil approximately 4 quarts water for the water bath.
- Line bottom of 9-inch springform pan with parchment paper and lightly grease the inside with nonstick cooking spray.
- Make the graham cracker crust: crush graham crackers into fine crumbs using a food processor or by hand. Mix crumbs with melted butter and granulated sugar until evenly moistened.
- Press the crumb mixture firmly into the bottom of the prepared pan in an even layer. Bake for 10 minutes, then cool completely on a wire rack.
- Waterproof the springform pan by wrapping it with two large 18-inch foil squares in a plus shape, folding up the sides carefully. Optionally place wrapped pan inside a slow cooker liner or large roasting bag and tie off to prevent water seepage.
- Make cheesecake filling: Beat very soft cream cheese on medium speed with paddle attachment for about 4 minutes until light and fluffy.
- Add granulated sugar and cornstarch; beat for an additional 5 minutes until smooth.
- Add room-temperature sour cream, key lime juice, lime zest, and vanilla extract; beat until blended.
- Add eggs one at a time and then the egg yolk, mixing only until combined after each addition to avoid overbeating.
- Pour filling over completely cooled crust. Gently drop pan on counter a few times to release large air bubbles, keeping pan upright.
- Place wrapped springform pan in a large roasting pan. Place roasting pan in oven before adding water to avoid spills.
- Slowly pour boiling water into roasting pan until it reaches halfway up the sides of the springform pan.
- Bake cheesecake at 325°F for 65 to 85 minutes. Do not open oven door before 65 minutes. The edges should be firm and a 2- to 3-inch center should still wobble slightly.
- After baking, turn off oven and crack door open; leave cheesecake inside for 60 minutes.
- Remove roasting pan and cheesecake from oven and water bath; place cheesecake on wire rack.
- Dip a thin-bladed knife in hot water, dry it, and run around cheesecake edge to loosen from pan. Unclamp springform pan.
- Cool cheesecake at room temperature for 2 to 3 hours until completely cool.
- Cover and refrigerate overnight (preferably 24 hours) to allow flavors to develop and filling to firm.
- To make stabilized whipped cream: hydrate gelatin in cold water for 5 minutes; microwave 10 seconds and stir; let cool slightly.
- Whip cold heavy cream with powdered sugar and vanilla to soft peaks.
- Slowly add cooled gelatin mixture on low speed, increase speed to medium and whip to stiff peaks.
- Pipe stabilized whipped cream onto cheesecake before or after chilling as desired.
- Alternatively, whip cold heavy cream with powdered sugar and vanilla to desired peaks (soft or stiff) without gelatin. Add just before serving.
- Garnish with fresh raspberries, sliced strawberries, lime wedges, lime zest, and mint as desired.
- To slice, dip a thin knife in hot water before each cut and wipe dry for clean slices. Serve chilled.
Notes
Use soft, full-fat cream cheese and room-temperature eggs, sour cream, and lime juice to ensure a smooth filling., Wrap the springform pan securely with foil and optional liner to prevent water bath leaks., Do not overbeat after adding eggs to avoid cracks and air bubbles., The center should remain slightly wobbly when done to prevent dryness., Gradual cooling helps prevent cracking and creates a creamy texture., Stabilized whipped cream can be prepared 1-2 days ahead and piped onto cheesecake., Cheesecake can be baked in 10-inch springform pan with adjusted baking time or in 9×13 inch pan for bars., Crust can be made with gluten-free cookies or other cookie crumbs as a substitute., Cheesecake can be refrigerated up to 7 days and frozen up to 2 months with proper wrapping.
- Prep Time: 30 minutes
- Cook Time: 2 hours 20 minutes
- Category: Dessert
- Cuisine: American
Nutrition
- Serving Size: 1 slice
- Calories: Approximately 360 calories per serving
- Fat: 25 grams per serving
- Carbohydrates: 30 grams per serving
- Protein: 7 grams per serving