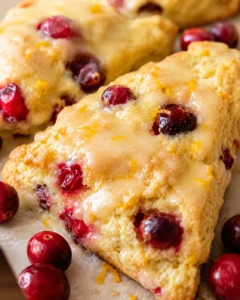
Easy Glazed Orange Scones with Fresh Orange

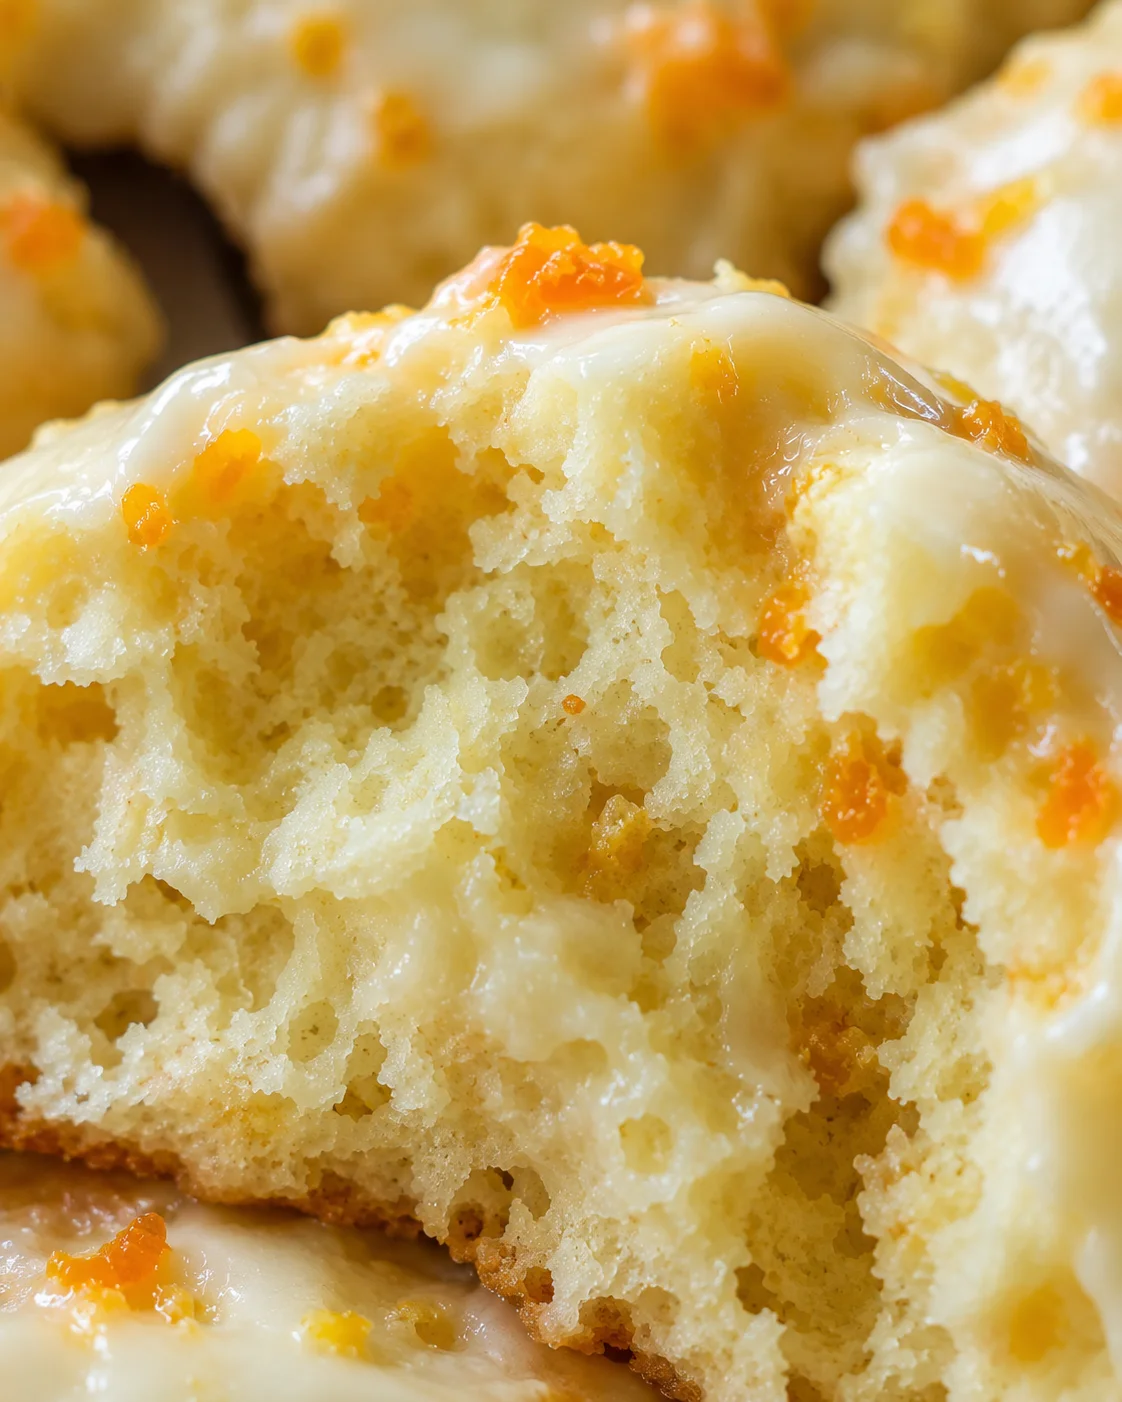
Bright, tender, and glazed with fresh citrus, this orange scones recipe makes a lovely batch of bakery-style treats without requiring complicated shaping. Cold grated butter creates a delicate crumb, while heavy cream, orange zest, and fresh orange juice give the scones a soft texture and clear orange flavor. A vanilla-orange butter glaze adds a smooth, sweet finish.

The recipe makes 8 regular scones or 16 petite mini scones. The scones are especially nice for brunch, a tea party, a luncheon, or a weekend baking project, and they fit right in at Easter, Mother’s Day, or a bridal or baby shower. The dough is mixed just until shaggy, shaped into a disc, chilled briefly, and baked until the bottoms are lightly golden.
Plan on about 15 minutes of preparation, 10–30 minutes of chilling, and 13–15 minutes in a 400°F (204°C) oven. The glaze is optional, but the fresh orange finish makes these scones feel extra special.
Why You Will Love This
These orange scones balance a tender interior with lightly crisp edges and a flaky, buttery bite. Fresh orange zest carries the most concentrated citrus aroma, and a small amount of juice brightens the dough without making it heavy. Vanilla bean paste—or vanilla extract when that is what you have—rounds out the orange flavor.
Cold ingredients do important work here. Grated butter is easy to distribute through the flour, and freezing it before mixing helps the pieces stay cold while the dough comes together. The brief chill after shaping firms the butter again so the scones can rise and bake before the butter melts away.
The method is flexible without changing the basic formula. You can shape one large disc for 8 generous wedges or divide the dough into two smaller discs for petite scones. You can leave the scones unglazed, dip the cooled tops into glaze, or use a freezer bag as a simple piping bag for a swirled finish.
Ingredients
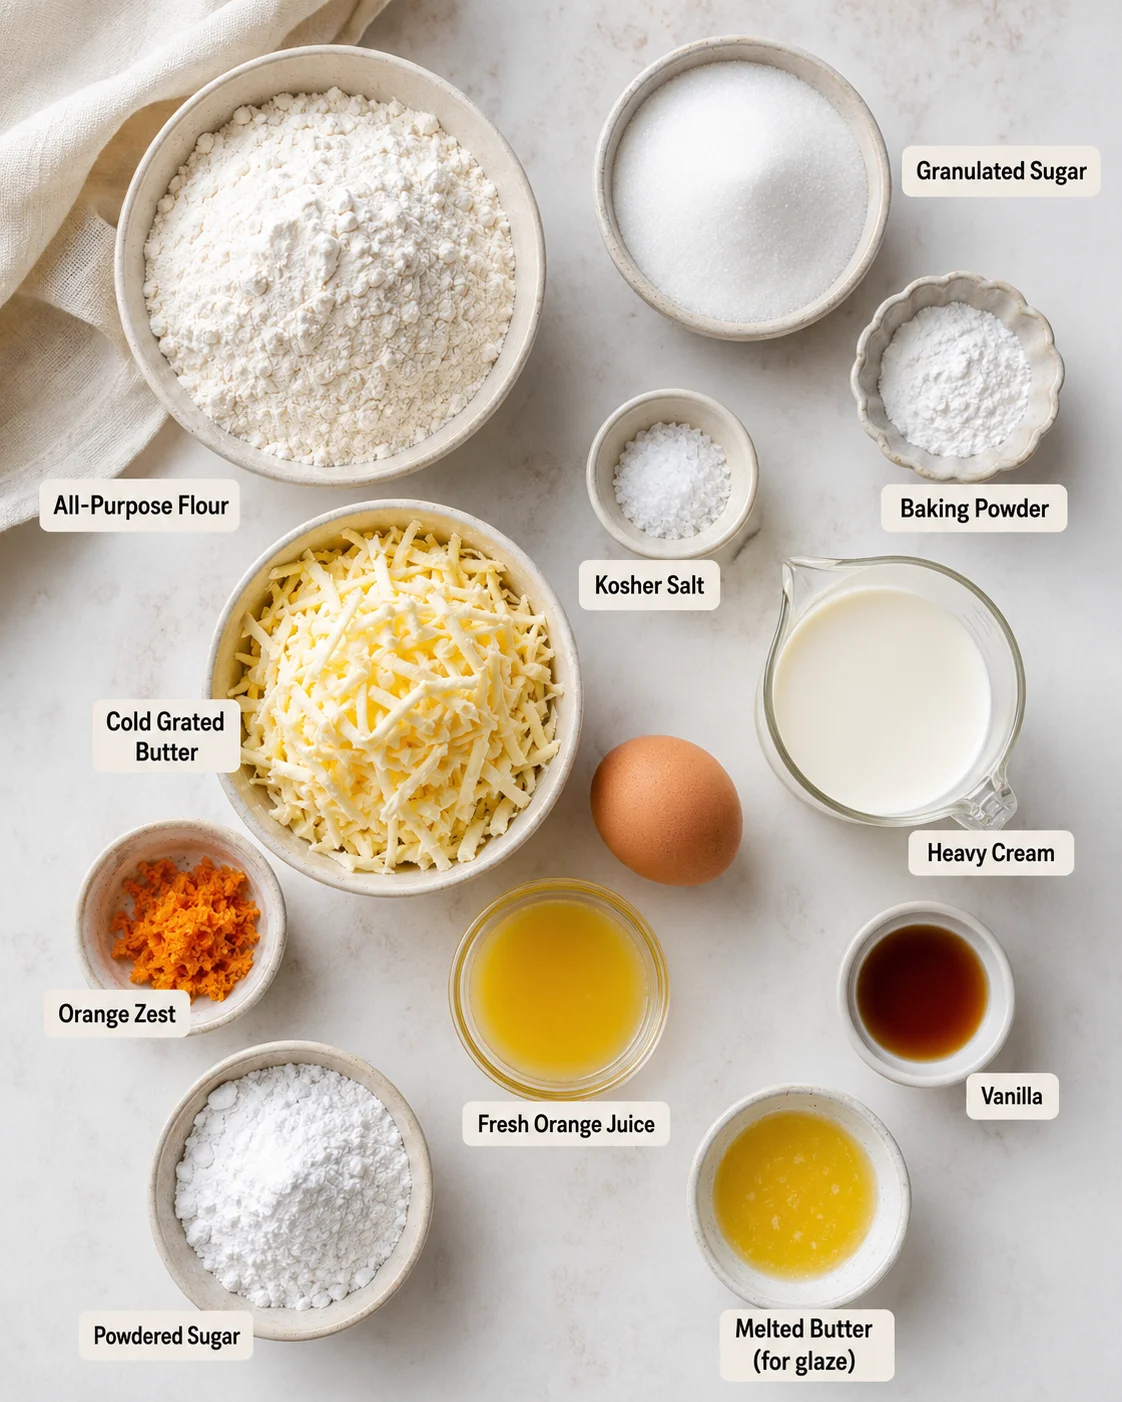
Gather the ingredients before beginning so the butter and cream can stay cold. The recipe is divided into the scones and the optional orange vanilla butter glaze.
For the Orange Scones
- 1¾ cups all-purpose flour: Unbleached all-purpose flour works well. A cup-for-cup gluten-free variation is included below.
- ¼ cup granulated sugar: This gives the scones gentle sweetness. For a sweeter batch, increase the total sugar to as much as ½ cup, or use up to ¼ cup additional sugar as a measured variation.
- 2 teaspoons baking powder: Use 1½ teaspoons for the high-altitude adjustment.
- ¼ teaspoon kosher salt.
- 4 tablespoons salted butter: Keep it cold. Grate it with a box grater and freeze it, or cut it into small pieces and keep it chilled until needed. Pure cream butter is preferred; butter blends can contain more water.
- ½ cup heavy cream: Keep the cream cold. At high altitude, the dough may need an extra 1–2 tablespoons of liquid, added gradually.
- 1 teaspoon vanilla bean paste: Vanilla extract may be used instead.
- 1 large egg: Room-temperature egg is easiest to whisk into the cream. If needed, set the egg in warm, not hot, water for 5–7 minutes.
- 1 tablespoon orange zest: This is about the zest from one orange. A microplane-style zester makes quick work of the peel.
- 1–2 tablespoons fresh orange juice.
For the Optional Orange Vanilla Butter Glaze
- 1 cup powdered sugar.
- ½ teaspoon vanilla bean paste: Vanilla extract is also fine.
- 1 tablespoon butter, melted.
- Zest from 1 orange.
- Juice from ½ orange, as needed: Add only enough to make a smooth, thick, pourable glaze.
Useful Equipment
You will need a large mixing bowl, a small bowl or measuring cup, a parchment-lined baking sheet, a box grater or pastry cutter, and a wire rack. A bench scraper or large knife makes it easy to divide the dough. An oven thermometer is useful because ovens can run 25–50 degrees hotter or cooler than the displayed temperature. A microplane zester is helpful for getting fine orange zest without taking much of the bitter white pith.
Instructions
Work efficiently once the cold butter is ready. The dough should look shaggy and just barely hold together rather than becoming smooth like bread dough.
- Prepare the pan and dry ingredients. Line a baking sheet with parchment paper. In a large bowl, whisk together the flour, granulated sugar, baking powder, and kosher salt. Set the bowl aside while you prepare the butter and orange.
- Chill the butter and prepare the orange. Grate the cold butter with a box grater and place it in the freezer. You can also cut the butter into small cubes and keep the pieces refrigerated until ready to use. Zest the orange and squeeze the juice, keeping the zest and juice separate until needed.
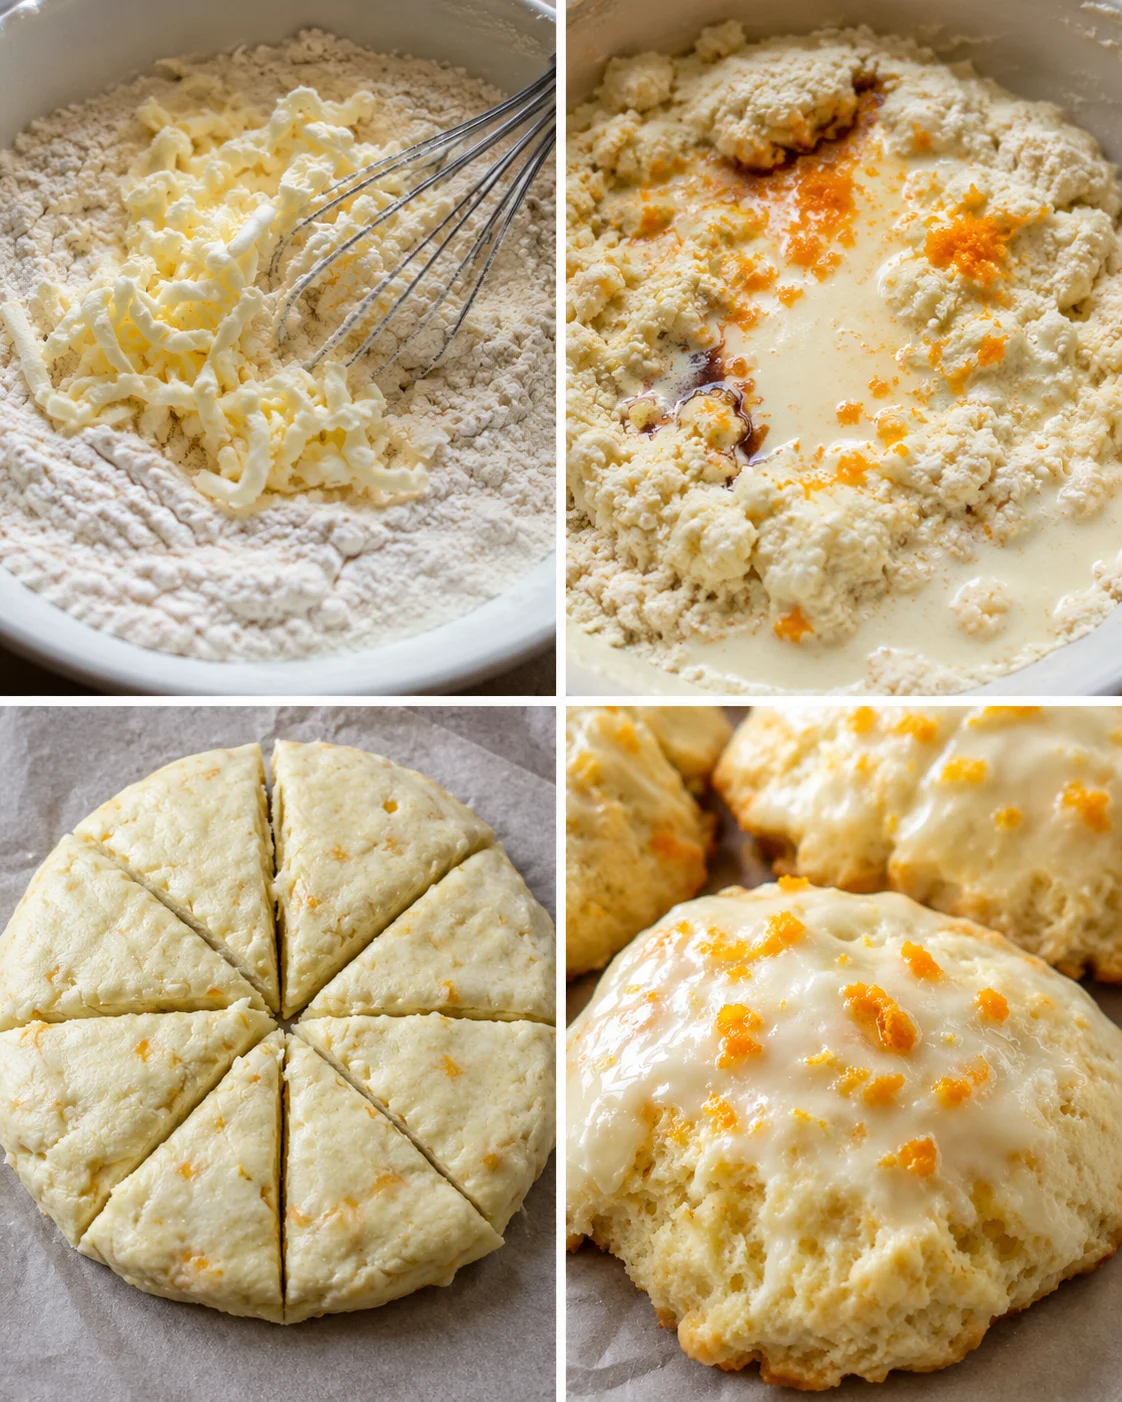
- Combine the butter with the dry mixture. Add the frozen grated butter to the flour mixture. Use a pastry cutter or your fingertips to toss and quickly mix until the mixture resembles coarse crumbs. Work quickly so the butter stays cold. A few visible pieces of butter are helpful; the mixture does not need to be completely uniform.
- Whisk the wet ingredients. In a small bowl or measuring cup, whisk together the heavy cream, vanilla bean paste or extract, egg, 1 tablespoon orange zest, and 1–2 tablespoons orange juice.
- Make the shaggy dough. Make a small well in the center of the dry ingredients. Pour in the egg mixture and gently stir with a fork until the dough just comes together. Stop mixing as soon as there are no large pockets of dry flour. The dough should look shaggy rather than smooth or wet.
- Shape the dough. Turn the dough onto the parchment-lined baking sheet or a lightly floured surface. Use the parchment to bring the dough together and press it into one disc about 8 inches across and ½–¾ inch thick. If the dough feels very dry, add a small splash of orange juice or heavy cream—just a few dribbles—then work it in quickly.
- Cut the scones. Use a bench scraper or large knife to cut the disc in half, then into quarters, and then cut each quarter in half. This makes 8 large scones. Pull the wedges barely away from one another for a more evenly raised shape, or separate them farther for a more rustic appearance.
- Chill and preheat. Freeze or refrigerate the shaped scones for 10–30 minutes to firm the butter. During this time, preheat the oven to 400°F (204°C).
- Bake. Bake until the bottoms are lightly golden brown, about 13–15 minutes. At 13 minutes, the scones will be softer and more tender. At 15 minutes, they will be firmer and somewhat drier. Move the scones to a wire rack and let them cool completely before glazing.
- Mix the glaze. In a wide bowl, whisk together the powdered sugar, orange zest, melted butter, and vanilla bean paste or extract. Add orange juice a little at a time until the glaze is smooth and thick but pourable. The glaze is easiest to control when the juice is added gradually.
- Finish the scones. Once the scones are completely cool, pick up one at a time and dip the top into the orange glaze. Return each scone to the wire rack so the glaze can set. For a drizzled finish, spoon the glaze into a freezer bag, snip just a little from one corner, and swirl it over the tops.
Tips for Success
Keep the butter and cream cold
Cold butter is the foundation of the flaky texture. Grating it makes the butter pieces small enough to distribute quickly, while a short freeze keeps them firm during mixing. Cold cream also helps the dough stay manageable. Keep the cream in the refrigerator until you are ready to whisk it with the egg and flavorings.
Pure cream butter is a better choice than a butter blend for this dough. Salted or unsalted butter can be used, but the butter should be real butter rather than a soft spread. European-style butter, with more butterfat and less added water, is another option when you want to splurge on a special batch.
Mix only until the dough comes together
Scones are delicate. Unlike yeast bread, they do not benefit from kneading. Overworking the dough can make the finished scones tough and can keep them from rising as well. Stir gently with a fork, and stop when the dough is shaggy and barely holding together.
Do not try to fix a shaggy dough by adding a large amount of liquid. The goal is enough cream and orange juice to bring the flour together, not a wet dough. If the mixture is truly dry, add liquid a few drops or dribbles at a time and work quickly.
Shape with parchment
Parchment keeps the dough from sticking and lets you press the floury pieces together without warming the butter too much with your hands. Fold or use the paper to guide the dough into a disc, then use the bench scraper or knife to make clean wedges. A parchment-lined pan also makes it easy to move the shaped dough without disturbing the wedges.
Choose the spacing for the look you want
Scones that remain close together as they bake tend to rise more evenly and keep a taller, softer profile. Scones placed farther apart spread into a more rustic shape. Both arrangements work; the spacing is a simple way to choose between a more uniform batch and a relaxed homemade look.
Do not skip the second chill
The 10–30 minute refrigerator or freezer rest firms the butter after shaping. That cold start gives the scones a better chance to hold their shape in the hot oven. It also gives you time to confirm the oven is fully preheated. Because ovens can be inaccurate by 25–50 degrees, an oven thermometer helps you know whether the displayed 400°F is close to the actual temperature.
Use the visual cues
For regular scones, begin checking at 13 minutes. The bottoms should be lightly golden brown. A shorter bake gives a softer, more tender result, while a longer bake gives a firmer, drier scone. Always cool the scones fully before glazing so the icing can stay on the surface instead of melting away.
Get the glaze consistency right
Whisk in orange juice a little at a time until the glaze is thick but pourable. If it is too thin, add powdered sugar one tablespoon at a time. If glaze slips off a scone, the scone may still be too warm or the glaze may need more sugar. Set the glazed scones on a wire rack placed over the parchment-lined baking sheet for easier cleanup. If any glaze remains, drizzle it over the finished scones with a spoon.
Variations
Food processor method
For a food processor version, add the flour, sugar, baking powder, and salt to the bowl and pulse to combine. Add the grated or cubed cold butter and pulse just until the mixture resembles a coarse meal. Whisk the cream, egg, vanilla, orange zest, and orange juice together first, then pour the combined wet ingredients into the processor. Pulse only a few times, just enough to moisten the dry ingredients. Turn the dough onto a lightly floured surface and continue with shaping, cutting, chilling, and baking.
Blueberry orange-style scones
For a blueberry variation, omit the orange juice and orange zest from the dough and use a little lemon zest instead. Fold in 1 cup of fresh or frozen blueberries at the same time you add the wet ingredients. Work carefully so the berries remain as intact as possible, then shape and bake as directed.
Sweeter orange scones
The base recipe uses ¼ cup sugar. If you prefer a sweeter scone, add up to ¼ cup more sugar, or use up to ½ cup total sugar in the dough. The orange glaze also contributes sweetness, so you can keep the dough at the base amount and let the finish provide the extra sweetness.
Orange extract glaze
If you do not have enough fresh orange for the glaze, use ¼–½ teaspoon orange extract in place of the glaze’s orange juice and orange zest. Fresh zest and juice give the brightest flavor, but the extract is a practical alternative for the icing.
Gluten-free orange scones
Replace the regular flour with 1¼ cups cup-for-cup gluten-free flour, plus ¼ cup almond flour and ¼ cup oat flour. Gluten-free flours can absorb more liquid, so add extra liquid a teaspoon at a time if the dough feels too dry. Begin checking the scones 2–3 minutes before the earliest regular bake time. They are ready when puffed and no longer glossy. Slightly underbaked is preferable to dry and overdone for this variation.
Mini orange scones
For petite scones, divide the dough into two equal portions on separate parchment sheets. Shape each portion into a smaller disc and cut each disc into 8 wedges, for 16 mini scones total. Keep the oven temperature the same, but begin checking for doneness around 12 minutes.
High-altitude adjustments
At high altitude, reduce the baking powder to 1½ teaspoons. Above 5,000 feet, add 1–2 tablespoons of additional flour. The dough may need a little more liquid, but add it slowly and stop as soon as the dough barely holds together. Bake at the stated temperature and begin checking 2–3 minutes early.
Storage and Make-Ahead
Store baked scones on the counter in an airtight container for up to 5 days. You can also wrap them individually and place them in a covered cake stand. Let the scones cool fully before storing so trapped warmth does not soften the glaze or the edges.
For make-ahead scones, shape and cut the dough, then wrap the unbaked wedges tightly in plastic wrap and place them in a freezer bag. Freeze for up to 4 months. Bake the scones directly from frozen on a lightly greased or parchment-lined cookie sheet, adding a few extra minutes as needed.
Baked scones can also be wrapped well and frozen. For the best texture, freeze them without glaze and glaze them after thawing. A well-wrapped baked batch can be kept for up to 3 months; another storage guideline allows a 3–4-month range when the scones are wrapped securely. If the scones are already glazed, they can still be frozen, but the unglazed method gives the cleanest finish after thawing.
Serving Suggestions
Serve the scones once the glaze has set, with the crisp edges, tender centers, and bright orange aroma at their best. They make a cheerful addition to brunch, a tea party, a luncheon, or a relaxed weekend breakfast. The smaller wedges are convenient for a dessert table, while the regular wedges make a more substantial bakery-style treat.
For spring celebrations, arrange the glazed scones on a pretty plate or covered cake stand for Easter, Mother’s Day, a bridal shower, or a baby shower. A few dried edible flowers over the glaze make a festive tea-party finish. The orange flavor also suits a midwinter pick-me-up when you want something sunny and citrusy.
If you prefer a simpler pastry, leave the scones plain or add only a light drizzle instead of dipping the tops. If you want a more pronounced finish, use the extra glaze with a spoon after the first coat sets. Either way, allow the scones to cool before adding the glaze.
FAQ: Frequently Asked Questions
How do I get the scones to rise and stay fluffy?
Start with fresh baking powder, keep the butter and cream cold, avoid overworking the dough, and chill the shaped scones for 10–30 minutes before baking. To check baking powder, place 1 teaspoon in a cup and add ⅓ cup hot tap water. It should bubble. If it does not, replace it with fresh baking powder.
Can I use baking soda instead of baking powder?
Yes, but baking soda is about three times more potent than baking powder and needs acid to activate it. Use about ¾ teaspoon baking soda for this recipe, and the orange juice supplies acidity. The flavor and rise can differ from the baking-powder version, so do not use the two leaveners as equal replacements.
What can I use instead of heavy cream?
Buttermilk, evaporated milk, reconstituted dry milk, canned coconut milk, plain yogurt, another plant-based milk, or even water can be used as possible replacements. They may not create the same fluffy, high rise as heavy cream. Add the liquid gradually because different options can change how quickly the shaggy dough comes together.
Why did my orange glaze slide off?
The scones may have been too warm, or the glaze may have been too thin. Let the scones cool completely, then whisk powdered sugar into the glaze a tablespoon at a time until it is thick but still pourable. A wire rack over parchment lets the glaze set without pooling around the bottoms.
Why are my scones tough or flat?
Overworking the dough can make scones tough and reduce their rise. Warm butter can also spread before the dough has a chance to set. Mix gently, use only enough liquid to bring the dough together, and chill the formed wedges before they go into the hot oven. Keeping the wedges closer together can also encourage a more even rise.
Can I make 16 mini scones instead of 8 regular scones?
Yes. Divide the dough into two equal portions, shape each into a smaller disc, and cut each disc into 8 wedges. Bake at 400°F (204°C), but start checking around 12 minutes because the smaller pieces finish sooner.
More Details for a Tender Batch
The flour, sugar, baking powder, and salt form the dry base of the dough. Flour supplies structure, sugar sweetens the crumb and supports browning, baking powder provides lift, and salt keeps the flavor from tasting flat. The quantity of sugar is intentionally moderate, which lets the orange zest stay noticeable. If the scones are going under a generous glaze, the base amount of sugar keeps the overall finish balanced.
Butter is both a flavor ingredient and a texture ingredient. When cold butter is spread through the flour in small pieces, it creates pockets that help the baked dough feel flaky. Grated butter is particularly convenient because it can be tossed through the dry ingredients with little handling. Cubed butter works too, provided the pieces stay cold and are cut into the flour until the mixture resembles coarse crumbs.
Heavy cream enriches the dough and helps the scones stay tender. The egg adds richness and helps the mixture bind. Vanilla brings a gentle aromatic note, while orange zest supplies concentrated citrus character. The juice is used in a smaller amount, so add it carefully: the dough should come together without turning wet, and the glaze should be thick enough to coat the tops.
How to judge the dough before shaping
A properly mixed scone dough will not look polished. It may have floury spots, small cold butter pieces, and rough edges. When you squeeze or press it gently, it should hold together. If it crumbles immediately and will not form a disc, add a few drops of cream or orange juice and fold the dough once or twice. If it looks shiny, wet, or sticky, avoid adding more liquid; use a light dusting of flour on the work surface and handle it briefly.
There is no need to knead the dough or press it repeatedly. Bring the pieces together with the parchment, press to the stated thickness, and move on to cutting. The less the dough is worked, the more delicate the baked texture will be. Use the bench scraper to lift or reposition a wedge instead of pulling the warm dough with your fingers.
Why the disc thickness matters
A disc about ½–¾ inch thick gives the wedges enough height to rise while still baking through in the 13–15 minute window. A much thinner disc will produce smaller, flatter wedges that can dry more quickly. A much thicker disc may need more time in the oven, so staying close to the stated thickness keeps the regular batch predictable.
Cut the disc cleanly from the center outward. The half-quarter-eighth pattern keeps the wedges similar in size. If the knife or scraper becomes coated with dough, wipe it clean between cuts. You can leave the wedges almost touching or move them a little farther apart. Close spacing supports an even rise; wider spacing gives the edges more room and a rustic shape.
Balancing the bake time
The recipe gives a range rather than one rigid finish because a softer scone and a firmer scone are both useful results. Start checking at 13 minutes. The bottoms should be lightly golden brown, and the wedges should look set rather than wet. If you prefer a tender center, remove them nearer the early end. If you prefer a firmer bite, continue toward 15 minutes, watching carefully so the edges do not become overly dry.
Mini scones need the same oven temperature but should be checked around 12 minutes. Gluten-free scones should also be watched early, 2–3 minutes before the regular bake time. For that variation, look for a puffed shape and a surface that is no longer glossy. At high altitude, begin checking 2–3 minutes early as well, after making the baking powder and flour adjustments.
Glazing without a mess
Cool the scones completely on a rack before dipping. A wide bowl gives enough room to coat the tops without scraping the sides against the glaze. Dip one scone at a time, let excess glaze drip back into the bowl, and place the scone on the rack. Parchment underneath catches drips and makes cleanup simple.
For a thinner decorative finish, use the freezer-bag method and snip only a tiny corner. A small opening creates a controlled line, while a larger opening can release too much glaze at once. If the glaze thickens while you work, whisk in a very small amount of orange juice. If it becomes too loose, add powdered sugar gradually. Extra glaze can be spooned over the first layer after it begins to set.
Planning the batch around an occasion
Regular scones make a generous serving for brunch or a breakfast plate. Mini scones are convenient when several other foods will be served, such as at a tea party, luncheon, or shower. The dough can be shaped and frozen well before an event, then baked from frozen with a few extra minutes. For the neatest finish, bake the scones without glaze, let them cool, and add the icing closer to serving time.
The orange flavor works across seasons. Fresh citrus makes the batch feel suited to spring celebrations, while the tender pastry is just as welcome for a winter afternoon treat. A simple glaze keeps the presentation classic; dried edible flowers over the glaze add a special touch for tea service. Plain scones can be packed in an airtight container for a casual breakfast or snack.
A quick preparation checklist
- Line the baking sheet before mixing.
- Grate and freeze the butter, or cube it and keep it chilled.
- Zest the orange before squeezing the juice.
- Whisk the dry ingredients thoroughly so the baking powder and salt are distributed.
- Combine the wet ingredients separately before adding them to the flour mixture.
- Mix with a fork only until the dough is shaggy and just holding together.
- Shape the disc with parchment and cut 8 regular wedges, or divide for 16 mini wedges.
- Chill the formed dough for 10–30 minutes.
- Check regular scones at 13 minutes, mini scones around 12 minutes, and gluten-free or high-altitude batches 2–3 minutes early.
- Cool completely before dipping or drizzling with glaze.
Using the orange zest well
Orange zest is the most concentrated orange ingredient in the dough, so grate only the colored outer peel. The white pith underneath can be bitter. Zest the orange before juicing it, and measure the zest for the dough separately from the zest reserved for the glaze. Using fresh zest in both places gives the pastry and icing a connected citrus flavor.
Because oranges vary in size and juiciness, treat the juice as an adjustable ingredient. The dough needs only 1–2 tablespoons, and the glaze needs enough to become smooth and pourable. Add a little, whisk or mix, and assess the texture before adding more. This keeps the dough from becoming wet and lets you control whether the glaze is thick enough to coat the scone.
Making the dough in a cool, orderly sequence
Start by lining the pan, then whisk the flour, sugar, baking powder, and salt. Grate the butter and put it in the freezer before measuring the orange zest and juice. Next whisk the cream, egg, vanilla, zest, and juice in one small vessel. This order keeps the cold butter from sitting at room temperature and makes the final mixing quick.
Once the wet mixture enters the bowl, use a fork rather than a mixer. A fork breaks up dry pockets while leaving the dough rough. If you use your hands to distribute grated butter, use a light touch and return the bowl to the refrigerator if the butter starts to soften. The dough should not need repeated handling to become smooth; a shaggy appearance is the correct stopping point.
Regular wedges and petite wedges
For 8 regular scones, press the entire batch into one disc about 8 inches across. Cutting in half, then quarters, then eighths creates wedges that are easy to portion. For 16 mini scones, divide the dough into two equal portions before shaping. Use separate parchment sheets when convenient, form each portion into its own smaller disc, and cut each disc into 8 petite wedges.
Mini scones are not a separate dough. They use the same temperature and the same cold-butter method, but the smaller pieces finish sooner. Begin checking at about 12 minutes, looking for a set surface and lightly golden bottoms. The same early checking is helpful for gluten-free and high-altitude batches, where the suggested adjustments can change how quickly the wedges bake.
Keeping frozen dough organized
When freezing unbaked scones, cut the wedges first so the dough is ready to bake in individual portions. Wrap the shaped dough tightly in plastic wrap, place it in a freezer bag, and label the bag with the date and the baking directions. Freeze for up to 4 months. Bake from frozen on a lightly greased or parchment-lined cookie sheet and allow a few extra minutes if needed.
For baked scones, let every piece cool completely before wrapping. Freeze them unglazed when possible and add the orange icing after thawing. This protects the glaze’s appearance and texture. If the scones are already glazed, wrap them carefully and keep the pieces from pressing against one another. Counter storage is preferable for the short term: use an airtight container and enjoy within the stated 5-day window.
Small adjustments that protect the finished texture
Several small choices make a noticeable difference. Keep the cream refrigerated, use real cold butter, and avoid adding all the liquid at once. Shape with parchment instead of repeatedly flouring and kneading the dough. Chill the cut wedges before baking, and use an oven thermometer if your oven temperature is uncertain. Let the baked scones cool fully before glazing, and adjust the icing with powdered sugar or juice rather than applying a thin glaze that runs off.
These steps do not add complexity; they simply protect the tender, flaky result. The dough can remain rustic, the wedges can be close together or farther apart, and the glaze can be dipped or drizzled. What matters most is preserving the cold butter, gentle mixing, brief chill, and clear doneness cues.
Nutrition
Nutrition per 1 scone: 355 calories; 44g carbohydrates; 8g protein; 16g fat; 9g saturated fat; 1g polyunsaturated fat; 5g monounsaturated fat; 0.3g trans fat; 175mg cholesterol; 293mg sodium; 104mg potassium; 1g fiber; 22g sugar; 647 IU vitamin A; 2mg vitamin C; 97mg calcium; and 2mg iron.
These glazed orange scones are at their best when the dough is handled gently and the butter stays cold. With fresh zest in the dough and glaze, they deliver a bright citrus finish in a tender, flaky package—whether you bake a full batch of regular wedges or a tray of petite scones.
PrintBright, tender scones glazed with fresh citrus, featuring delicate crumb from cold grated butter and a soft texture enhanced by heavy cream, orange zest, and juice. Finished with a vanilla-orange butter glaze for a sweet citrus finish.
- Total Time: 28-45 minutes (including chilling time)
- Yield: 8 regular scones or 16 mini scones 1x
Ingredients
- 1¾ cups unbleached all-purpose flour
- ¼ cup granulated sugar (up to ½ cup for sweeter variation)
- 2 teaspoons baking powder (1½ teaspoons for high altitude)
- ¼ teaspoon kosher salt
- 4 tablespoons salted butter, cold and grated or cubed
- ½ cup heavy cream, cold (plus 1–2 tablespoons extra liquid for high altitude, added gradually)
- 1 teaspoon vanilla bean paste or vanilla extract
- 1 large egg, room temperature
- 1 tablespoon orange zest (from about one orange)
- 1–2 tablespoons fresh orange juice
- Optional Orange Vanilla Butter Glaze:
- 1 cup powdered sugar
- ½ teaspoon vanilla bean paste or vanilla extract
- 1 tablespoon butter, melted
- Zest from 1 orange
- Juice from ½ orange (add gradually until smooth and pourable)
Instructions
- Preheat oven to 400°F (204°C) and line a baking sheet with parchment paper.
- In a large bowl, whisk together flour, granulated sugar, baking powder, and kosher salt.
- Grate cold butter and freeze or keep chilled until ready to use.
- Add grated cold butter to dry ingredients and quickly mix using a pastry cutter or fingertips until mixture resembles coarse crumbs with some visible butter pieces.
- In a separate bowl, whisk together heavy cream, vanilla bean paste or extract, egg, 1 tablespoon orange zest, and 1–2 tablespoons orange juice.
- Make a well in the center of the dry ingredients, pour in wet mixture, and gently stir with a fork until dough just comes together and looks shaggy; avoid overmixing.
- Turn dough onto parchment-lined surface; use parchment to bring dough together and press into an 8-inch disc about ½–¾ inch thick; add a few dribbles of cream or orange juice if dough is too dry, mixing quickly.
- Cut the disc into 8 wedges by halving, quartering, then halving each quarter; pull wedges apart slightly for more even rise or separate more for rustic appearance.
- Chill shaped wedges in the fridge or freezer for 10–30 minutes while preheating oven.
- Bake scones 13–15 minutes until bottoms are lightly golden; check at 13 minutes for a softer scone or at 15 minutes for a firmer texture.
- Transfer scones to a wire rack to cool completely before glazing.
- For glaze, whisk powdered sugar, orange zest, melted butter, and vanilla bean paste or extract in a bowl; add orange juice gradually until glaze is thick but pourable.
- Dip cooled scone tops in glaze or drizzle glaze with a snipped freezer bag; allow glaze to set on a wire rack before serving.
Notes
Use cold butter and cream to achieve tender, flaky texture., Do not overmix dough to prevent toughness., Adjust sugar amount for sweetness preference, keeping total between ¼ to ½ cup., Mini scones can be made by dividing dough into two discs and cutting each into 8 wedges; bake at 400°F (204°C) but check doneness around 12 minutes., For high altitude, reduce baking powder to 1½ teaspoons, add 1–2 tablespoons extra flour, and possibly extra liquid gradually., Glaze consistency is key: add juice slowly to powdered sugar mixture to avoid thin glaze that slides off scones., Store baked scones in airtight container up to 5 days; freeze unbaked shaped wedges up to 4 months for later baking; freeze baked scones unglazed for up to 3 months and glaze after thawing for best texture., Variations include using gluten-free flour blend, blueberry substitution, or orange extract in glaze if fresh orange is unavailable.
- Prep Time: 15 minutes
- Cook Time: 13-15 minutes
- Category: Breakfast / Brunch Pastry
Nutrition
- Serving Size: 1 scone
- Calories: 355 calories per scone
- Fat: 16g fat per scone
- Carbohydrates: 44g carbohydrates per scone
- Protein: 8g protein per scone