Classic Buttermilk Scones Recipe: Light, Flaky, and Easy

These classic buttermilk scones are light, flaky, and wonderfully easy to make. They bake in just 12 to 15 minutes, need no electric mixer, and are a practical way to use the extra buttermilk in the refrigerator. Serve them warm with butter, your favorite jam, lemon curd, mango curd, or rhubarb compote.
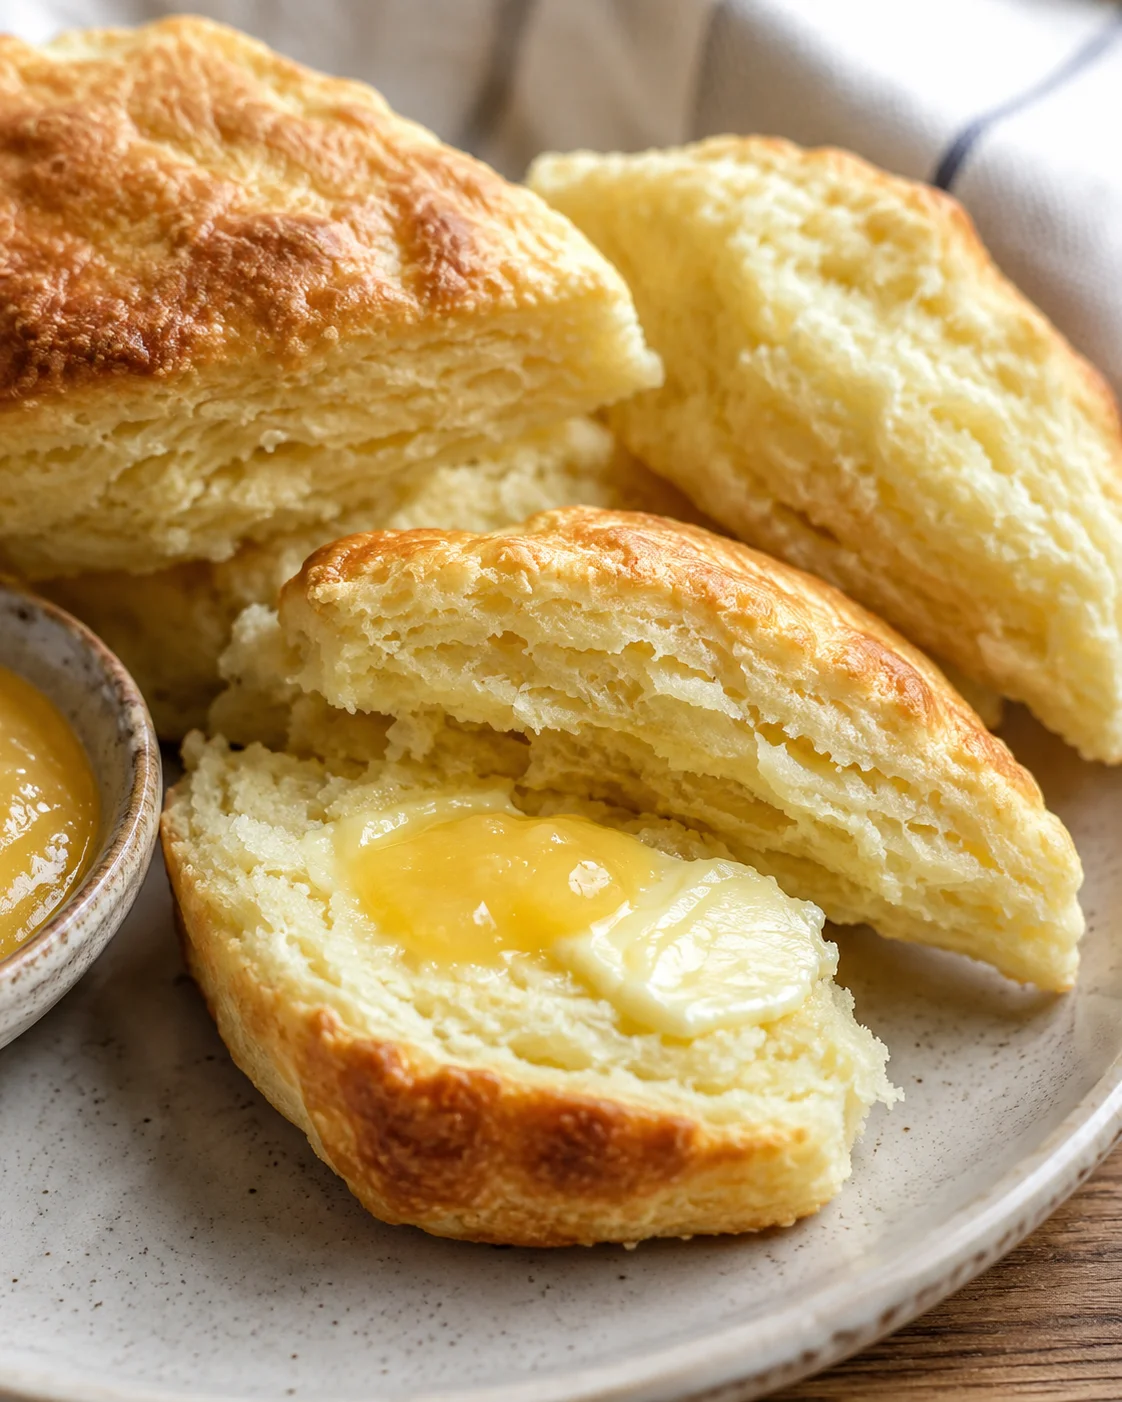
They are just as comfortable on a Saturday brunch table as they are at afternoon tea. You can keep them plain, add a handful of mix-ins, or freeze the finished scones for another day. The recipe makes 16 small scones, each about the size of a standard dinner roll.
There is a little afternoon-tea story behind these scones. A summer visit to Gravenhurst led to a first afternoon tea at a dainty blue tea shop by the docks, with a lovely lake view. It was 40C/104F outside, and casual tourist clothes—shirt, shorts, and Birkenstocks—did not exactly feel like formal tea attire. Inside, though, the air conditioning was running, the staff was warm and friendly, the room smelled of freshly baked bread, and the food was delightful. The scones stood out, inspiring a long-running scone mission and this simple, adaptable recipe.
Why You Will Love This
This buttermilk scones recipe keeps the process approachable without sacrificing the flaky texture that makes a good scone special. Everything is mixed by hand, which means you do not need a stand mixer or hand mixer. Hand mixing also makes it easier to stop as soon as the dough comes together instead of working it too much.
The bake is fast: the scones need only 12 to 15 minutes in a 400F oven. They brown quickly, so you can go from dough to warm scones in less time than many breakfast bakes require. Keep an eye on them during the final minutes because every oven is different.
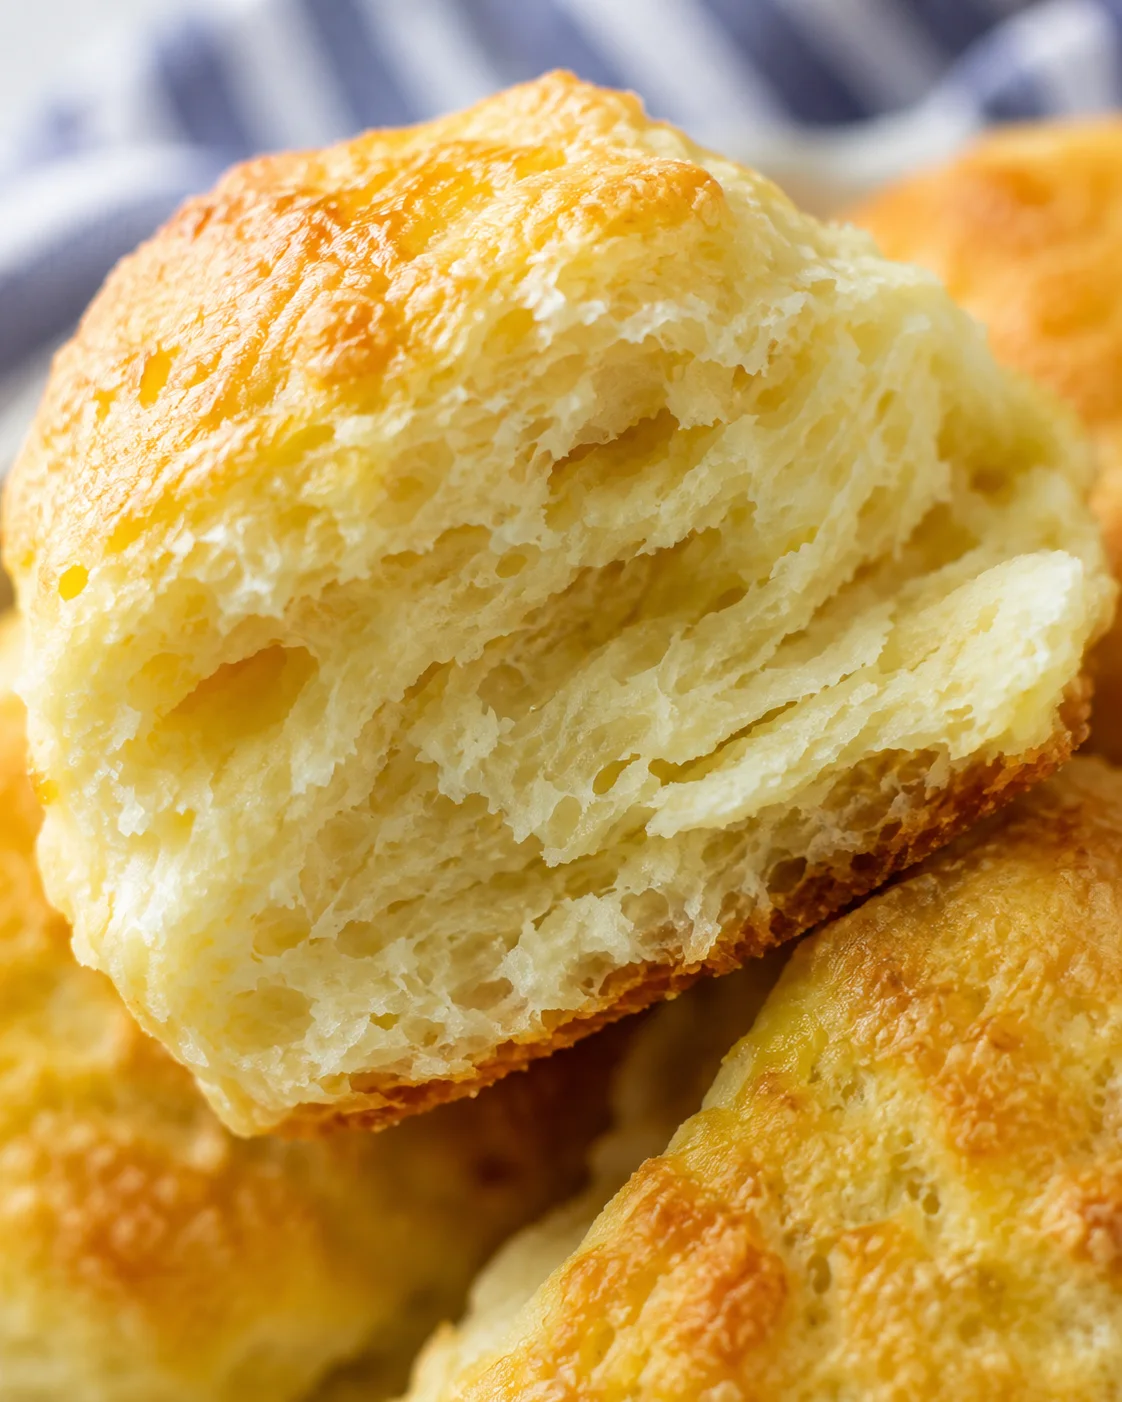
The recipe also gives leftover buttermilk a useful purpose. The finished scones are light and flaky when warm, with enough sweetness to enjoy on their own but a gentle flavor that welcomes toppings. Their small size makes them easy to serve at brunch, afternoon tea, or whenever a freshly baked treat sounds right.
Ingredients
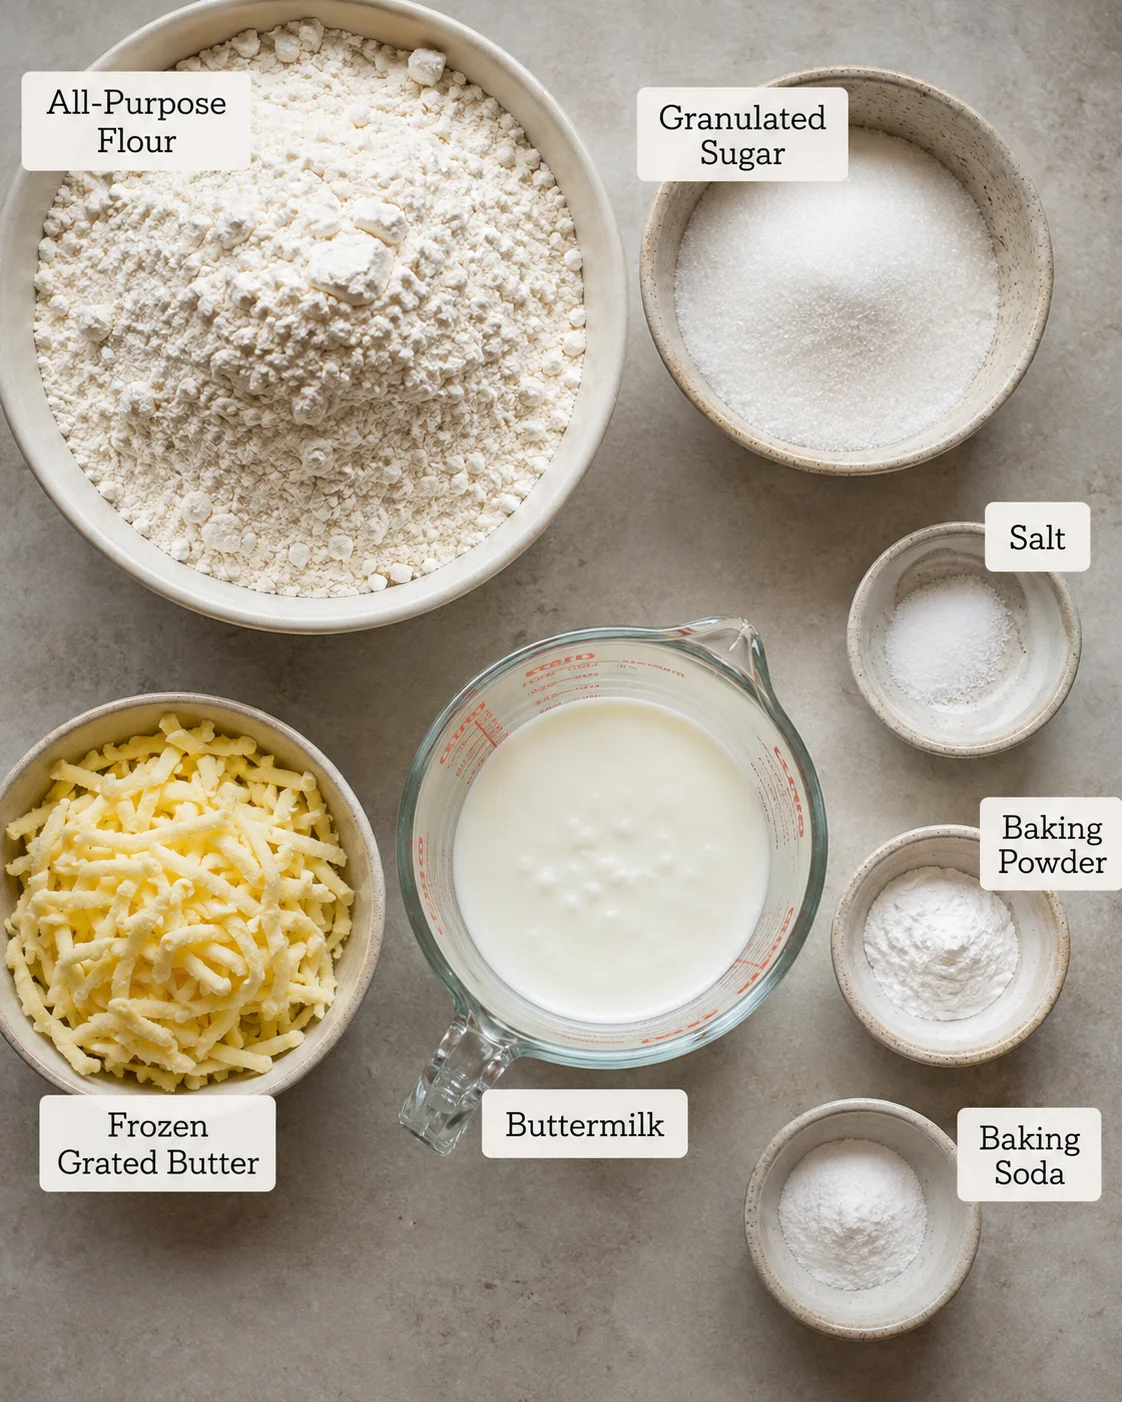
Gather the ingredients before you begin. The butter is the one ingredient that benefits from advance preparation: freeze it for at least 30 minutes, then grate it before adding it to the dry mixture.
- 3 cups all-purpose flour
- 1/3 cup granulated sugar
- 1 teaspoon salt
- 2 1/2 teaspoons baking powder
- 1/2 teaspoon baking soda
- 3/4 cup unsalted butter, frozen and grated
- 1 cup buttermilk
For equipment, have a large mixing bowl, a cheese grater, baking sheets, and a bench scraper ready. A pastry cutter is useful for cutting the butter into the flour, but a fork works too. If you do not have a pastry cutter, two forks or two knives can do the same job.
Instructions
Set aside enough room to work on a lightly floured surface. The dough should be handled gently, and the butter should stay cold as long as possible.
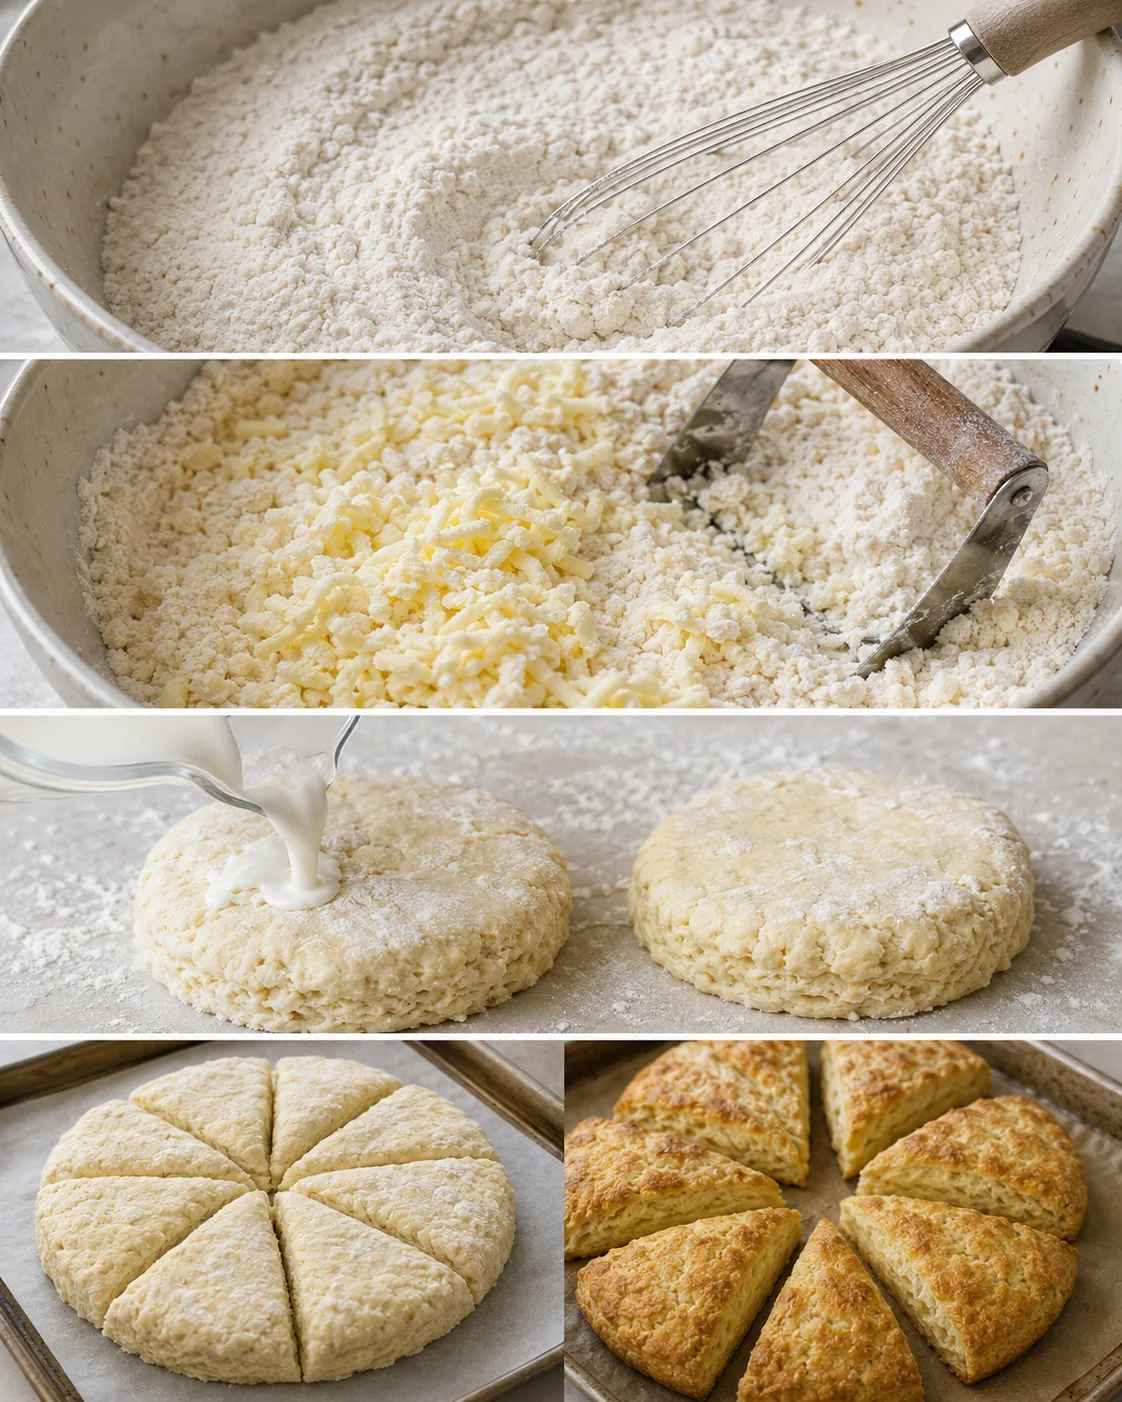
- Prepare the oven and pan. Preheat the oven to 400F. Lightly grease a baking pan and set it aside. One large cookie sheet may be enough, but you may need two baking sheets depending on their size.
- Combine the dry ingredients. In a large bowl, stir together the flour, sugar, salt, baking powder, and baking soda.
- Cut in the butter. Add the frozen, grated butter. Use a pastry cutter or fork to work it into the flour mixture until it looks coarse. You should still see pieces of butter-and-flour mixture about the size of chickpeas; those pieces help create flaky layers.
- Add the buttermilk. Make a well in the center and pour in the buttermilk. Mix just until the ingredients are combined. Do not overmix. If you are adding chocolate chips or another mix-in, fold it in now.
- Shape the dough. Turn the dough onto a floured surface and divide it into two equal parts. Lightly knead each portion, shaping it into a round about 3/4 inch thick and 6 inches in diameter.
- Cut the scones. Cut each round into 8 wedges. Place the wedges on the prepared baking sheets, spacing them evenly at about 2 inches apart.
- Bake. Bake for 12 to 15 minutes, or until the scones are lightly browned. Stay close to the oven and watch them carefully during this window; they can brown quickly.
- Serve warm. Remove the scones from the oven and serve them warm.
Tips
Freeze the butter before grating it. Freeze the butter for at least half an hour, grate it with a boxed cheese grater, and return the grated butter to the freezer while you prepare the remaining ingredients. This small change produces flakier scones than the cold, cubed-butter approach used in many similar bakes. Grating takes a little extra effort, and gloves can help protect your hand while you work.
Keep the mixing brief. The dough does not need to become smooth. A coarse mixture with visible butter pieces is exactly what you want before the buttermilk goes in. Once the liquid is added, stir only until there are no large pockets of dry flour. Overmixing can make the dough less tender.
Use the visual cues. The butter-and-flour mixture should look coarse, the rounds should be about 3/4 inch thick, and the finished scones should be lightly browned. Because ovens vary and these scones brown quickly, begin checking at the 12-minute mark rather than walking away.
Variations
These scones make a flexible base for other favorite ingredients. Add 1/2 to 3/4 cup of mix-ins to the dough before you knead and shape it. Dried cranberries, dried blueberries, and chocolate chips are all options that work especially well with the plain dough.
When adding sweet mix-ins, reduce the sugar a little so the finished scones do not become too sweet. The exact adjustment can depend on the sweetness of the additions, so make a modest reduction rather than changing the flour, butter, or buttermilk quantities.
You can also keep the batch plain and let the toppings provide the variation. That makes it easy to serve some scones with butter and jam while offering others with curd or compote.
Storage
These scones freeze beautifully. Once you have finished serving them, place the extras in a Ziploc bag and put them straight into the freezer. There is no need to thaw one before reheating it.
To warm a frozen scone, microwave it for about 30 seconds. It will be more cakey than flaky after reheating, but it is still good. The scones stay fresh for about two weeks when frozen.
Serving Suggestions
Serve the scones warm and plain, or split them and add butter. Your favorite jam is an easy choice, while lemon curd adds a bright, citrusy option. Mango curd and rhubarb compote bring different fruit flavors to the same tender base.
They are a natural addition to a Mother’s Day brunch or an afternoon-tea spread, but there is no need to wait for a special occasion. Afternoon tea does not have to happen in the afternoon, and it does not even have to include tea. Put out a plate whenever you want a warm, homemade bite with a cup of coffee, tea, or whatever you are drinking.
FAQ
How many scones does this recipe make?
The batch makes 16 small scones. Each one is about the size of a standard dinner roll because the dough is divided into two rounds and each round is cut into 8 wedges.
Do I need an electric mixer?
No. Mix the dough by hand. A pastry cutter or fork helps cut the butter into the dry ingredients, and two forks or knives can be used if you do not have a pastry cutter.
Why is the butter frozen and grated?
Frozen grated butter distributes small cold pieces through the flour mixture. The recipe uses this technique to create flakier scones. Freeze the butter for at least 30 minutes, grate it, and return it to the freezer while you measure and mix the other ingredients.
Can I add chocolate chips or fruit?
Yes. Add 1/2 to 3/4 cup of mix-ins before kneading the dough. Dried cranberries, dried blueberries, and chocolate chips are listed options. If the additions are sweet, use a little less sugar so the scones do not become too sweet.
Can I freeze the baked scones?
Yes. Put the finished scones in a Ziploc bag and freeze them without thawing first. Microwave one for about 30 seconds when you are ready to eat it. The reheated texture will be more cakey than flaky, and the scones stay fresh for about two weeks frozen.
Nutrition
The listed nutrition estimate is 187 calories, 23g carbohydrates, 2g protein, 9g fat, 5g saturated fat, 24mg cholesterol, 202mg sodium, 126mg potassium, 4g sugar, 290 IU vitamin A, 57mg calcium, and 1.2mg iron. Nutritional information is an estimate only.
PrintLight, flaky buttermilk scones that bake quickly and require no electric mixer. Perfect for brunch or afternoon tea, served warm with butter or your favorite toppings.
- Total Time: 27-30 minutes
- Yield: 16 small scones 1x
Ingredients
- 3 cups all-purpose flour
- 1/3 cup granulated sugar
- 1 teaspoon salt
- 2 1/2 teaspoons baking powder
- 1/2 teaspoon baking soda
- 3/4 cup unsalted butter, frozen and grated
- 1 cup buttermilk
Instructions
- Preheat the oven to 400F and lightly grease one or two baking sheets.
- In a large bowl, combine flour, sugar, salt, baking powder, and baking soda.
- Add the frozen grated butter to the dry ingredients. Use a pastry cutter or fork to work it in until the mixture looks coarse with pea-sized butter pieces.
- Make a well in the center and pour in the buttermilk. Mix just until combined without overmixing. Fold in any optional mix-ins at this point.
- Turn the dough onto a floured surface and divide into two equal portions.
- Lightly knead each portion and shape into rounds about 3/4 inch thick and 6 inches in diameter.
- Cut each round into 8 wedges and place wedges on the prepared baking sheets about 2 inches apart.
- Bake for 12 to 15 minutes until lightly browned, watching closely to avoid overbaking.
- Serve warm.
Notes
Freeze the butter for at least 30 minutes before grating to ensure flakier scones., Do not overmix the dough to keep scones tender and flaky., Check scones starting at 12 minutes since ovens vary and they brown quickly., Optional add-ins include 1/2 to 3/4 cup dried cranberries, dried blueberries, or chocolate chips. Reduce sugar slightly if using sweet mix-ins., Finished scones freeze well. Reheat from frozen in the microwave for about 30 seconds. Texture will be more cakey when reheated.
- Prep Time: 15 minutes
- Cook Time: 12-15 minutes
- Category: Baked Goods
Nutrition
- Serving Size: 1 scone (about the size of a standard dinner roll)
- Calories: 187 calories per serving
- Fat: 9g fat per serving
- Carbohydrates: 23g carbohydrates per serving
- Protein: 2g protein per serving