Luscious Strawberry Rhubarb Upside Down Cake Recipe

There’s something truly special about baking with fresh, seasonal fruit—the bright colors, the inviting aromas, and the way it magically turns into something even tastier once it hits the oven. But when strawberries and rhubarb team up? Oh, that’s when kitchen magic really happens. Their sweet and tangy combo is exactly what summer desserts are made for.
I stumbled onto this Strawberry Rhubarb Upside Down Cake one summer when my garden was overflowing with rhubarb (it happens every year!). Ready for a change from the usual pies, I gave this a try. The moment I flipped that pan and saw the shiny, jewel-toned fruit layer on top, I knew I had a new favorite. Now, whenever rhubarb season rolls around, this cake is the first dessert I want to bake.
This Strawberry Rhubarb Upside-Down Cake brings together comfort and a bit of kitchen theater—the best kind! It celebrates the freshest, peak-season fruit by turning a handful of simple ingredients into a vibrant, glossy topping. Then there’s the grand finale: the joyful flip that turns the cake into a real showstopper on the plate.
You’ll be enjoying a beautiful 9-inch cake in just about an hour and five minutes. That includes 20 minutes of hands-on prep and roughly 45 minutes baking. No fancy gadgets or skills needed—if you can mix a batter and spread fruit in a pan, you’re already halfway there.
Keep reading for the full ingredient list, detailed step-by-step instructions, handy baking tips, serving ideas, storage advice, and answers to common questions. Plus, there are plenty of photos to guide you. Whether this is a casual family dessert or the highlight of your summer gathering, you’ll have all you need for a stunning result.
Why You’ll Fall For This Cake
This cake is one of those winners that’s simple to pull off but impressive enough to wow every guest. Here’s why it’s become my absolute favorite go-to dessert:
- Easy as pie (but way better!): No decorating skills needed. The fruit does all the hard work, creating a gorgeous topping when you flip the cake over.
- Sweet meets tart perfectly: The natural sweetness of strawberries balances out rhubarb’s zingy tang, creating that perfect summer flavor combo. If you love that contrast, you’ll also enjoy Chocolate Rhubarb Brownies.
- Summer vibes in every bite: That bright red topping just screams “fresh fruit season” before you even take a bite.
- Foolproof and straightforward: If you can toss fruit with sugar and mix a simple batter, you’ve got this down. For an even more hands-off option, try this Strawberry Rhubarb Dump Cake.
- Always a showstopper: That moment when the pan flips and reveals a glossy, fruit-studded top? Pure kitchen magic that never gets old. Craving another dramatic flip? Check out the Perfect Peach Upside-Down Skillet Cake with easy salted caramel topping.
Trust me, this is the kind of dessert that has everyone asking for the recipe before they’re through their first slice.
Ingredients for Topping and Cake
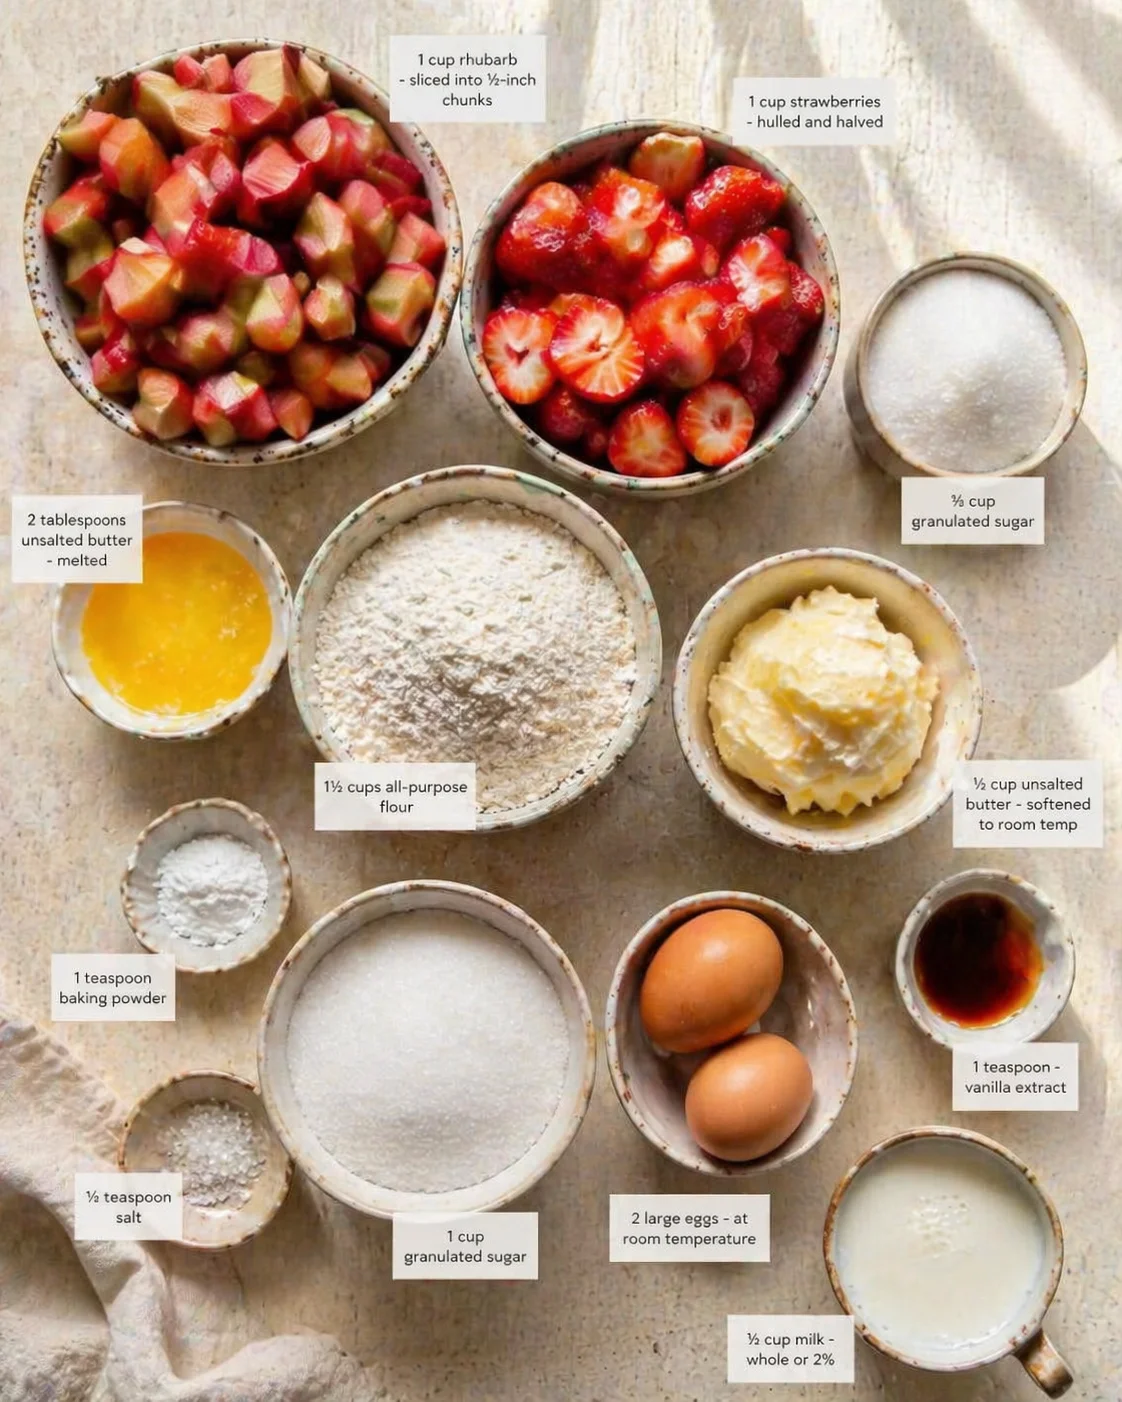
- 1 cup rhubarb – sliced into ½-inch chunks (no peeling necessary, just trim the ends)
- 1 cup strawberries – hulled and halved (pick firm berries so they hold up well)
- ¾ cup granulated sugar – just enough to cut the tartness of the rhubarb
- 2 tablespoons unsalted butter – melted
- 1½ cups all-purpose flour – spooned and leveled for accuracy
- 1 teaspoon baking powder
- ¼ teaspoon salt
- ½ cup unsalted butter – softened to room temperature
- 1 cup granulated sugar
- 2 large eggs – at room temperature
- 1 teaspoon vanilla extract
- ½ cup milk – whole or 2%
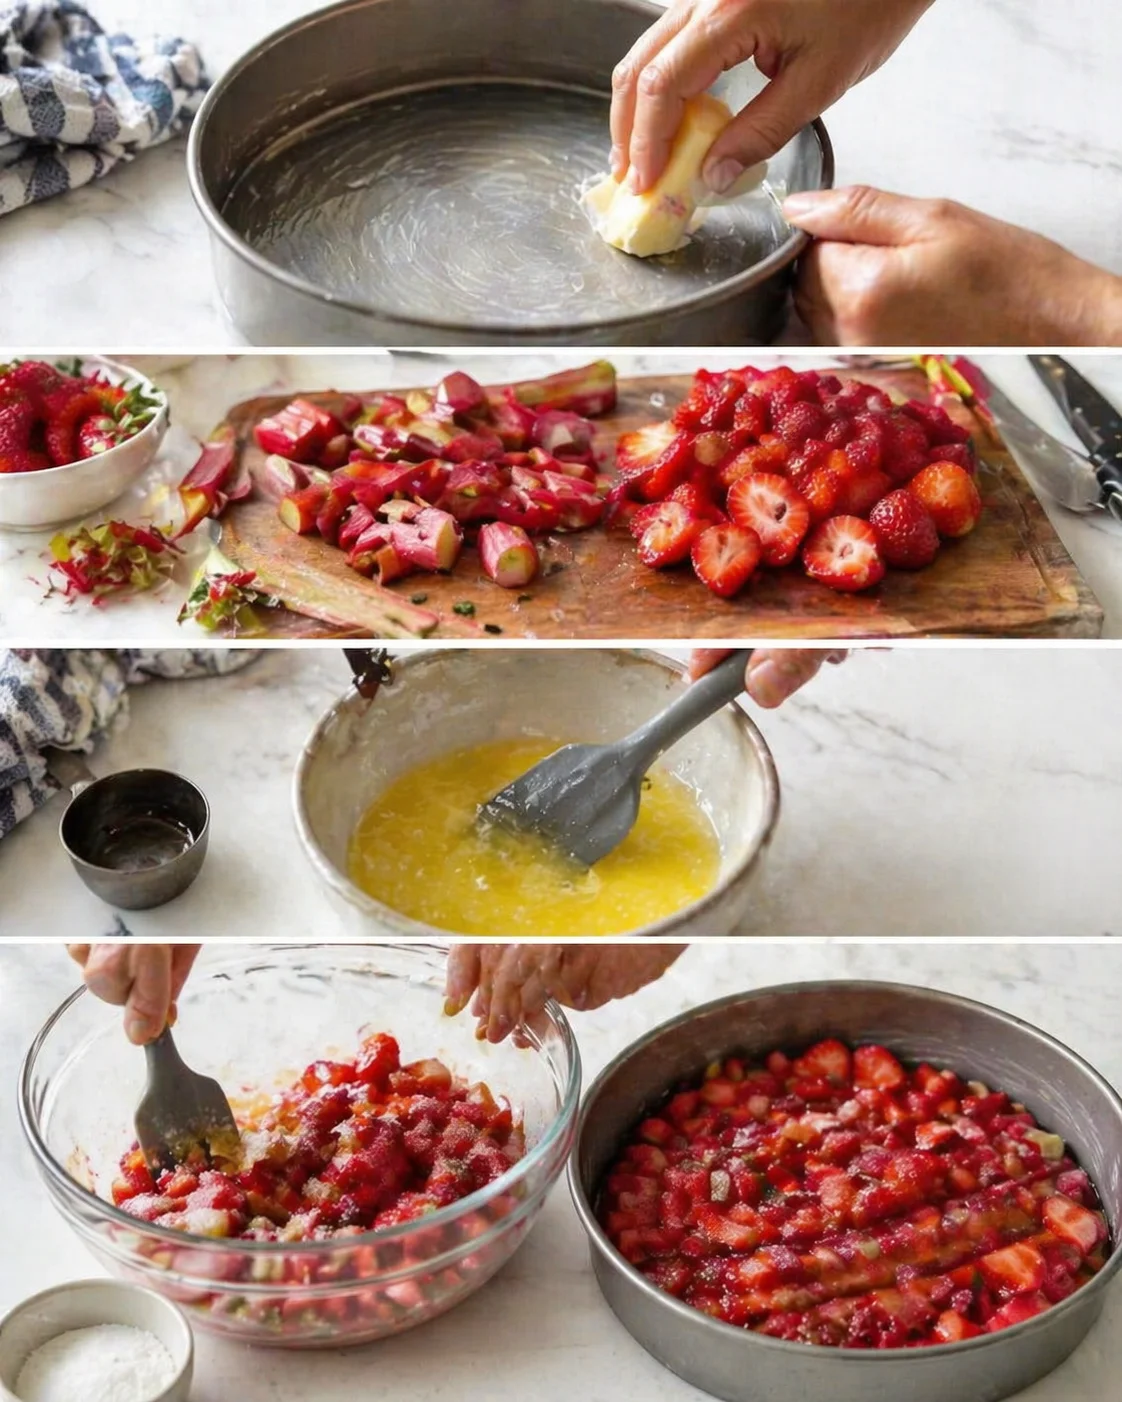
How to Bake and Assemble
- Preheat oven to 350°F (175°C) and generously grease a 9-inch round cake pan.
- Trim the rhubarb ends and cut into ½-inch pieces; hull and halve the strawberries.
- Melt 2 tablespoons unsalted butter.
-
In a medium bowl, toss the rhubarb, strawberries, ¾ cup granulated sugar, and melted butter; spread the mixture in an even layer across the bottom of the prepared pan.
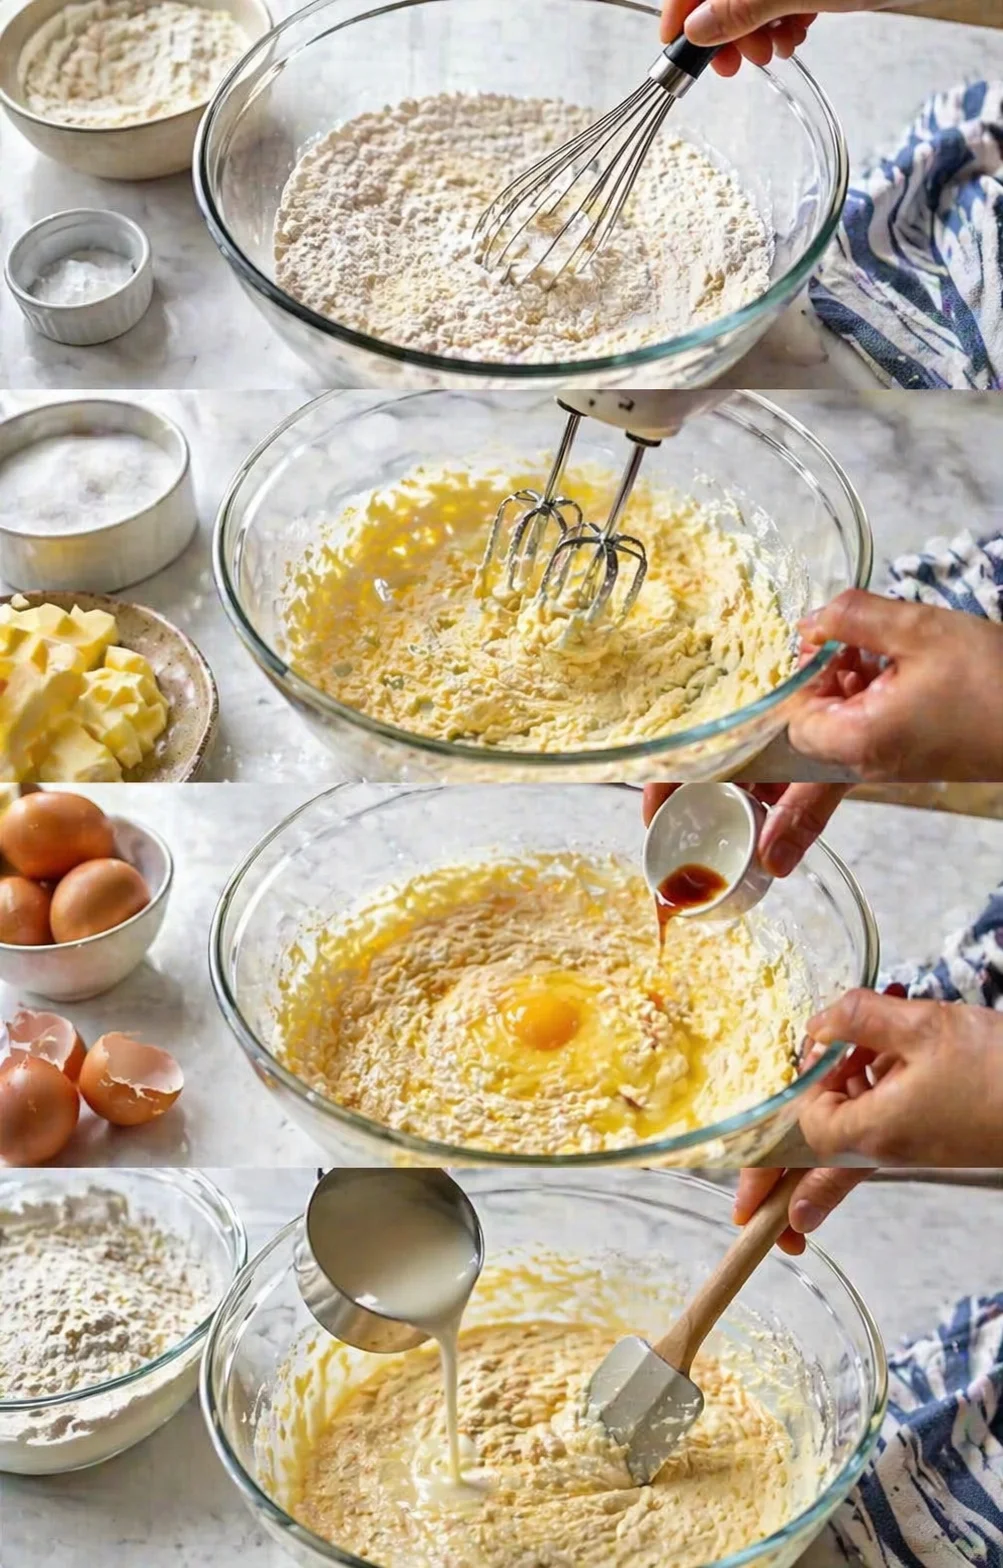
- Whisk together 1½ cups all-purpose flour, 1 teaspoon baking powder, and ¼ teaspoon salt.
- Using a hand mixer, cream ½ cup softened unsalted butter with 1 cup granulated sugar until light and fluffy.
- Add the eggs one at a time, mixing well after each addition, then stir in 1 teaspoon vanilla extract.
-
Alternate adding the flour mixture and ½ cup milk to the butter mixture, beginning and ending with the flour, mixing just until combined and scraping down the bowl as needed.
- Gently pour the batter over the fruit in the pan and smooth the top with a spatula.
- Bake for 40–45 minutes, or until a toothpick inserted into the center comes out clean and the edges begin to pull away from the pan (start checking at 35 minutes).
- Remove the pan from the oven and let the cake cool in the pan for 10 minutes.
-
Place a plate over the pan and carefully invert to release the cake; gently nudge any fruit that sticks back onto the cake.
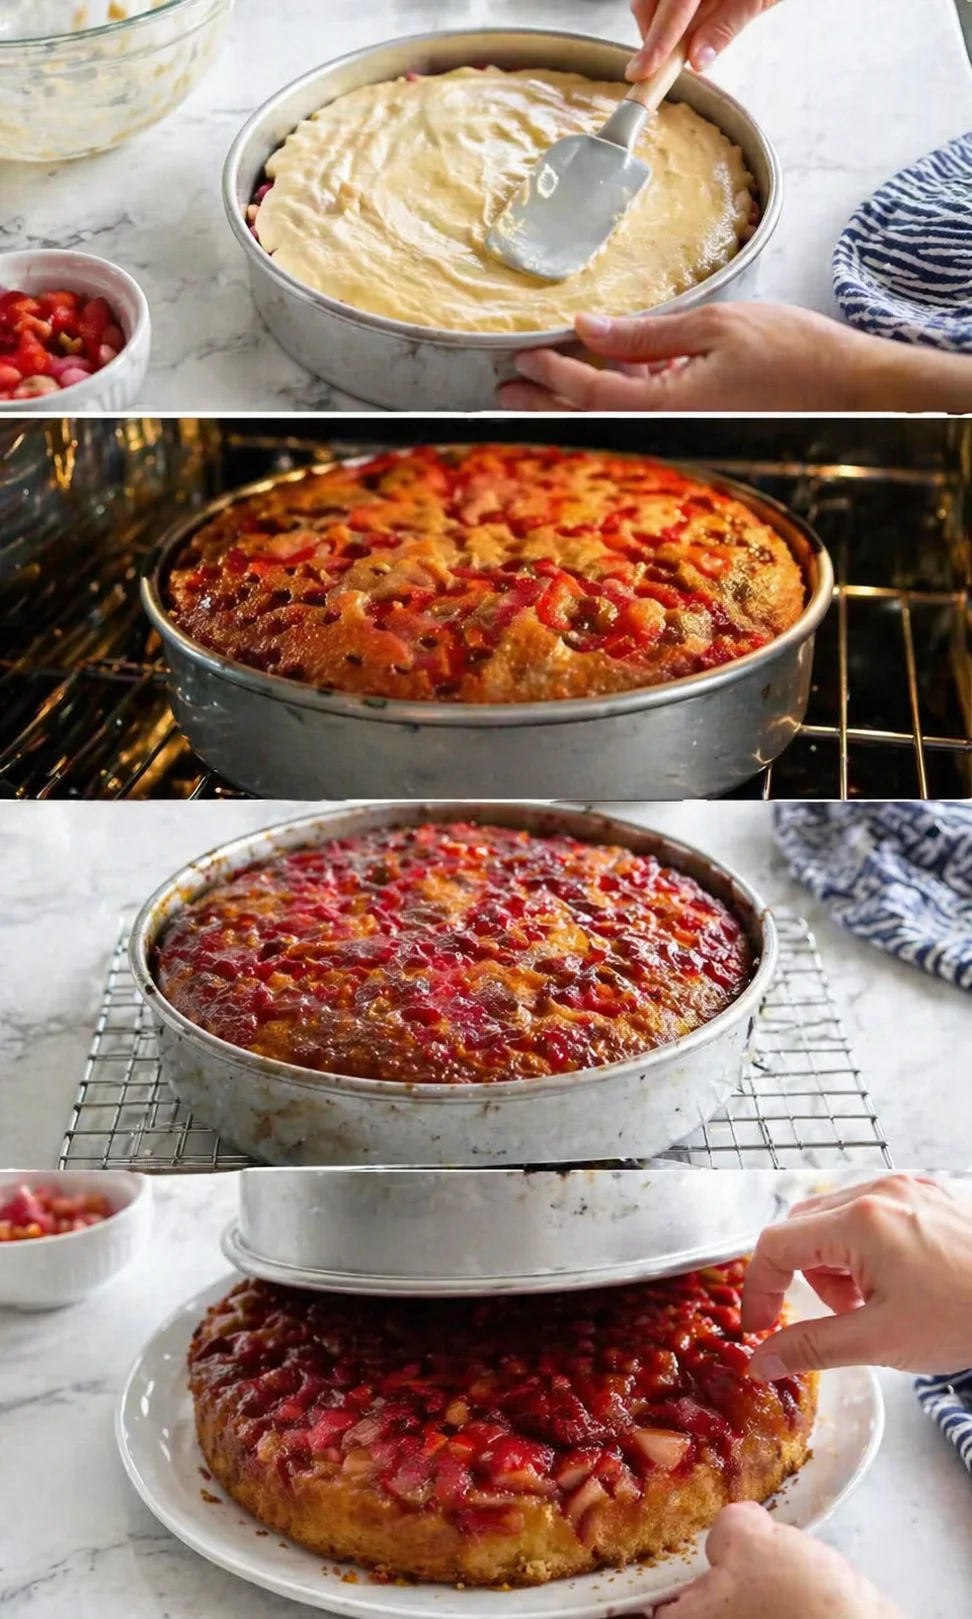
-
Allow the cake to cool on the plate a bit before slicing.

Pro Tips for Better Results
After baking this cake more times than I can count (and happily eating even more slices), I’ve picked up some handy tips that really make a difference:
- Fresh fruit is key – Use garden-fresh rhubarb and freshly picked strawberries whenever possible for the best flavor and texture. Got extra berries? Turn them into Strawberry Watermelon Popsicles.
- Grease your pan thoroughly – Make sure every corner and crevice is coated, especially if you’re using a Bundt pan. I swear by butter plus a light dusting of flour for the best release.
- Don’t overbake – Moist cake is the goal! Start checking at 35 minutes. When a toothpick comes out with just a few moist crumbs, it’s perfect. Prefer a softer, custardy rhubarb dessert? Try these Heavenly Rhubarb Custard Bars.
- Flip at just the right time – That 10-minute cooling window is magic. Too soon, and the cake falls apart; too long, and it sticks.
- Store smart – Cover loosely with foil or a cake dome. Avoid plastic wrap directly over the fruit topping—it can make it soggy. Honestly, this cake tastes even better the next day.
Follow these tricks, and you’ll be serving up a dessert that everyone’ll rave about!
Serving Suggestions and Flavor Twists
This cake is delicious all on its own, but I love playing around with different ways to serve it. Here are some of my favorite ideas to dress it up:
- A scoop of vanilla ice cream melting over the warm fruit—pure bliss (also great with a classic nectarine crisp)
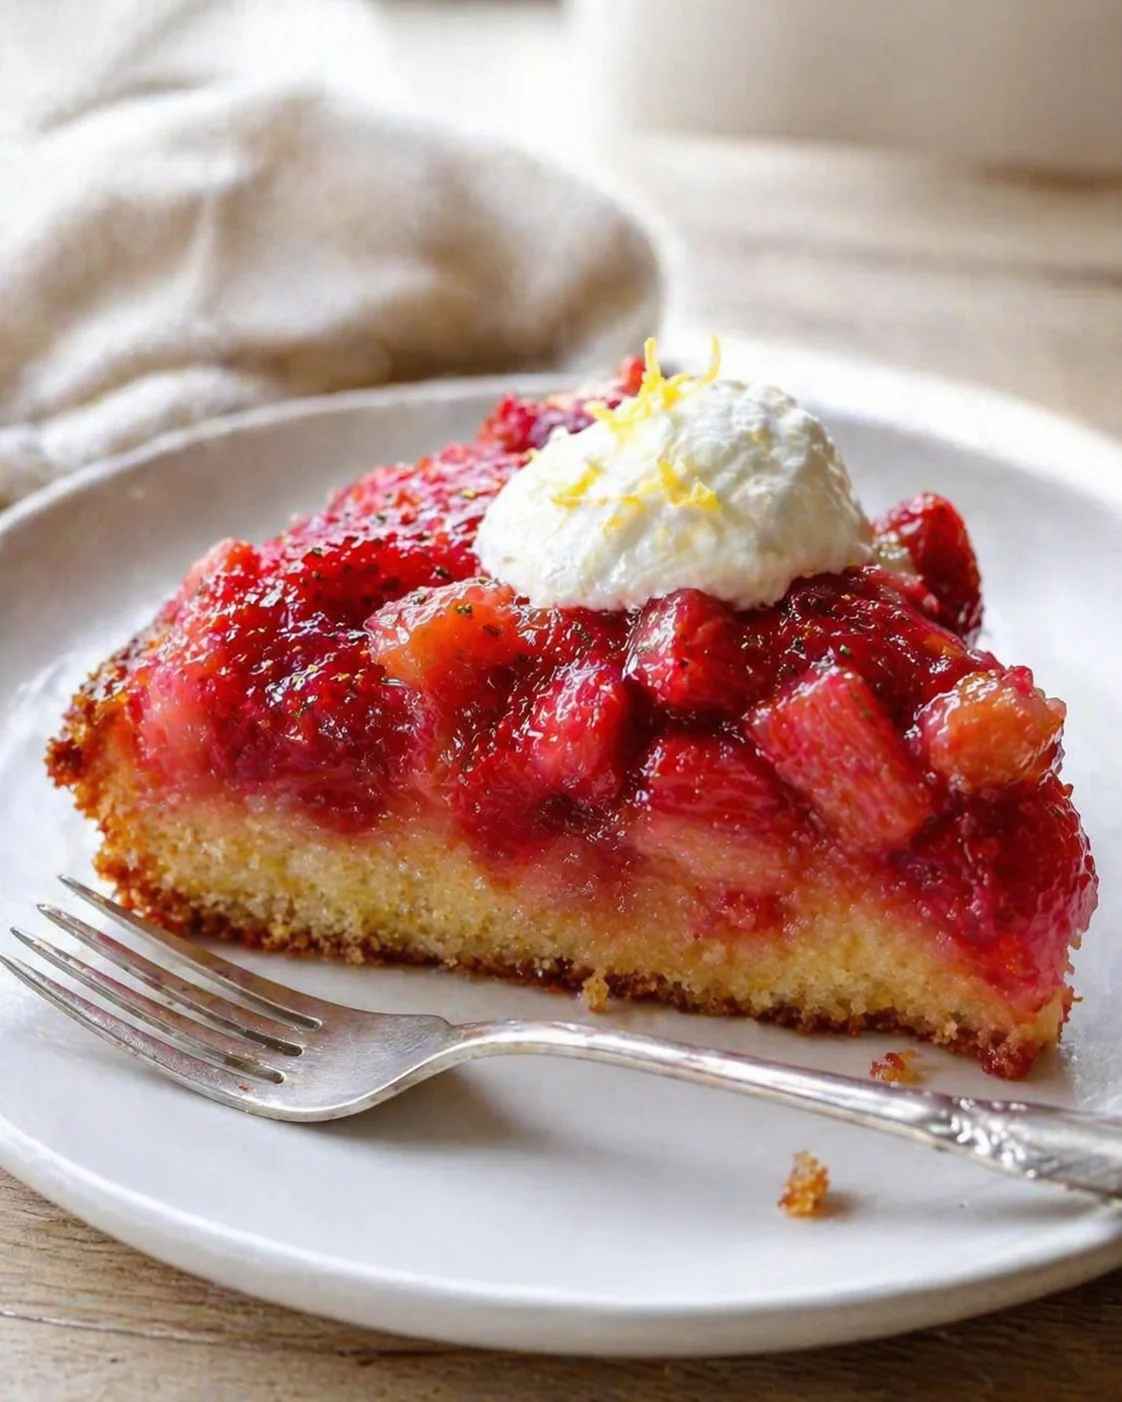
- Fresh whipped cream with a touch of orange zest for a bright twist—if you crave more citrus with rhubarb, try this lemon rhubarb loaf
- As a star at your afternoon tea, especially paired with a cup of Earl Grey
- For breakfast—because, hey, fruit makes it healthy, right?
- A dollop of Greek yogurt for a lighter, tangy contrast
No matter how you serve it, that first forkful of tender cake and sweet-tart fruit is always a delightful treat.
Storage and Make-Ahead Tips
This cake is best enjoyed the day it’s made, but if you have leftovers, no worries—they keep well for a few days when stored right. At room temperature, loosely cover the cake with foil or use a cake dome. Avoid plastic wrap touching the fruit topping to keep it from getting soggy. Properly stored, it stays fresh for up to 3 days.
- If refrigerating: Store single slices in an airtight container to keep them from drying out quickly. Refrigeration speeds up drying, so only do this if it’s warm or you need to keep it longer. Eat within 3 days.
- To freeze: Wrap individual slices in parchment or wax paper, then seal with foil or put into a freezer-safe bag. Freeze for up to a month. Thaw overnight in the fridge, then bring to room temperature for 30–60 minutes before serving.
-
Reheating tips:
- Microwave: Heat a slice for 20–30 seconds on medium power (adjust time depending on your microwave).
- Oven: Warm at 300°F (150°C) for 8–12 minutes, tented with foil to keep the topping moist.
- From frozen: Thaw completely before reheating for best texture.
Make-ahead tip: You can prepare the fruit topping up to 24 hours ahead and keep it chilled. The fruit will release its juices, which actually makes the topping more flavorful. For the best texture and shine, bake the cake the same day you want to serve it or bake it one day ahead and store loosely covered at room temperature. If you need a dessert that can be fully made ahead and refrigerated, consider these Ina Garten rhubarb cheesecake squares.
Answers to Common Questions
I get so many questions about this cake! Here are the answers to the most popular ones:
- Can I use frozen fruit? Definitely! Just thaw the rhubarb and strawberries completely and drain them very well—you can even pat them dry with paper towels. Because frozen fruit tends to release more liquid, you might need to bake a bit longer to get the cake set.
- How do I keep it from sticking to the pan? My go-to method is buttering every spot in the pan thoroughly, then lining the bottom with parchment paper. Also, don’t skip the 10-minute cooling window before flipping—the caramelized fruit needs time to set.
- Can this be made ahead? It’s best fresh, but honestly, I think it tastes even better the next day as flavors have time to meld. Store it loosely covered at room temperature for up to 3 days. Just avoid the fridge if you want to keep it moist. If you’re after a dessert that’s designed for making ahead, try these creamy rhubarb cream cheese bars—they set up in the fridge and slice cleanly.
See? This recipe is straightforward and forgiving. Now, grab your apron and bake with confidence!
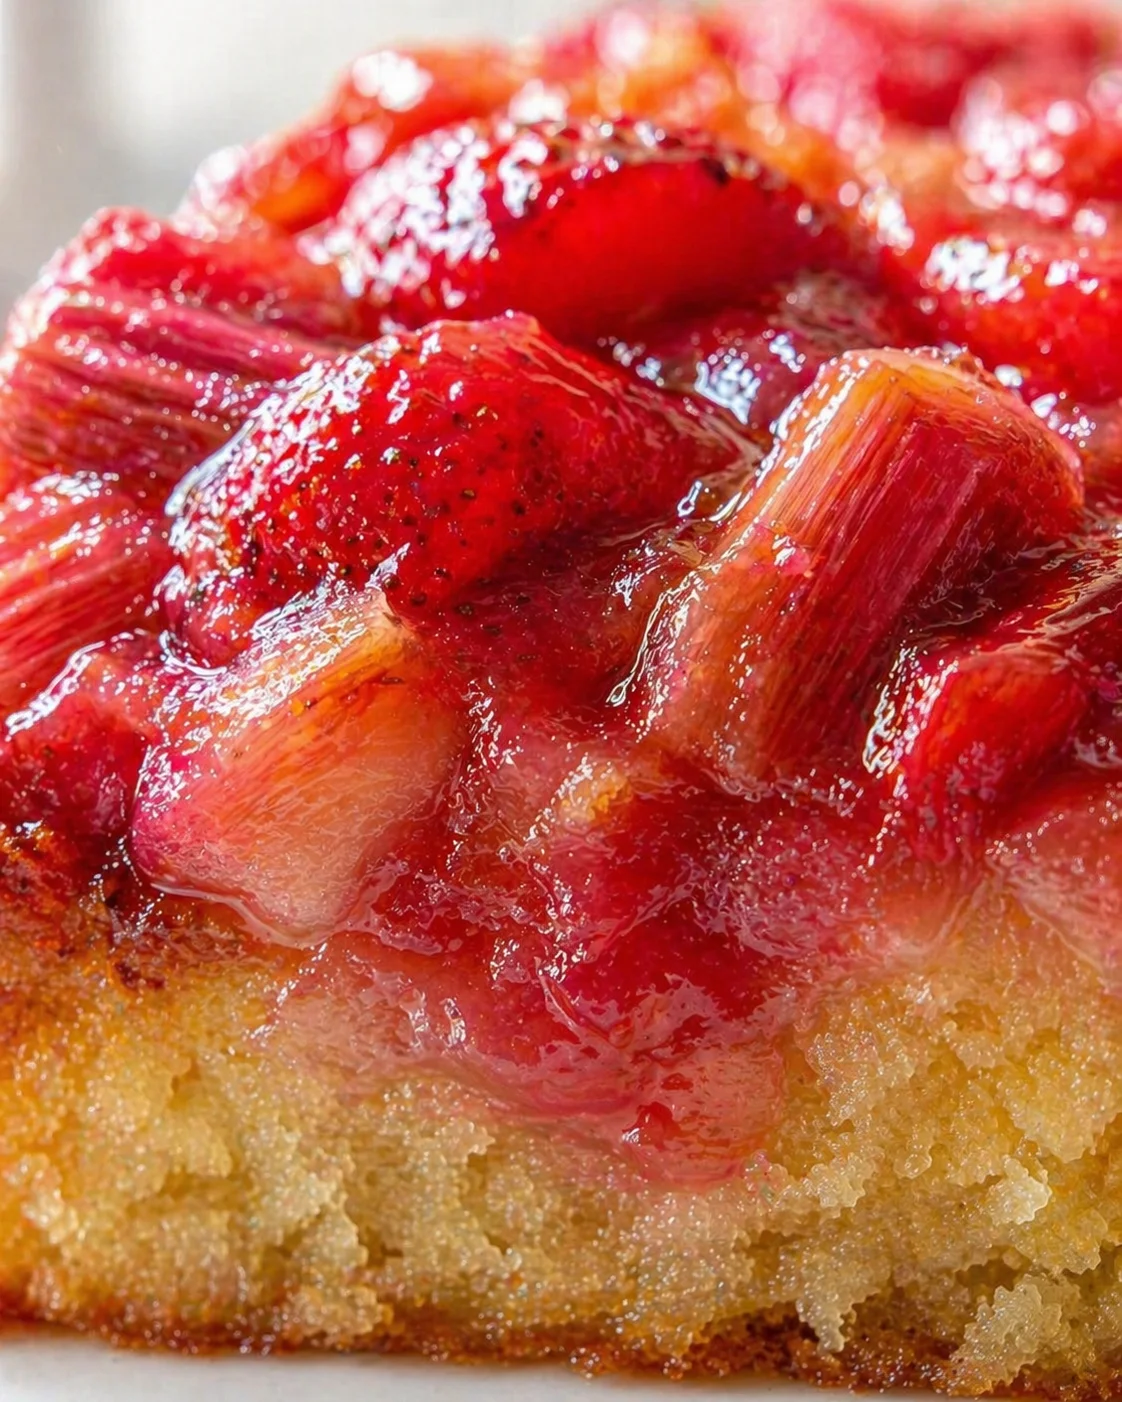
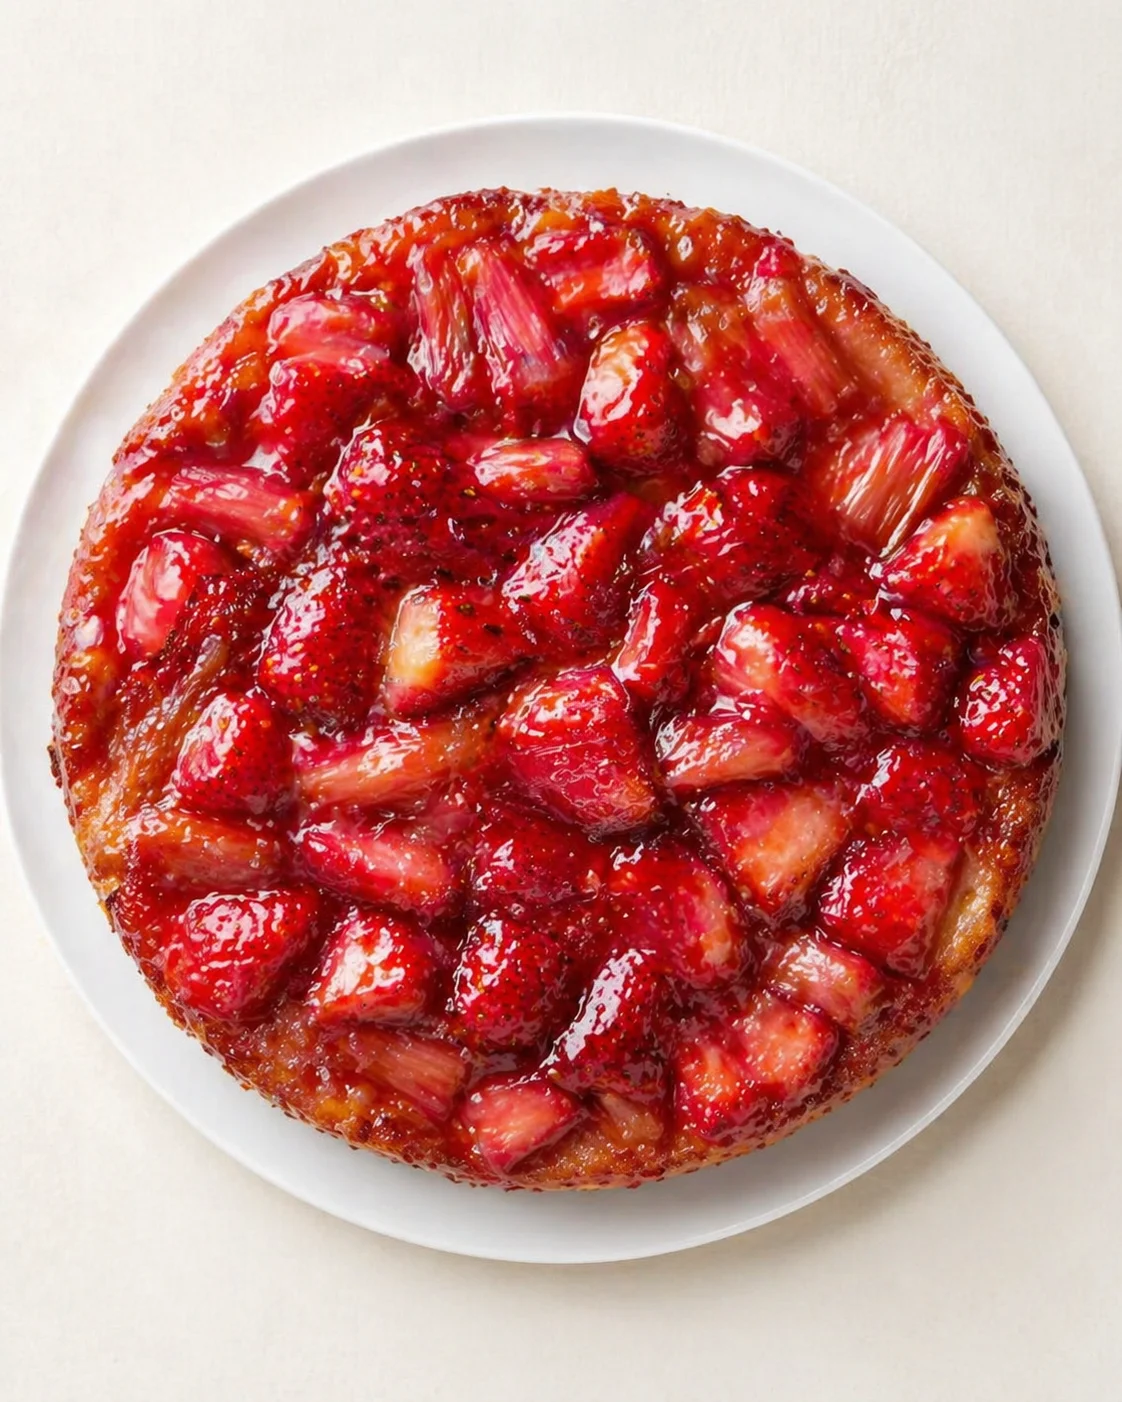
A vibrant, glossy upside-down cake featuring a sweet-tart topping of fresh strawberries and rhubarb baked atop a tender buttery cake base.
- Total Time: 1 hour 5 minutes
- Yield: 8 servings 1x
Ingredients
- 1 cup rhubarb, sliced into ½-inch chunks (trimmed ends, no peeling)
- 1 cup strawberries, hulled and halved (firm berries recommended)
- ¾ cup granulated sugar (for topping)
- 2 tablespoons unsalted butter, melted (for topping)
- 1½ cups all-purpose flour, spooned and leveled
- 1 teaspoon baking powder
- ¼ teaspoon salt
- ½ cup unsalted butter, softened to room temperature
- 1 cup granulated sugar (for cake batter)
- 2 large eggs, room temperature
- 1 teaspoon vanilla extract
- ½ cup milk (whole or 2%)
Instructions
- Preheat oven to 350°F (175°C) and generously grease a 9-inch round cake pan.
- Trim rhubarb ends and cut into ½-inch pieces; hull and halve strawberries.
- Melt 2 tablespoons unsalted butter.
- In a medium bowl, toss rhubarb, strawberries, ¾ cup granulated sugar, and melted butter. Spread the mixture evenly across the bottom of the prepared pan.
- Whisk together flour, baking powder, and salt.
- Using a hand mixer, cream ½ cup softened butter with 1 cup sugar until light and fluffy.
- Add eggs one at a time, mixing well after each addition, then stir in vanilla extract.
- Alternate adding flour mixture and ½ cup milk to the butter mixture, starting and ending with the flour. Mix just until combined, scraping down the bowl as needed.
- Gently pour the batter over the fruit in the pan and smooth the top with a spatula.
- Bake 40–45 minutes or until a toothpick inserted in center comes out clean and edges pull away from the pan; begin checking at 35 minutes.
- Remove pan from oven and let cake cool 10 minutes in the pan.
- Place a plate over the pan and carefully invert to release cake. Gently nudge any fruit sticking back onto cake.
- Allow cake to cool on the plate before slicing.
Notes
Use fresh, garden-fresh rhubarb and strawberries for best flavor and texture., Grease the pan thoroughly, butter with optional light flour dusting for best release., Start checking cake doneness at 35 minutes to avoid overbaking; moist crumbs on toothpick is ideal., Flip the cake after 10 minutes of cooling for best shape; too soon or too late can cause sticking or breaking., Store covered loosely with foil or cake dome at room temperature up to 3 days. Avoid plastic wrap touching fruit topping to prevent sogginess., Reheat slices in microwave 20–30 seconds on medium power or oven at 300°F (150°C) for 8–12 minutes tented with foil., Frozen fruit can be used, thawed, drained, and patted dry; may require longer baking time.
- Prep Time: 20 minutes
- Cook Time: 40-45 minutes
- Category: Dessert
- Cuisine: American
Nutrition
- Serving Size: 1 slice
- Calories: Approx. 280 kcal per serving
- Fat: 9 g per serving
- Carbohydrates: 45 g per serving
- Protein: 4 g per serving