Maple Pumpkin Scones

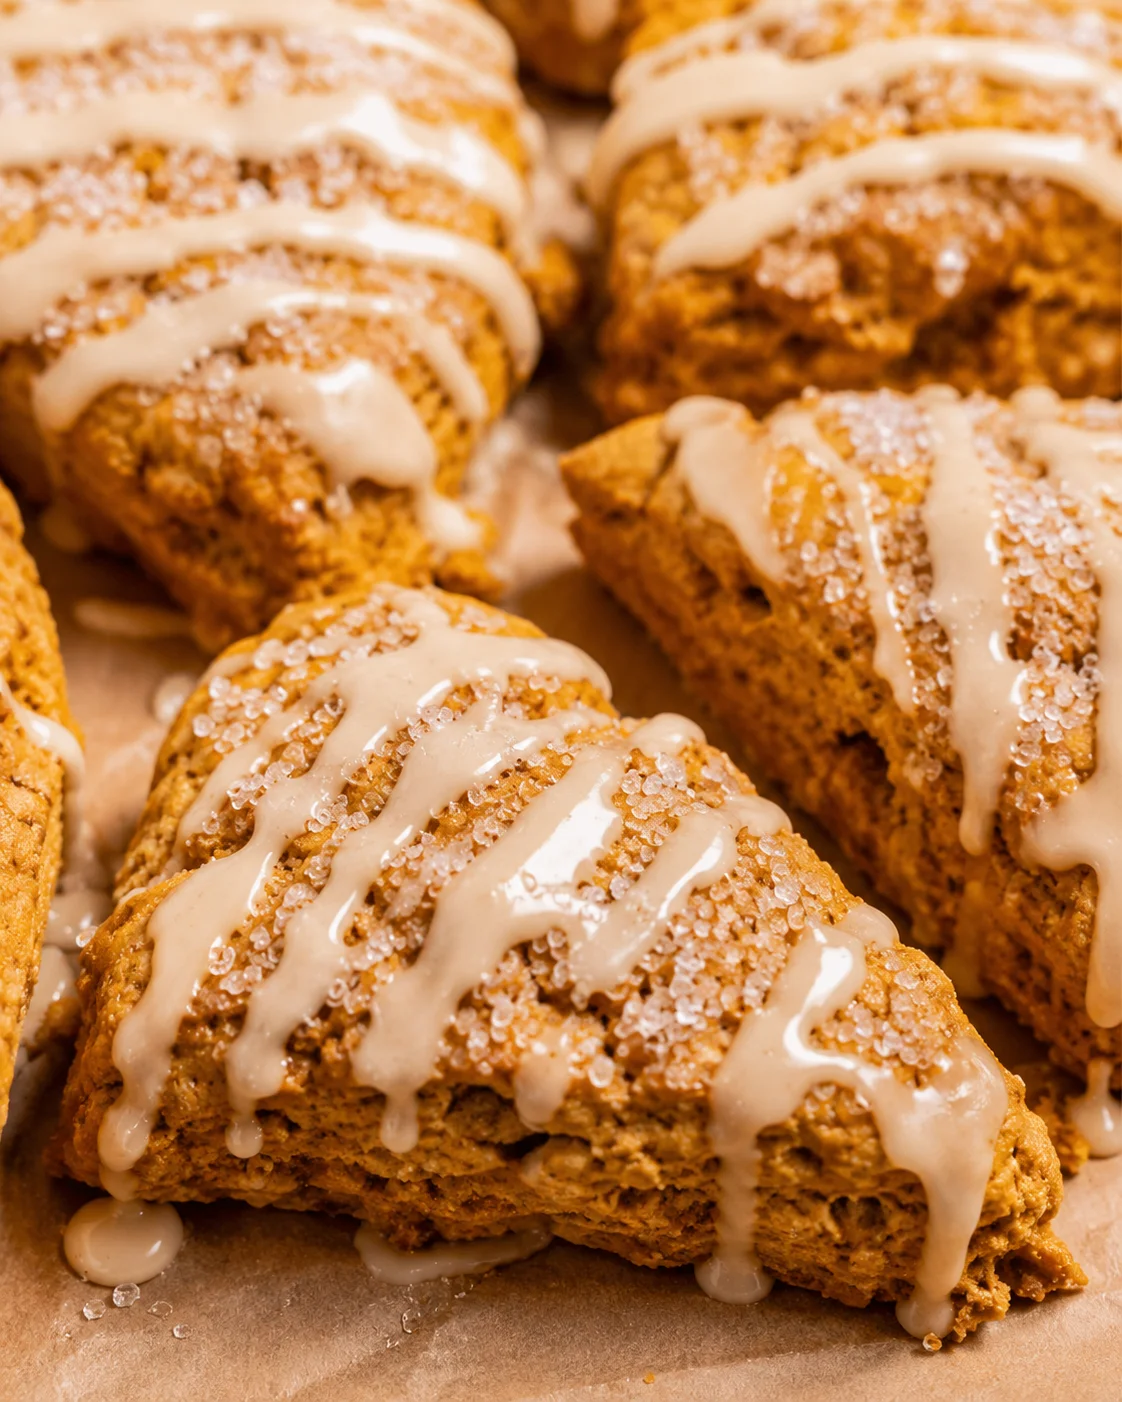
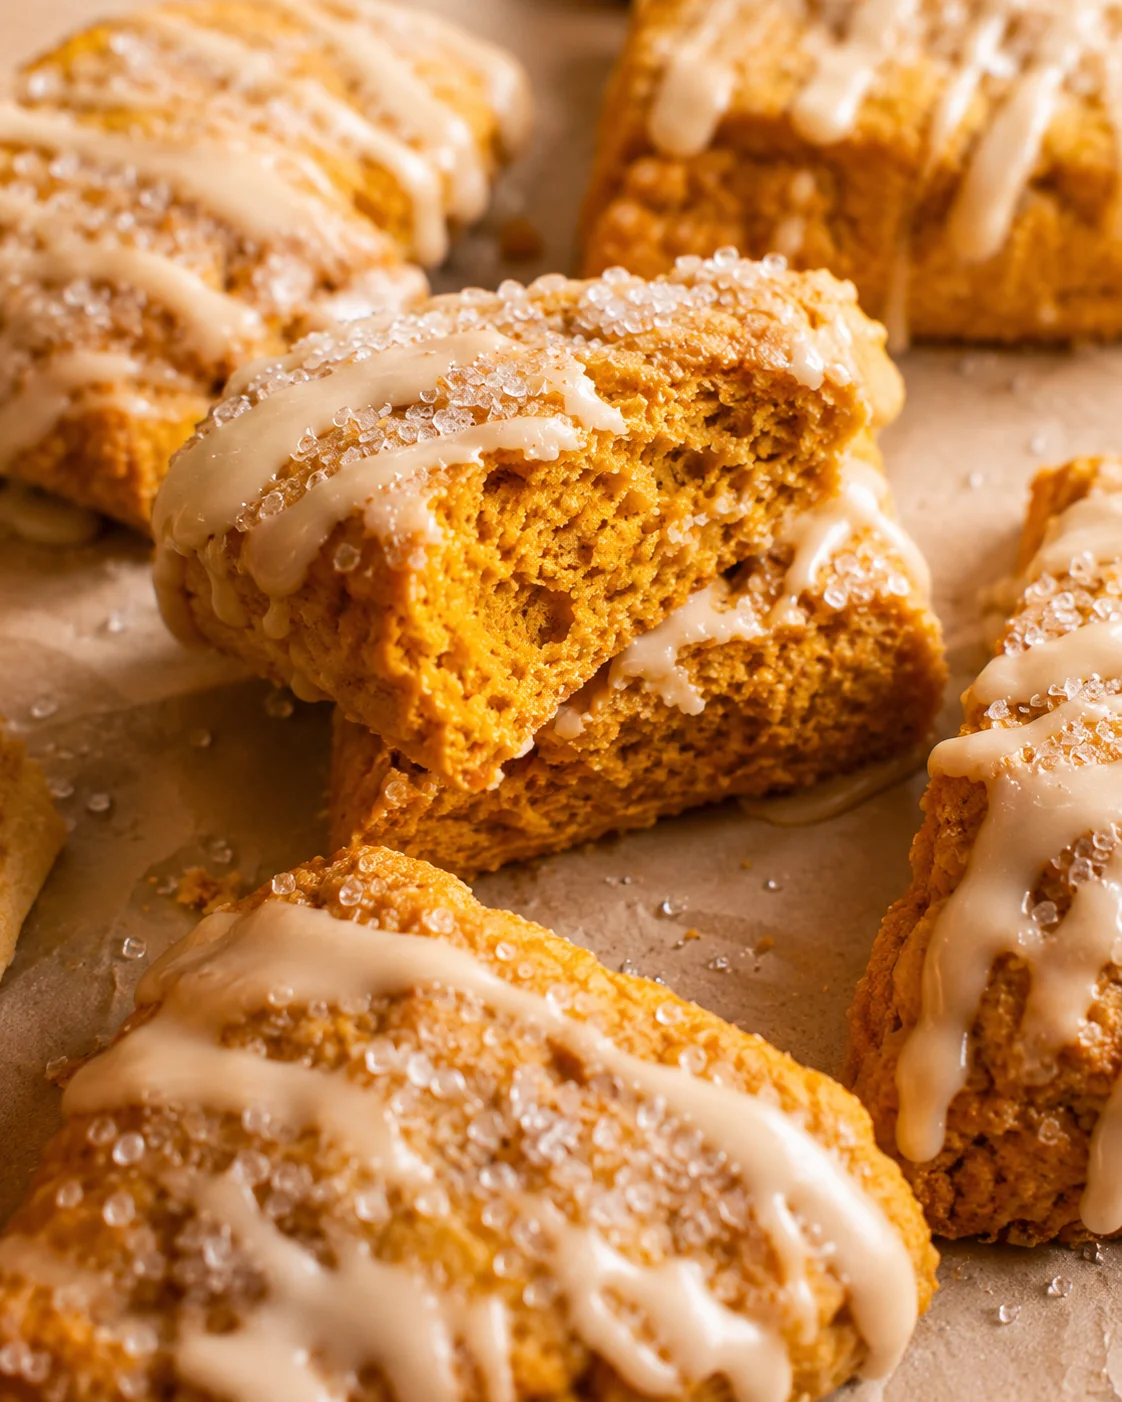
These Maple Pumpkin Scones are an easy fall breakfast treat that’s tender and moist inside with a lightly crisp crust, all topped off with a simple maple-yogurt glaze. The recipe is straightforward, made mostly with wholesome ingredients — pumpkin purée adds natural moisture and flavor, and only 2 tablespoons of butter keep it light. You can use whole wheat or a gluten-free flour blend, and in about 45 minutes, you’ll have eight fresh scones ready to enjoy warm and cozy.
Welcome to a quick and cozy fall bake! These Maple Pumpkin Scones bring that warm pumpkin-pie flavor without feeling heavy. Inside they’re soft and moist, with just enough crisp on the outside, finished perfectly with a simple maple-yogurt glaze that adds a touch of sweetness without being over the top.
Here’s the lowdown: from start to warm scones on your countertop, it takes about 45 minutes. Each batch makes eight scones, and you’ll love how easy the recipe is — mostly wholesome ingredients like plain pumpkin purée for moisture, a touch of butter, and just a few pantry staples. Plus, the dough comes together with little fuss; you can swap in whole wheat or gluten-free flour, and there are simple options for making these vegan or adding mix-ins.
Keep reading for a short, simple ingredient list, clear step-by-step instructions, and friendly tips to help your pumpkin scones turn out tender and delicious. Bonus: these scones are also great for making ahead or freezing if you want to prep in advance.
What Makes Them Special
- Warm autumn vibes: pumpkin, cinnamon, and real maple syrup combine for a breakfast that’s like pumpkin pie in scone form — without that heavy feeling (and if you love the flavor of a crustless pumpkin pie, these will hit the spot).
- Soft, tender center with just a touch of crisp on the outside — they’re never dry or crumbly like some scones can be.
- Less butter than your traditional scones (only 2 tablespoons here), and you can easily make them whole wheat or gluten-free without missing a beat.
- Quick and simple to whip up: the whole process takes about 45 minutes with minimal hands-on mixing.
Ingredients for the Scones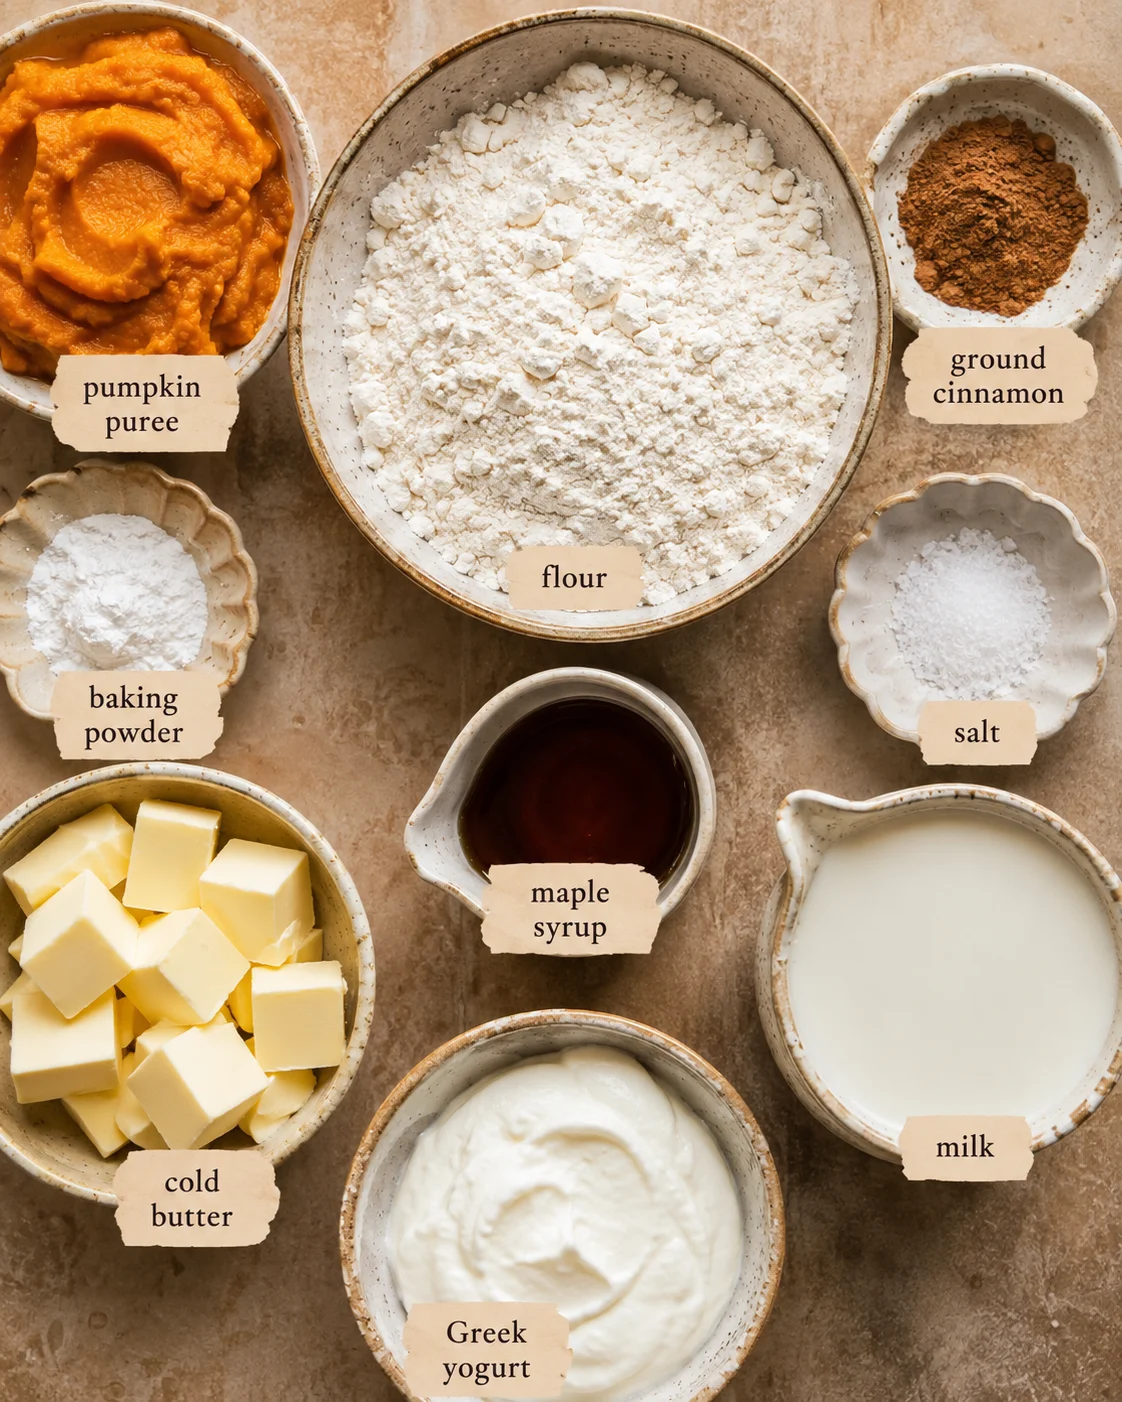
- 1 ½ cups (180 grams) whole wheat or gluten-free* flour (measured carefully)
- 1 ½ teaspoons baking powder
- 1 teaspoon ground cinnamon
- ¼ teaspoon salt
- 2 tablespoons unsalted butter, cold
- ½ cup pumpkin purée (make sure it’s NOT pumpkin pie filling)
- 8 1/8 teaspoons pure maple syrup
- 10 ½ teaspoons nonfat milk, divided
- 1 tablespoon plain nonfat Greek yogurt
- 1 ½ teaspoons pure maple syrup
- 1 cup (120 g) millet flour
- ¼ cup (35 g) brown rice flour
- ¼ cup (30 g) tapioca flour
- 1 ½ teaspoons xanthan gum
Make the Scones
- Preheat oven to 425°F (220°C) and line a baking sheet with foil or parchment; lightly spray with nonstick spray.
- Measure 1 ½ cups (about 180 g) flour using the spoon-and-level method or a kitchen scale.
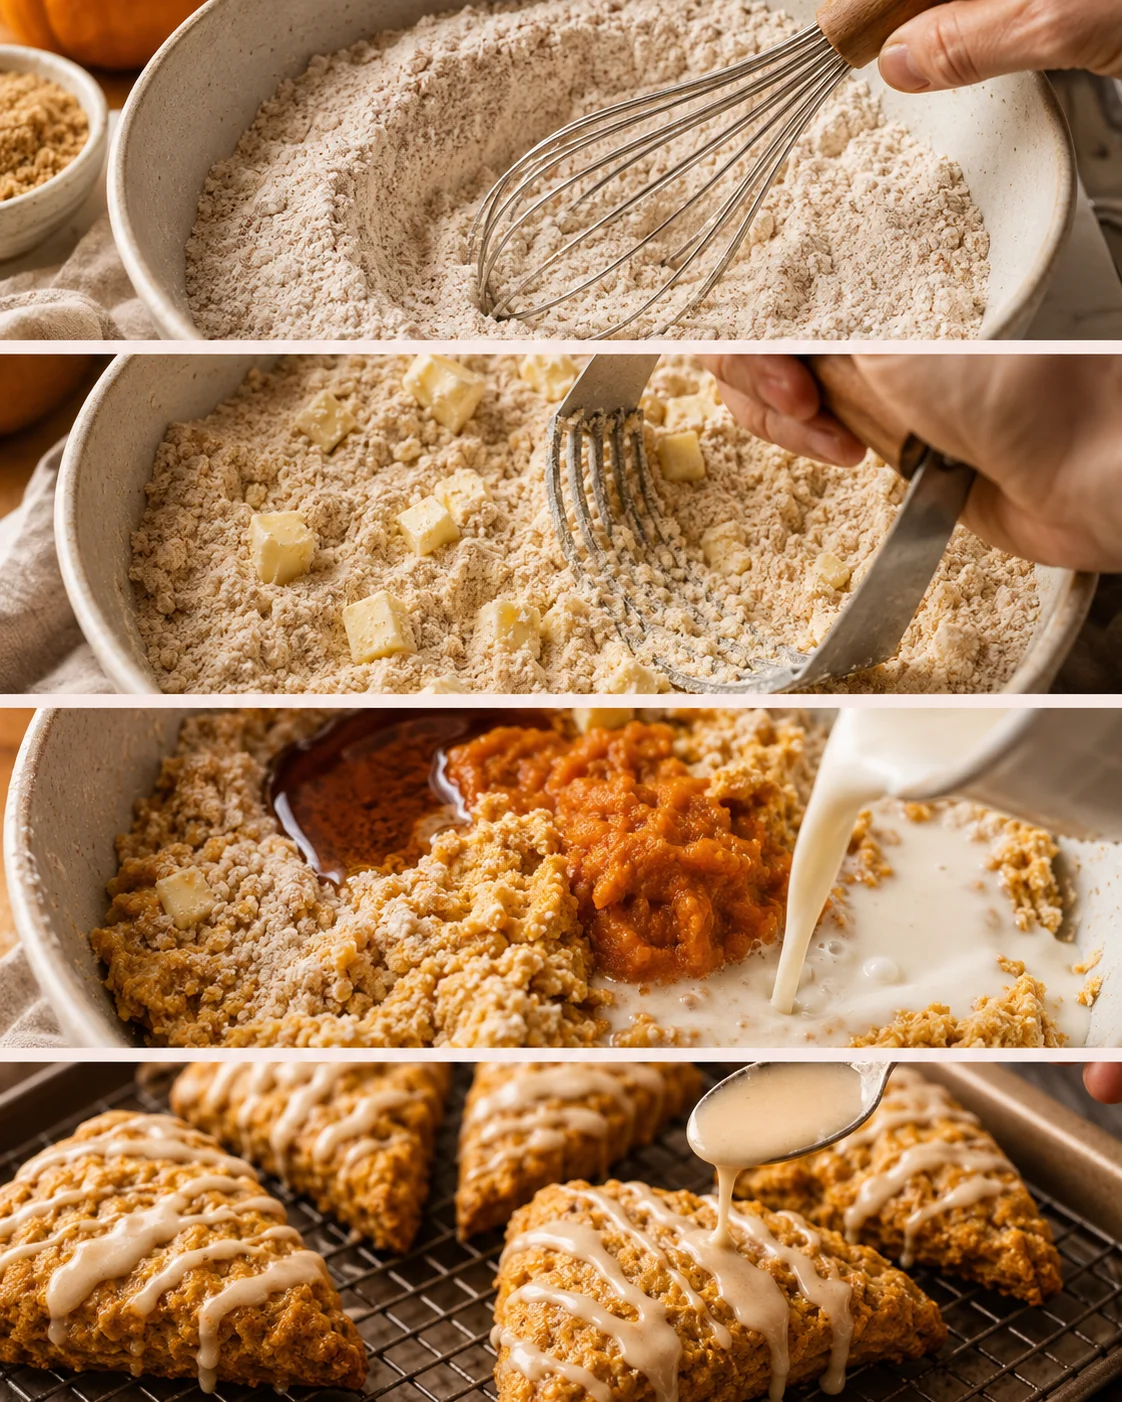
- Whisk together the measured flour, 1 ½ teaspoons baking powder, 1 teaspoon ground cinnamon, and ¼ teaspoon salt until evenly mixed.
- Cut 2 tablespoons cold unsalted butter into the dry mixture with a pastry cutter, two knives, or a fork until it resembles coarse crumbs with pea-sized bits of butter.
-
Stir in ½ cup pumpkin purée, 8 teaspoons pure maple syrup, and 10 teaspoons milk, mixing gently just until combined (do not overmix).
- If the dough feels sticky or too wet to shape, chill it in the refrigerator for 10 to 15 minutes to firm up.
- Divide the dough into eight equal pieces, roll each into a ball, place them on the prepared baking sheet, and press each ball down slightly to form a rounded disc.
- Mix the remaining 1/8 teaspoon maple syrup with ½ teaspoon milk and brush lightly over the tops of the scones.
- Bake at 425°F (220°C) for 12 to 14 minutes, or until the tops are a light golden brown.
- Let the scones cool on the baking sheet for 5 minutes, then transfer to a wire rack to cool completely.
- Whisk together 1 tablespoon plain nonfat Greek yogurt and 1 ½ teaspoons pure maple syrup until smooth.
- Spoon the glaze into a small zip-top bag, snip a tiny corner, and drizzle the glaze over the cooled scones.
Tips for Best Texture
- Measure your flour carefully using the spoon-and-level method or a kitchen scale (1 ½ cups should be about 180 grams). Too much flour will dry them out.
- Keep your butter cold! Working quickly and leaving small bits of chilled butter in the dough helps create a tender crumb — the same technique that makes these Peach Buttermilk Biscuits so flaky.
- Mix just until everything is combined — overmixing will make scones tough, and nobody wants that.
- Use plain pumpkin purée, not pumpkin pie filling, which has added sugar and spices that can throw off the recipe. If you have extra purée, try it in Pumpkin Protein Muffins.
- For neat glaze drizzles, using a zip-top bag with a tiny corner snipped off makes it easy to control.
- If your dough feels sticky or too wet to shape, pop it in the fridge for 10 to 15 minutes to firm up before dividing and shaping.
Flavor Variations and Substitutions
- Going vegan? Swap the butter for a plant-based buttery spread like Earth Balance, switch the milk to your favorite non-dairy kind, and use a soy, coconut, or almond yogurt for the glaze.
- Add mix-ins for extra texture and yum — chopped toasted pecans, walnuts, or dark chocolate chips all work beautifully (about 1/3 cup folded in). For a crunchy finish, sprinkle the glazed scones with a handful of maple nut granola.
- Want more spice? Toss in ¼ teaspoon nutmeg and ⅛ teaspoon ground ginger for that classic pumpkin pie spice vibe.
- Try a different glaze: swap the yogurt for 1 or 2 tablespoons of softened cream cheese to make it richer, or go with a simple powdered sugar glaze thinned with a touch of maple syrup — or, for a sweet-savory brunch twist, skip the glaze and serve them warm with a swipe of maple bacon jam.
- Flour swaps: if you prefer all-purpose flour instead of whole wheat, that’s totally fine. Just measure by weight if you can and be cautious not to overmix so your scones stay tender.
How to Store and Reheat
- Room temperature: Store your pumpkin scones (glazed or not) in an airtight container for up to 2 days. They’re perfect for grabbing on the go! For a longer-lasting, shelf-stable fall snack, try a batch of Pumpkin Spice Sourdough Granola.
- Refrigerator: Keep scones covered in an airtight container for up to 5 days. Let them warm to room temperature or heat quickly before enjoying. For another make-ahead pumpkin breakfast that keeps well chilled, try Pumpkin Chia Pudding.
- Freezing: Freeze unglazed scones in a single layer on a baking sheet until firm, then transfer them to a freezer bag for up to 2 months. When you’re ready, bake them from frozen at 325°F for 10 to 15 minutes until warmed through. Add the glaze afterward for best results.
Common Questions About the Recipe
- Can I use pumpkin pie filling instead of pumpkin purée? It’s best not to. Pumpkin pie filling has added sugar and spices that change the flavor and texture. For the best pumpkin scones, stick to plain pumpkin purée. If you have extra purée, try it in pumpkin gnocchi with brown butter sauce.
- Can I make these with all-purpose flour? Absolutely! You can swap in all-purpose flour — just weigh your flour if you can for accuracy. The texture will be slightly lighter than whole wheat but still delicious.
- Do I have to use maple syrup? Maple syrup gives the scones their signature fall flavor, both in the dough and the glaze. Honey works as a substitute, but it will change the taste. For the brushed crust, you can use just milk if you prefer.
- Why did my scones turn out dense? Dense scones usually mean the dough was overmixed, the flour was measured too heavily, or the butter was too warm. Keep the butter chilled and stir just until combined.
- Can I make the dough ahead? Yes! You can shape the scones ahead, cover them on the baking sheet, and refrigerate for up to 24 hours. When baking from chilled, add a couple of extra minutes to the baking time. Or freeze shaped scones and bake from frozen as needed.
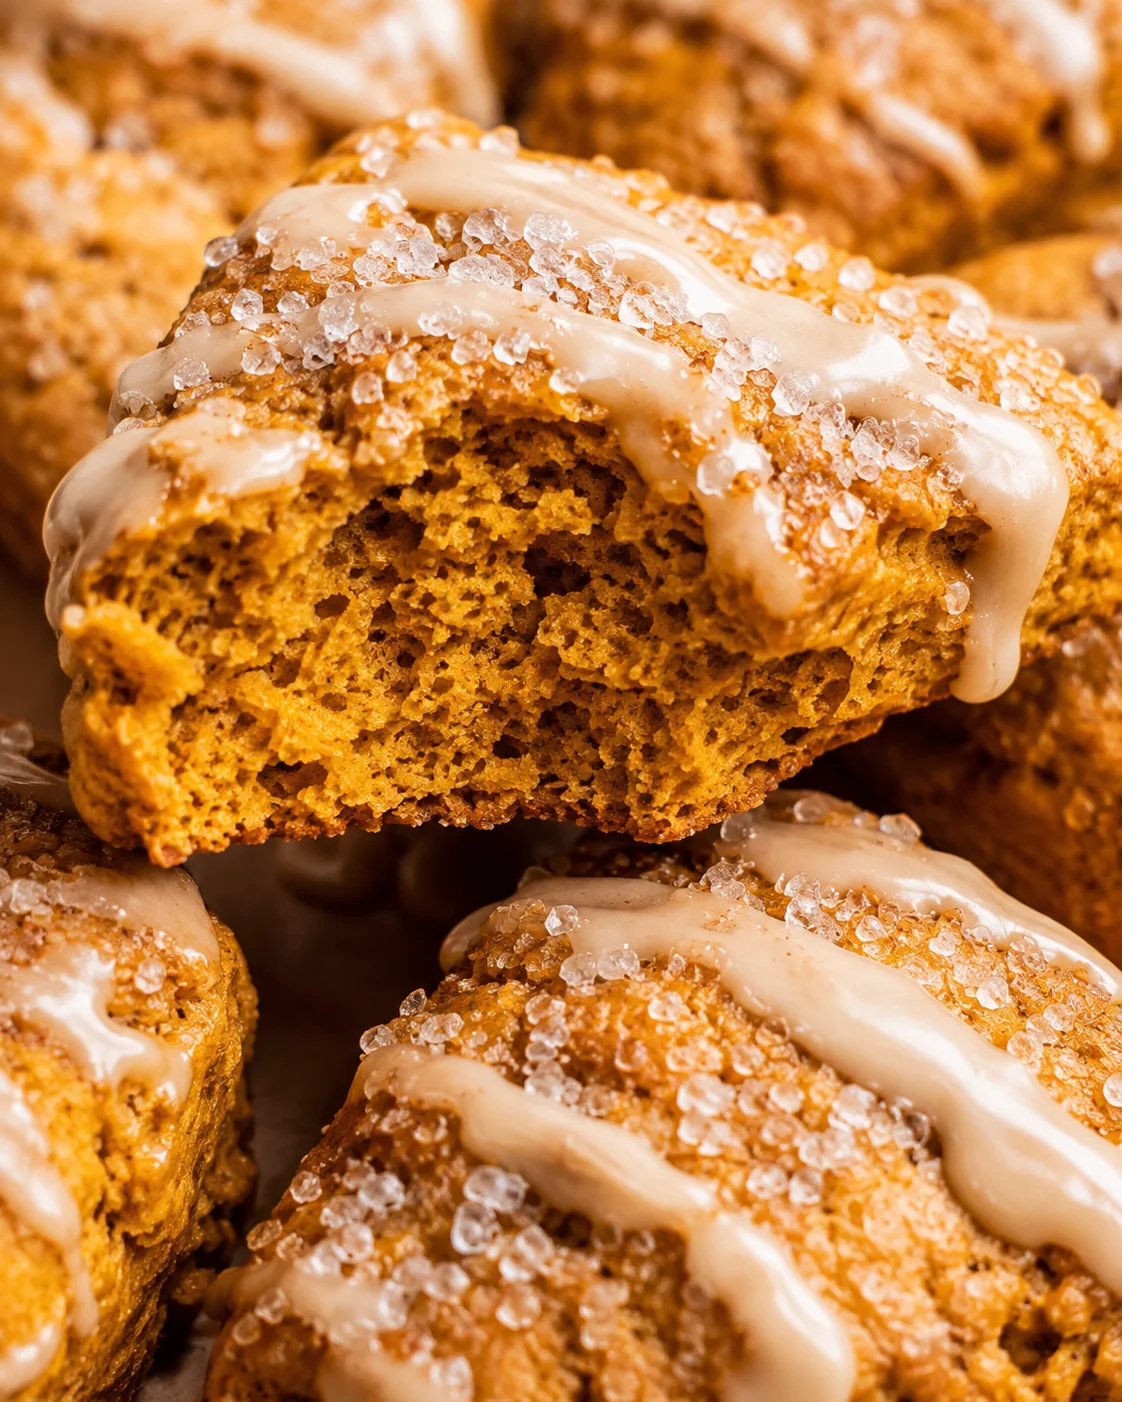
Tender and moist fall breakfast scones with pumpkin purée and a lightly crisp crust, topped with a simple maple-yogurt glaze. Made with wholesome ingredients and adaptable to whole wheat or gluten-free flour.
- Total Time: 45 minutes
- Yield: 8 scones 1x
Ingredients
- 1 ½ cups (180 grams) whole wheat or gluten-free flour (measured carefully)
- 1 ½ teaspoons baking powder
- 1 teaspoon ground cinnamon
- ¼ teaspoon salt
- 2 tablespoons unsalted butter, cold
- ½ cup pumpkin purée (not pumpkin pie filling)
- 8 teaspoons pure maple syrup (divided)
- 10 teaspoons nonfat milk (divided)
- 1 tablespoon plain nonfat Greek yogurt
- 1 ½ teaspoons pure maple syrup (for glaze)
- 1 cup (120 g) millet flour
- ¼ cup (35 g) brown rice flour
- ¼ cup (30 g) tapioca flour
- 1 ½ teaspoons xanthan gum
Instructions
- Preheat oven to 425°F (220°C) and line a baking sheet with foil or parchment; lightly spray with nonstick spray.
- Measure 1 ½ cups (about 180 g) flour using spoon-and-level method or kitchen scale.
- Whisk together flour, baking powder, ground cinnamon, and salt until evenly mixed.
- Cut 2 tablespoons cold unsalted butter into dry mixture with pastry cutter, two knives, or fork until coarse crumbs with pea-sized bits.
- Stir in ½ cup pumpkin purée, 8 teaspoons maple syrup, and 10 teaspoons milk; mix gently until combined without overmixing.
- If dough is sticky or too wet to shape, chill in refrigerator for 10 to 15 minutes.
- Divide dough into eight equal pieces, roll each into a ball, place on baking sheet, and press down slightly to form rounded discs.
- Mix remaining 1/8 teaspoon maple syrup with ½ teaspoon milk and brush lightly over scone tops.
- Bake for 12 to 14 minutes at 425°F (220°C) until tops are light golden brown.
- Let scones cool on baking sheet for 5 minutes, then transfer to wire rack to cool completely.
- Whisk together 1 tablespoon plain nonfat Greek yogurt and 1 ½ teaspoons pure maple syrup until smooth.
- Spoon glaze into a small zip-top bag, snip corner, and drizzle glaze over cooled scones.
Notes
Measure flour carefully using spoon-and-level or kitchen scale to avoid dryness., Keep butter cold to create a tender crumb., Mix just until combined to avoid toughness., Use plain pumpkin purée, not pumpkin pie filling with added sugars and spices., For neater glaze drizzles, use a zip-top bag with a small corner snipped off., To make vegan: substitute butter with plant-based spread, milk with non-dairy milk, and yogurt with non-dairy yogurt., Optional mix-ins: About 1/3 cup of chopped toasted pecans, walnuts, or dark chocolate chips., Optional spice additions: ¼ teaspoon nutmeg and ⅛ teaspoon ground ginger for pumpkin pie spice flavor., Flour substitutions: all-purpose flour can be used weighed carefully, but the texture will be lighter., Store in airtight container at room temperature up to 2 days, refrigerated up to 5 days, or freeze unglaed scones up to 2 months., Bake frozen scones at 325°F for 10 to 15 minutes before adding glaze.
- Prep Time: 15 minutes
- Cook Time: 14 minutes
- Category: Breakfast
Nutrition
- Serving Size: 1 scone
- Calories: ~150 calories per scone (estimate)
- Fat: Approx. 5 g per scone
- Carbohydrates: Approx. 25 g per scone
- Protein: Approx. 3 g per scone
More in Recipes
Gluten Free Pumpkin Muffins
Pumpkin Cottage Cheese Pancakes