Crustless Pumpkin Pie

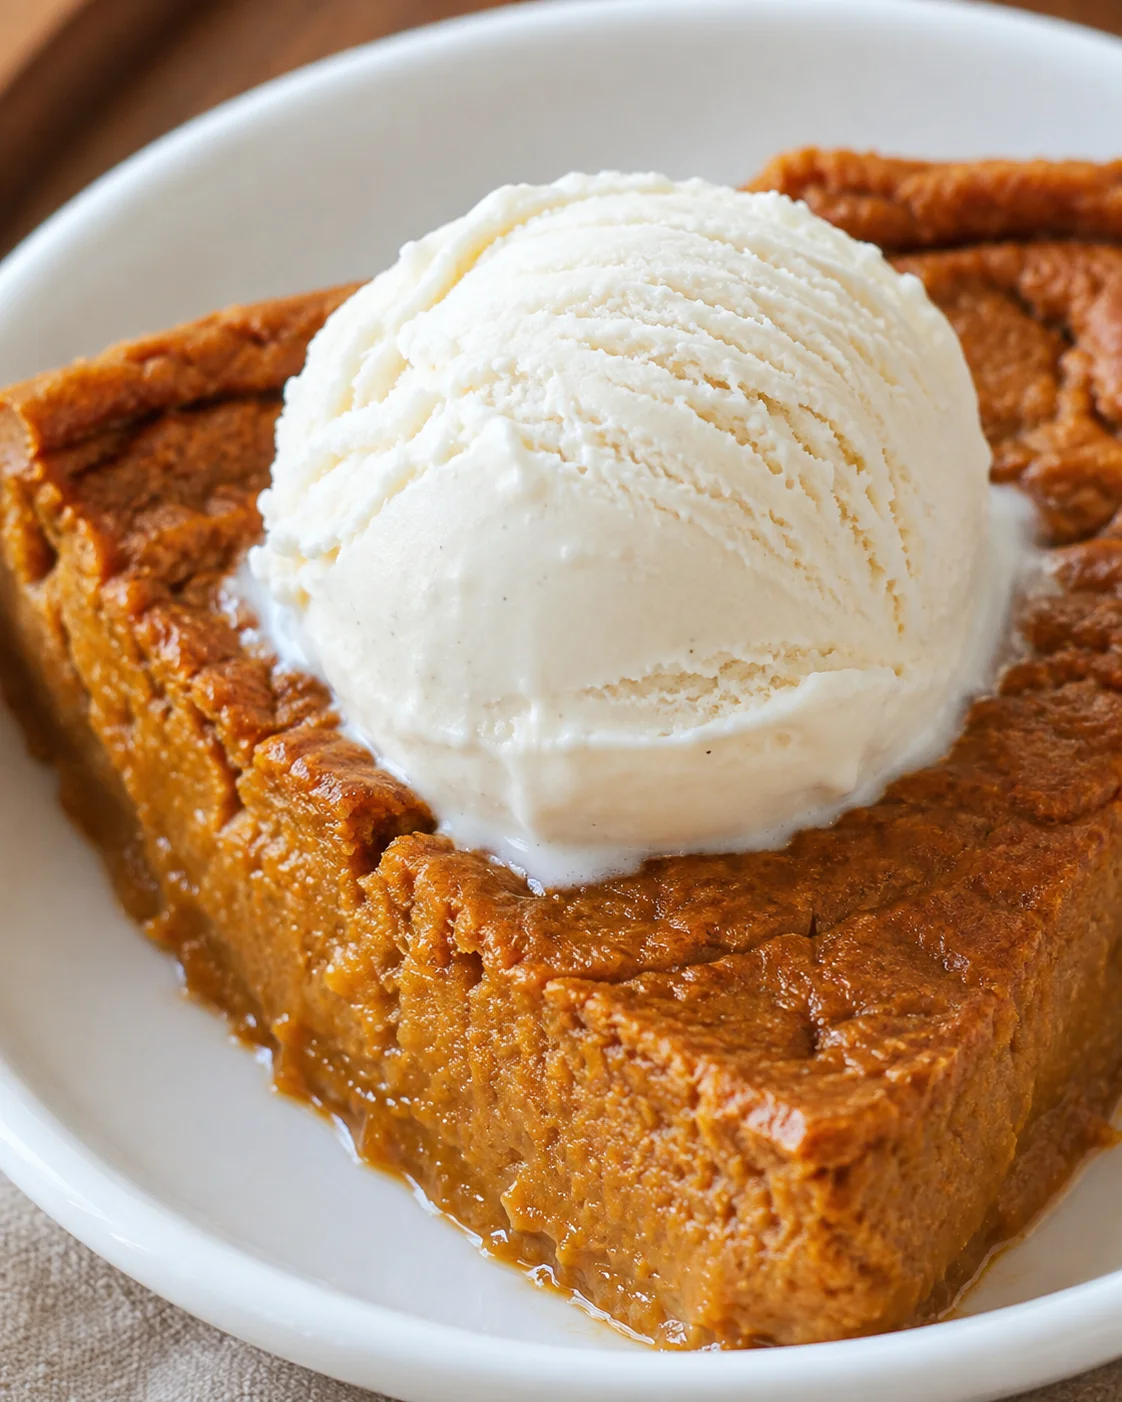
Crustless Pumpkin Pie
This easy crustless pumpkin pie recipe is a perfect go-to dessert that’s light, surprisingly healthy, and full of comforting flavor. It’s a delicious pumpkin treat you’re going to love!
Healthy crustless pumpkin pie
This pumpkin pie you can make without a crust is pretty much unbelievable.
You could totally enjoy all eight servings of this pumpkin pie and still end up with fewer calories and less fat than a single slice of many regular pumpkin pies!
Not that I’m encouraging you to eat the full pie in one sitting… but hey, it’s good enough to want to.
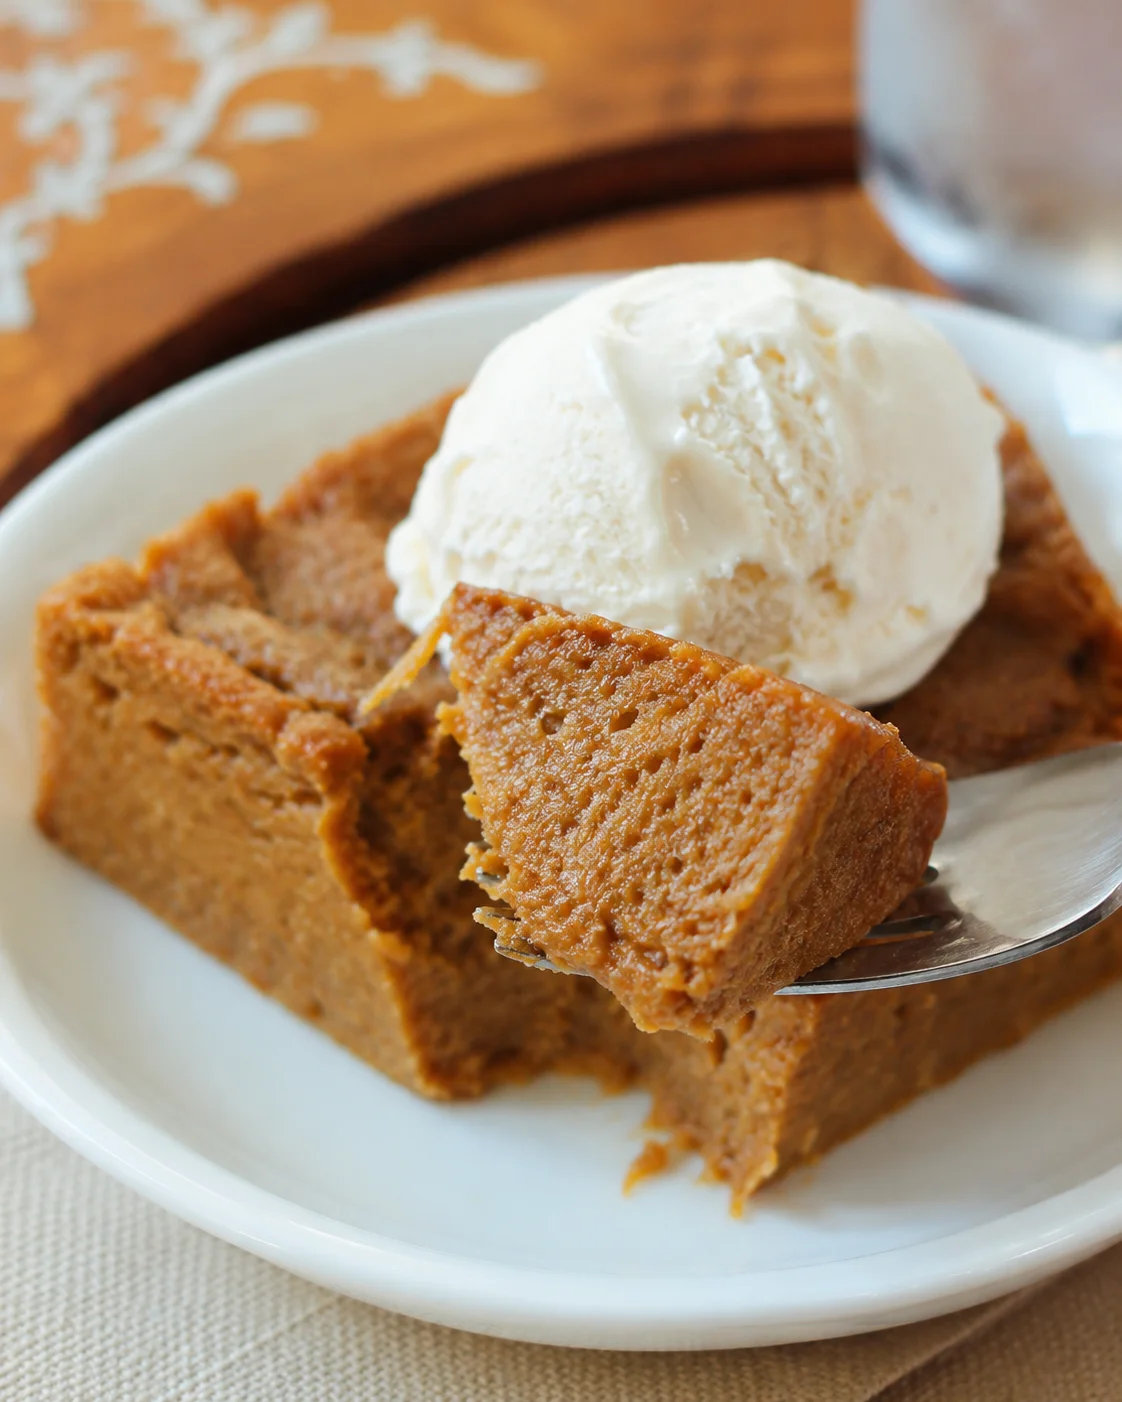
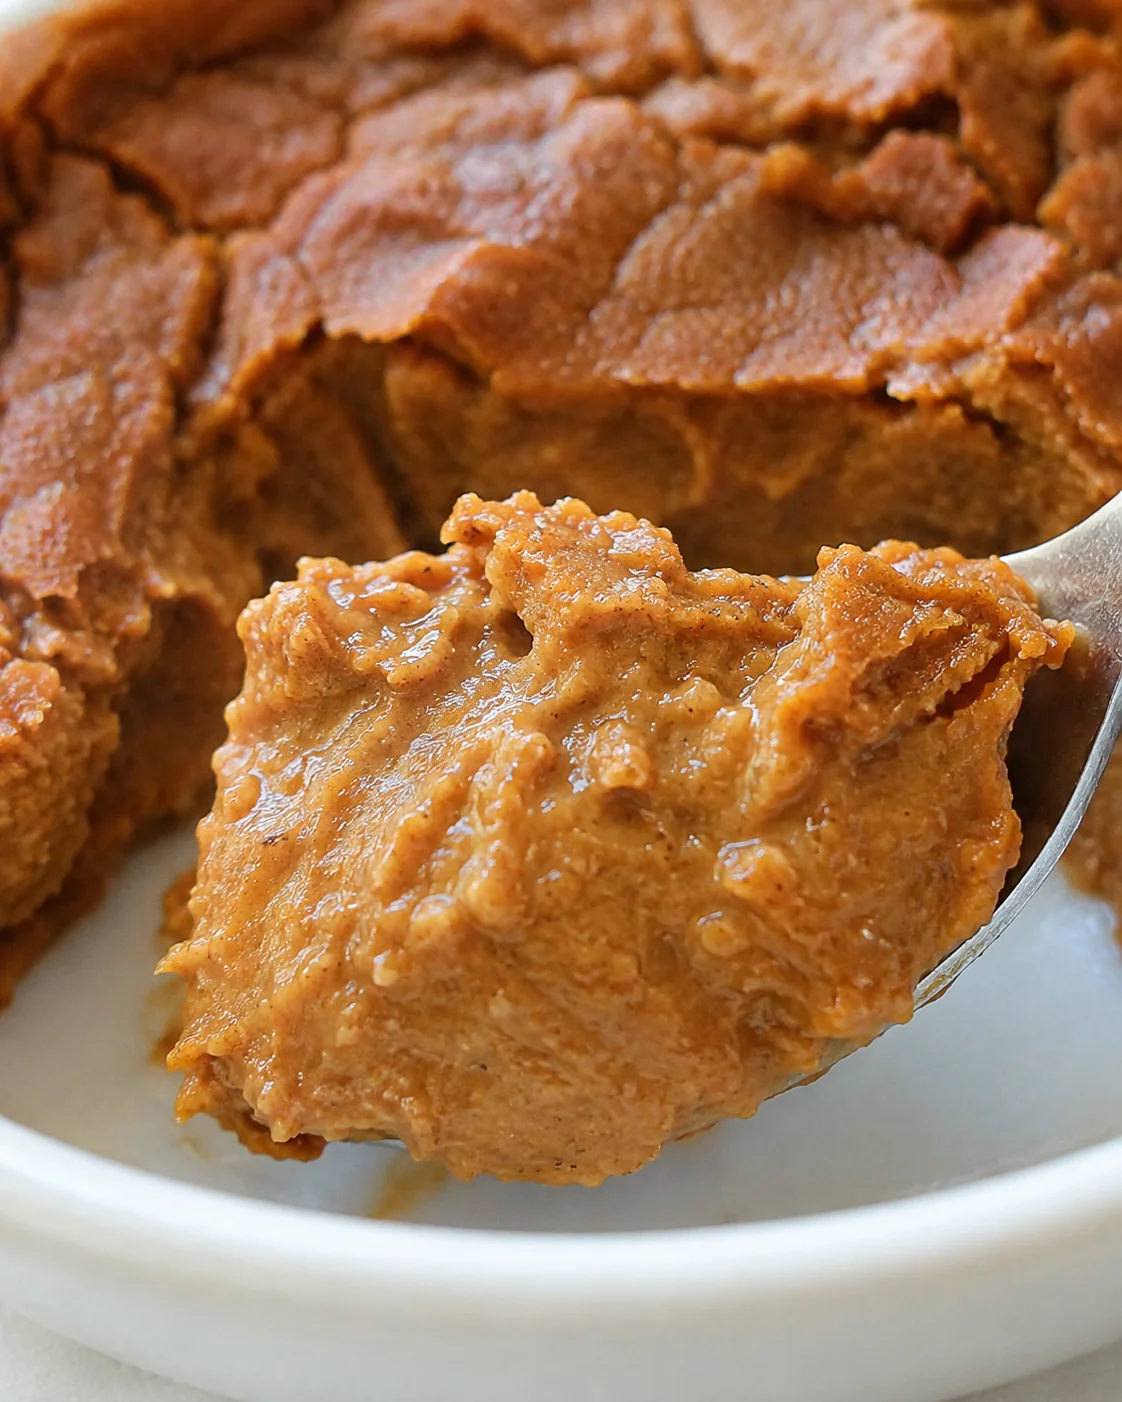
With its rich, custardy texture and deep pumpkin flavor, you’ll be hooked on every bite. It’s like a cozy pumpkin custard disguised as pie.
The best low calorie pumpkin pie
You’ll fall in love with this on the very first forkful.
This simple but delicious pumpkin pie has built quite a loyal fan base over the years. Many folks tell me they whip it up not just for Thanksgiving or Christmas, but pretty much all year long!
Some even enjoy it for breakfast—because why not? This bright orange pie is low in fat and calories but high in fiber, vitamin A, and calcium thanks to wholesome ingredients.
If you’re watching your weight or following Weight Watchers, this pie fits right in since it’s low in points. Plus, it’s easy to swap in your favorite sugar substitute if you prefer a no-sugar version.
Another bonus? Unlike many other crustless pumpkin pie recipes, this one doesn’t call for evaporated or sweetened condensed milk.
The best part is using a whole can of pumpkin, so no leftover puree hanging around wondering what to do with it.
Crustless pumpkin pie ingredients
To make this crustless pumpkin pie, you’ll gather pumpkin puree, cinnamon, pumpkin pie spice, your choice of milk, sweetener, flour or almond meal, baking powder, salt, and pure vanilla extract.
If you want the pie to be a bit thicker and easier to slice, add a tablespoon of ground flax seeds, one egg (skip if vegan), or two teaspoons of cornstarch.
For a low-carb or keto version, swap out sugar for xylitol or erythritol and use almond flour or almond meal instead of regular flour, measuring equally.
If coconut flour is your thing, remember to use way less because it soaks up moisture like crazy—just a few tablespoons will do.
Vegan? No worries. Pick your favorite plant-based milk—almond, oat, or coconut all work great—and skip the egg. You can still make a smooth, creamy, dairy-free, crustless pumpkin pie that way.
This recipe also covers all the bases with soy-free, nut-free, paleo, gluten-free, and oil-free swaps so everyone can enjoy.
Do you use fresh or canned pumpkin puree?
This recipe calls for canned pumpkin puree, which you can usually find at grocery stores year-round—though around the holidays, it can be tricky to find.
If canned pumpkin is sold out, check the organic section or grab a small sugar pumpkin to roast and puree yourself.
You can also try swapping in roasted sweet potato or canned butternut squash puree—they make a lovely alternative.
Just be sure you’re using plain pumpkin puree and not pumpkin pie filling, which already has sugar and spices added. Pumpkin puree is just pure, cooked pumpkin.
Pumpkin pie topping ideas
Honestly, you can enjoy this crustless pumpkin pie just as it is and really taste all those cozy spices and pumpkin richness.
But if you want to glam it up a bit, try a scoop of vanilla ice cream, a dollop of whipped cream—dairy or nondairy, a drizzle of maple syrup, or some toasted nuts for crunch.
How to make the pumpkin dessert
Start by gathering all your ingredients and reading through the steps so you’re ready to go.
Preheat your oven to 400°F and grease a 9- or 10-inch pie dish well.
In a large bowl, whisk together the canned pumpkin, your chosen milk, flax meal or egg if using, vanilla extract, and oil or almond butter if adding extra richness. No blender required—just a whisk and a bit of muscle.
In another bowl, mix together cinnamon, pumpkin pie spice, salt, baking powder, flour, and your sweetener. Add cornstarch if you’re using it as a thickener.
Add the dry ingredients to the wet and stir until everything comes together in a smooth batter. Don’t over-mix or you may lose that nice custard texture.
Pour the mixture into your pie pan and smooth the top evenly. Bake on the middle rack for 35 minutes. The pie will look a little soft and gooey in the center—that’s perfect!
Let the pie cool completely at room temperature, then pop it in the fridge uncovered. It needs at least 6 hours or overnight to firm up so you can slice it cleanly.
When you’re ready, slice and enjoy! You can serve it cold or gently warm slices for a few seconds in the microwave if you prefer a softer texture.
Keep leftovers stored tightly wrapped in the fridge for up to five days. For longer storage, freeze wrapped slices in an airtight container for up to three months. Just thaw completely before serving.
Some readers ask about making this as mini crustless pumpkin pies in muffin liners. I haven’t tried it myself, but if you do, reduce the baking time and keep a close eye—I bet they’d be adorable!
Crustless pumpkin pie recipe video
Watch the step-by-step video above to see exactly how to make this easy crustless pumpkin pie.
Welcome! If you adore pumpkin pie but want something lighter and easier, this crustless pumpkin pie is the answer. It offers all that warm pumpkin-spice flavor and creamy custard goodness of a traditional pie without a crust weighing it down or extra fat.
Below, you’ll find a simple one-bowl recipe featuring a full 15-oz can of pumpkin (so no leftover puree sitting around), straightforward step-by-step directions, plus a handy how-to video. It’s flexible, too — with tips for making it vegan, gluten-free, low-carb/keto, or richer based on what you prefer. Plus, there are ideas for baking, chilling, storing, and serving, plus answers to common questions.
Quick heads-up: the pie needs about 35 minutes baking, then at least 6 hours (or overnight) chilling to set up nicely for slicing. It fits a 9–10″ pie pan and serves about eight. Ready to get started? Just scroll down for ingredients, simple instructions, and helpful tips so you can customize this crustless pumpkin pie your way.
What Makes It So Good
This crustless pumpkin pie has all the cozy pumpkin-spice flavor and silky custard texture you want, but without the hassle of making crust or loading it up with heavy ingredients. Here’s why it’s quickly become a favorite:
- Guilt-free indulgence: It’s light on calories and fat compared to traditional pumpkin pies, but still rich and creamy. You get big pumpkin flavor and smooth custard without needing evaporated or sweetened condensed milk.
- Simple and quick: Just one bowl, no blender, a quick whisk, then 35 minutes in the oven before chilling. Perfect for busy weeknights or when you want a stress-free holiday dessert.
- No crust means less mess and fat: You can skip rolling and blind-baking crusts. This also cuts down calories but keeps all the flavor and texture you crave in a pumpkin pie.
- No leftover pumpkin: It uses a full 15-oz can of pumpkin puree, so no more wondering what to do with leftovers.
- Super adaptable: Customize easily — make it vegan by swapping plant milk and flax “egg,” go gluten-free with almond meal, or low-carb/keto with erythritol and almond flour. Add an egg, flaxmeal, or cornstarch for firmer slices.
- Make-ahead and freezer friendly: Bake it ahead, chill overnight for perfect slices, stash leftovers in the fridge for up to 5 days, or freeze slices for up to 3 months—great for meal prep or holiday entertaining.
- Versatile serving options: Enjoy it plain, warmed up, or dress it up with vanilla ice cream, nondairy whipped cream, maple syrup, or toasted nuts for whatever mood strikes.
- A crowd-pleaser all year: While it’s a hit at Thanksgiving and Christmas, plenty of readers enjoy this crustless pumpkin pie year-round—even for breakfast! It’s that comforting and handy.
All in all, the ease, flexibility, and surprisingly wholesome nature of this crustless pumpkin pie make it a no-fuss, crowd-pleasing dessert to keep on hand through fall, winter, and beyond.
This crustless pumpkin pie stands out because it’s easy, flexible, and surprisingly light, yet still delivers all that cozy pumpkin spice and creamy custard texture you expect from pumpkin pie. It’s a one-bowl wonder using a whole can of pumpkin puree with zero waste, plus it adapts easily for vegan, gluten-free, or low-carb diets. Since it’s both low-calorie and high-fiber, many folks enjoy it year-round—even as breakfast (for another light, make-ahead morning option, try Pumpkin Chia Pudding)—making it ideal for holidays or anytime you want a lighter dessert option.
Ingredients You’ll Need
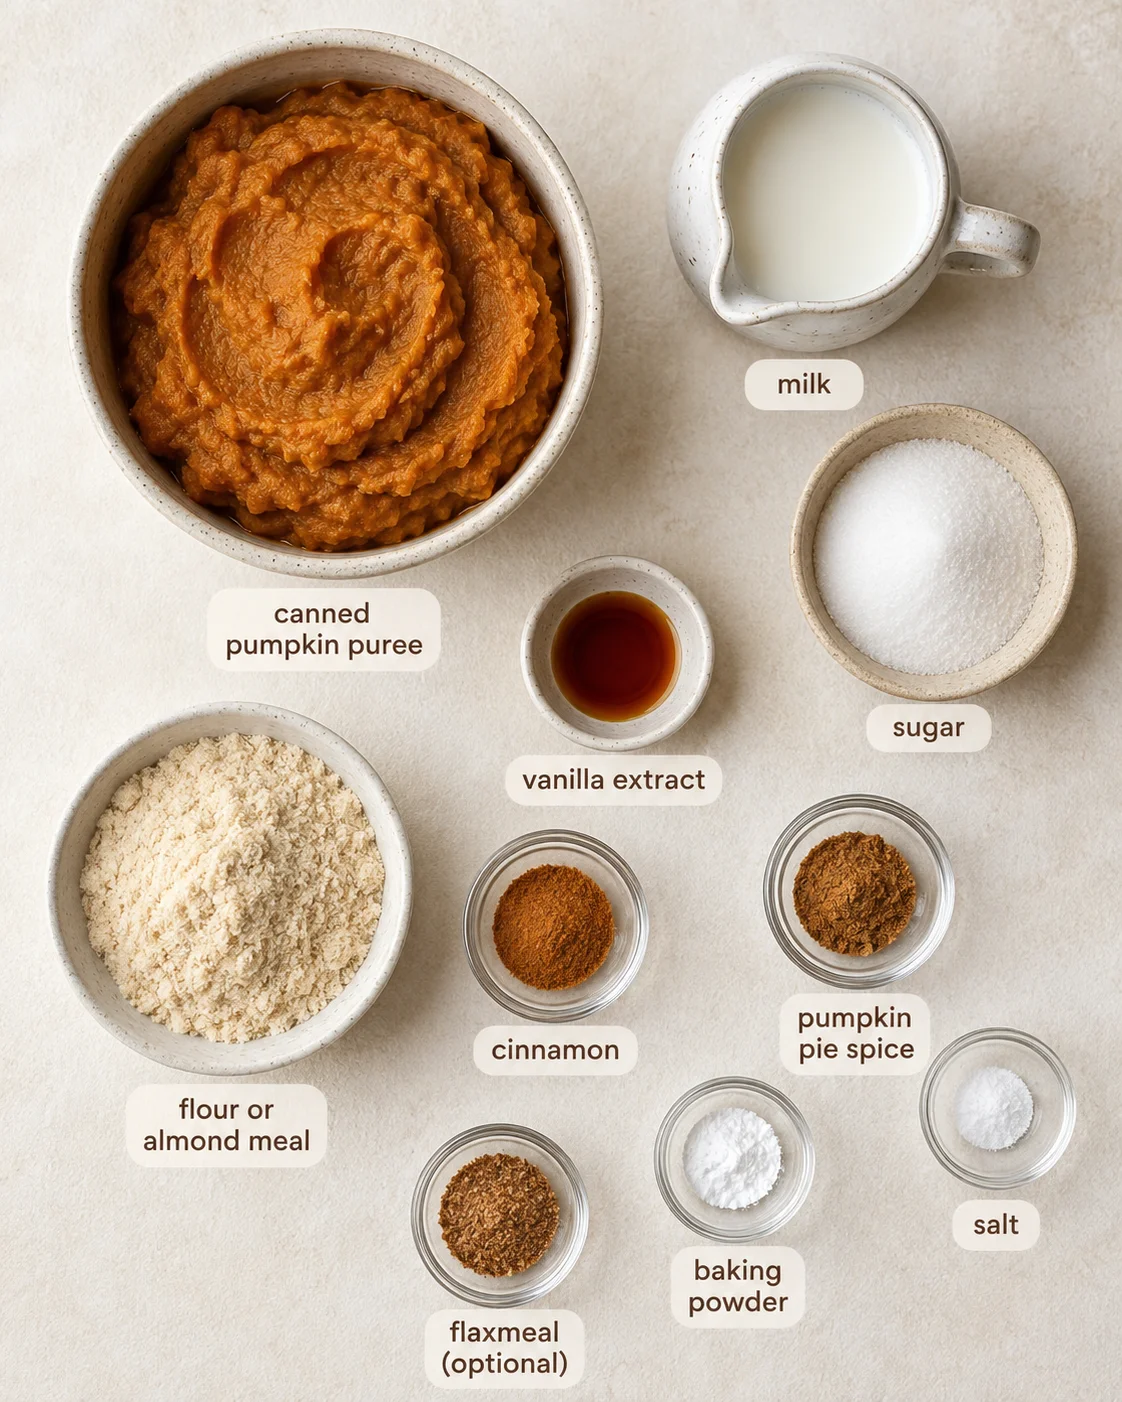
- 1 can pumpkin puree (15 oz)
- 1 cup milk of choice
- 2 1/2 tsp pure vanilla extract
- 2 tsp cinnamon
- 2 tsp baking powder
- 1 tsp pumpkin pie spice
- 1/2 tsp salt
- 1/3 cup flour (such as spelt, oat, white, sorghum, or almond meal)
- 1/2 cup sugar or unrefined sugar or granulated erythritol
- 1 tbsp flaxmeal or 2 tsp cornstarch (optional; can be skipped if serving pie in a bowl)
- optional 2 tbsp oil or almond butter for richness
Step-by-Step Method
- Gather all ingredients and read through the recipe.
- Preheat oven to 400°F (204°C).
- Grease a 9- or 10-inch pie pan thoroughly or spray with nonstick spray.
- If using a flax “egg,” mix 1 tbsp flaxmeal with 3 tbsp water and let sit a few minutes.
- In a large bowl, whisk together one 15‑oz can pumpkin puree, 1 cup milk, 2½ tsp vanilla, and your binder (flax “egg” or 1 egg or 2 tsp cornstarch); add 2 tbsp oil or almond butter if using.
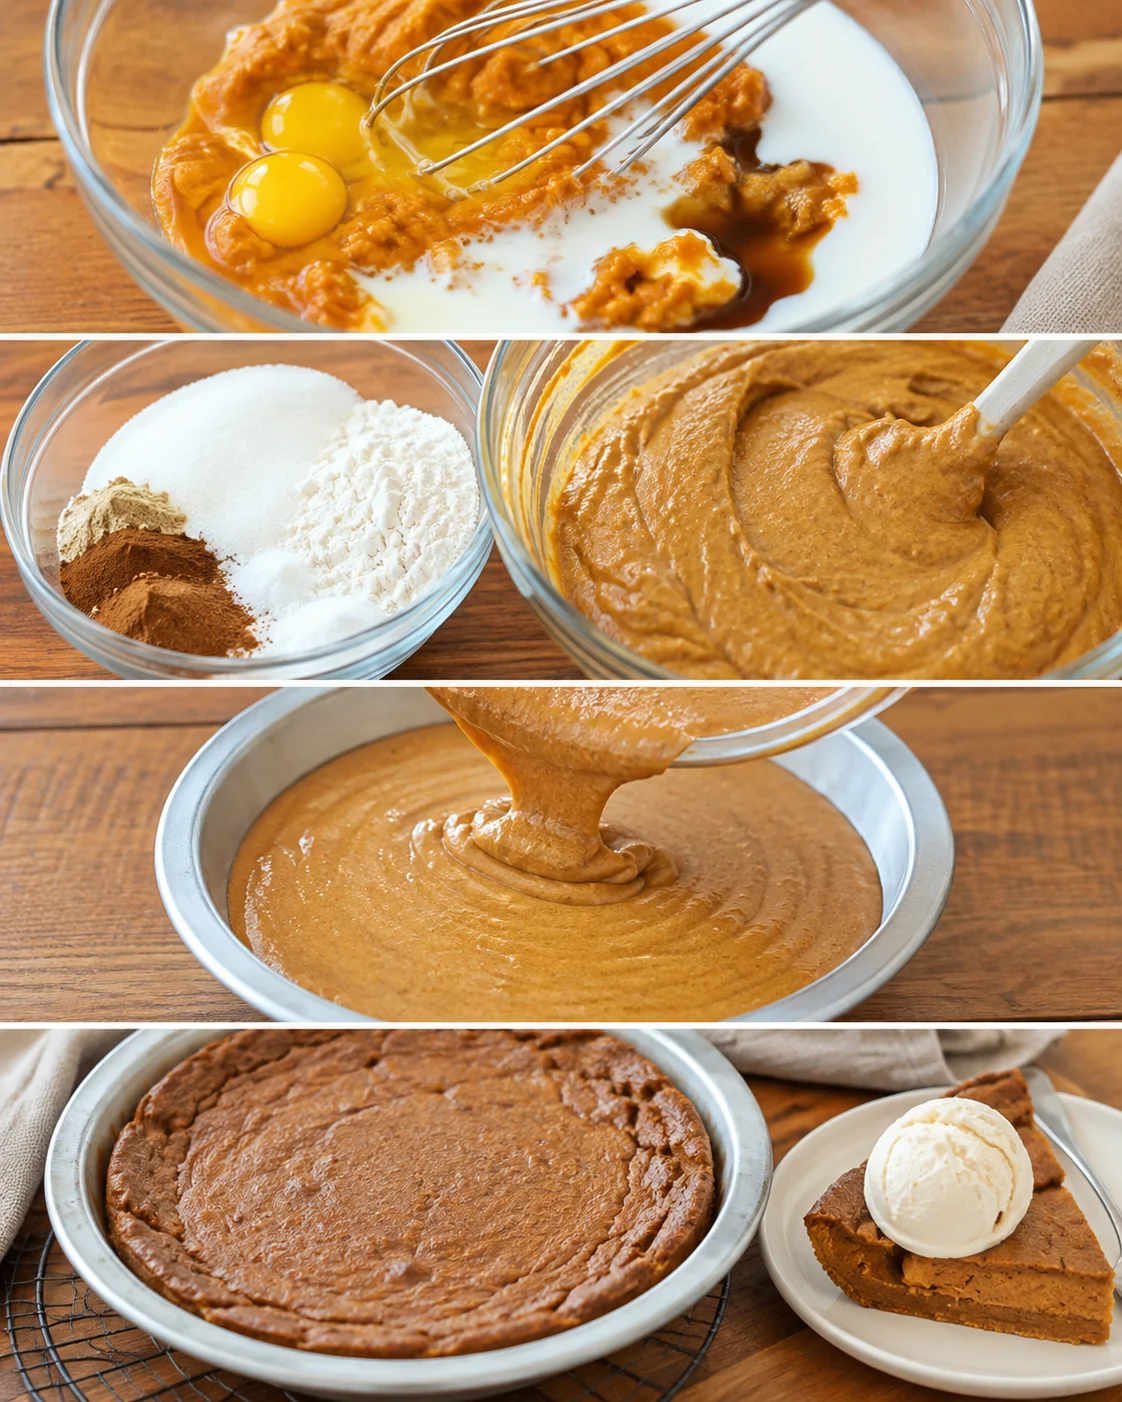
- In a separate bowl, whisk together 2 tsp cinnamon, 1 tsp pumpkin pie spice, 2 tsp baking powder, ½ tsp salt, 1/3 cup flour (or almond meal), and ½ cup sugar or erythritol (add extra cornstarch here if using).
- Add the dry ingredients to the wet ingredients and stir gently until just combined, avoiding overmixing.
- Pour the batter into the prepared pie pan and smooth the top evenly.
-
Bake on the oven’s center rack for about 35 minutes, until the edges are set and the center still jiggles slightly.
- Remove the pie from the oven and let it cool completely at room temperature.
- Chill the cooled pie uncovered in the refrigerator for at least 6 hours or overnight to firm up.
- Slice the chilled pie to serve.
Baking Tips and Tricks
- Make sure to grease your pie pan really well so when the pie chills, slices come out easily without sticking.
- Don’t expect the pie to look fully firm right out of the oven. It sets as it cools and especially after chilling in the fridge for several hours.
- To make your own vegan egg substitute, mix 1 tablespoon flaxmeal with 3 tablespoons water and let it sit for a few minutes before adding to the batter.
- If you use coconut flour, use only 2-4 tablespoons because it absorbs liquid much more than other flours. Start small and adjust as needed.
- Swap almond flour or almond meal 1:1 for the flour for a gluten-free pie. For firmer slices, add an egg or a bit more binder like flaxmeal.
- Measure your flour the right way—spoon it into the cup and level it off rather than scooping to avoid packing, which can make the batter too dense.
- Remove the pie from the oven when the edges are set but the center still jiggles a bit. The pie will finish cooking with residual heat and during chilling.
- Add a binder like 1 egg (if not vegan), 1 tbsp flaxmeal, or 2 tsp cornstarch for a firmer, sliceable crustless pumpkin pie.
Flavor Variations and Swaps
- Swap in equal amounts of roasted sweet potato or butternut squash puree for pumpkin puree if you want.
- If you’re watching carbs or on a keto diet, use erythritol or xylitol instead of sugar, and almond flour instead of regular flour to keep it low-carb.
- Going vegan? Use plant-based milk like almond, oat, or coconut, a flaxmeal “egg,” and either skip the oil or use almond butter to add richness.
- For gluten-free, swap out flour for almond meal or a gluten-free flour blend (texture will vary slightly).
- Toppings make this pie extra special: try it plain, with a scoop of vanilla ice cream, nondairy whipped topping, a drizzle of maple syrup, or a sprinkle of toasted nuts or Pumpkin Spice Sourdough Granola.
- For a creamier, richer pie, add 2 tablespoons of almond butter or oil to the batter.
Storing and Reheating
- Refrigerate your fully cooled and chilled pie in an airtight container or tightly wrapped with plastic or foil for up to 5 days. It keeps really well.
- Freeze the pie once it’s fully chilled and firm. Wrap tightly and store in an airtight container or freezer bag for up to 3 months. Just thaw overnight in the fridge before serving.
- To reheat, microwave individual slices in short 10–20 second bursts until warmed, or warm slices in a 300°F oven for 10–15 minutes. Be careful not to overheat to avoid a watery filling.
- You can bake the pie a day ahead and chill it overnight to firm it up. This makes serving effortless when you’re ready.
Troubleshooting and FAQs
- Can I use pumpkin pie filling instead of pumpkin puree? No, please don’t. Pumpkin pie filling already has sugar and spices added. Use plain pumpkin puree or homemade roasted pumpkin or squash puree for the best control over flavor and sweetness.
- How do I know when the pie is done? The edges should be set and slightly puffed, but the center will still wobble a little. It firms up more as it cools and chills in the fridge.
- Can I make this vegan? Absolutely! Use plant milk and flaxmeal “egg” (1 tbsp flaxmeal + 3 tbsp water) or cornstarch instead of regular egg, and skip any dairy or oil if you prefer.
- Is this recipe gluten-free? Yes, you can make it gluten-free by swapping the flour for almond meal or a gluten-free flour blend. The texture may vary slightly with the flour choice.
- Can I use fresh pumpkin? Yes—you can roast and puree fresh pumpkin flesh until smooth before using. Just avoid pumpkin pie filling.
- Can I bake the filling in muffin tins to make mini pies? I haven’t tested this yet. If you try, lower the baking time and start checking for doneness around 18-22 minutes since smaller pies bake faster.
- Why is my pie still gooey after baking? That’s normal! The pie needs time to cool and chill for several hours to fully set. Don’t skip the fridge step for clean slices.
- Can I make this sugar-free? Yes! Just replace sugar with granulated erythritol or xylitol and adjust sweetness to your taste.
A light and healthy crustless pumpkin pie with a rich custard texture and deep pumpkin flavor, easy to make and customizable for various dietary preferences.
- Total Time: 6 hours 50 minutes (including chilling)
- Yield: 8 servings 1x
Ingredients
- 1 can pumpkin puree (15 oz)
- 1 cup milk of choice (dairy or plant-based such as almond, oat, or coconut)
- 2 1/2 tsp pure vanilla extract
- 2 tsp cinnamon
- 2 tsp baking powder
- 1 tsp pumpkin pie spice
- 1/2 tsp salt
- 1/3 cup flour (such as spelt, oat, white, sorghum, or almond meal)
- 1/2 cup sugar or unrefined sugar or granulated erythritol
- 1 tbsp flaxmeal or 2 tsp cornstarch (optional for thickness)
- optional 2 tbsp oil or almond butter (for extra richness)
Instructions
- Gather all ingredients and read through the recipe.
- Preheat oven to 400°F (204°C).
- Grease a 9- or 10-inch pie pan thoroughly or spray with nonstick spray.
- If using a flax “egg,” mix 1 tbsp flaxmeal with 3 tbsp water and let sit for a few minutes.
- In a large bowl, whisk together pumpkin puree, milk, vanilla extract, and your binder (flax “egg” or 1 egg or cornstarch); add oil or almond butter if using.
- In a separate bowl, whisk together cinnamon, pumpkin pie spice, baking powder, salt, flour (or almond meal), and sugar or erythritol (add extra cornstarch if using).
- Add the dry ingredients to the wet ingredients and stir gently until just combined, avoiding overmixing.
- Pour the batter into the prepared pie pan and smooth the top evenly.
- Bake on the oven’s center rack for about 35 minutes, until the edges are set and the center still jiggles slightly.
- Remove the pie from the oven and let it cool completely at room temperature.
- Chill the cooled pie uncovered in the refrigerator for at least 6 hours or overnight to firm up.
- Slice the chilled pie to serve.
Notes
To make a firmer pie, add a binder such as 1 egg (if not vegan), 1 tbsp flaxmeal, or 2 tsp cornstarch., For vegan version, use plant-based milk and flax “egg,” omit regular egg., For gluten-free, swap flour for almond meal or gluten-free flour blend., For low-carb/keto, use erythritol or xylitol for sugar substitute and almond flour for flour., You can add 2 tbsp oil or almond butter for a creamier, richer pie., To avoid leftover pumpkin, use a full 15-oz can of pumpkin puree., Do not use pumpkin pie filling since it contains added sugar and spices., Pie can be served cold or gently warmed in microwave for softer texture., Store leftovers wrapped in fridge up to 5 days or freeze slices up to 3 months., To reheat, warm slices in microwave or oven at 300°F for 10-15 minutes.
- Prep Time: 15 minutes
- Cook Time: 35 minutes
- Category: Dessert
Nutrition
- Serving Size: 1 slice
- Calories: Approximately 120 calories per serving (variable based on substitutions)
- Fat: Approximately 2 grams per serving
- Carbohydrates: Approximately 20 grams per serving
- Protein: Approximately 3 grams per serving
More in Recipes
Gluten Free Pumpkin Muffins
Pumpkin Cottage Cheese Pancakes