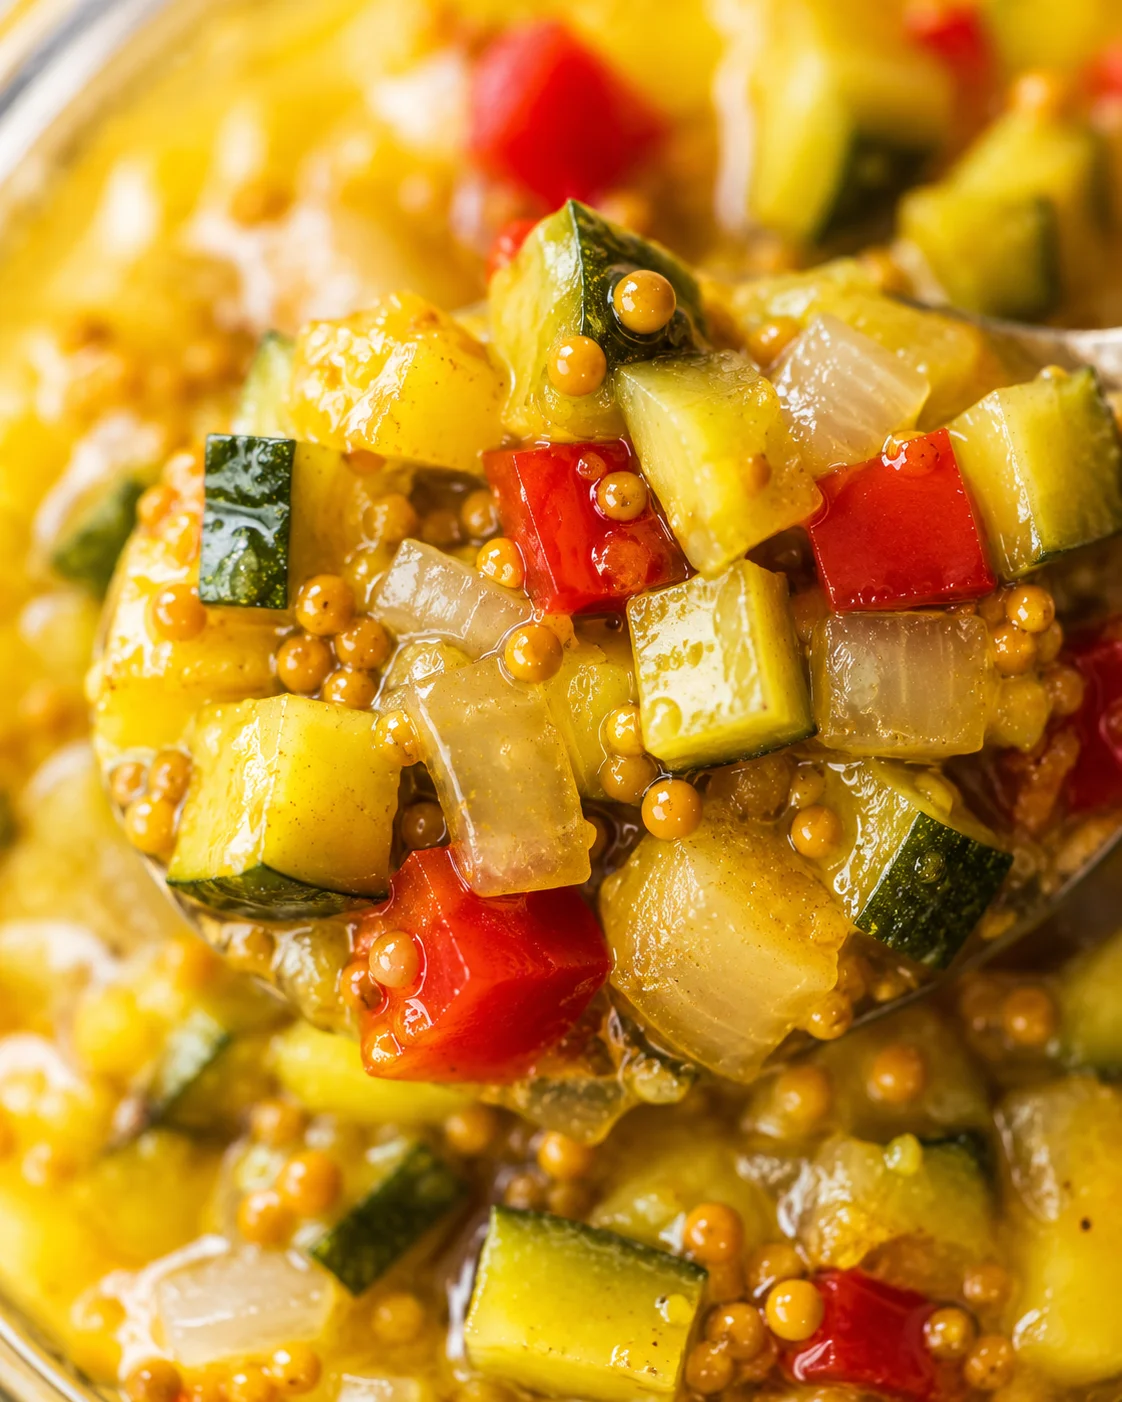
Zucchini Relish Recipe for a Tasty Burger Topping

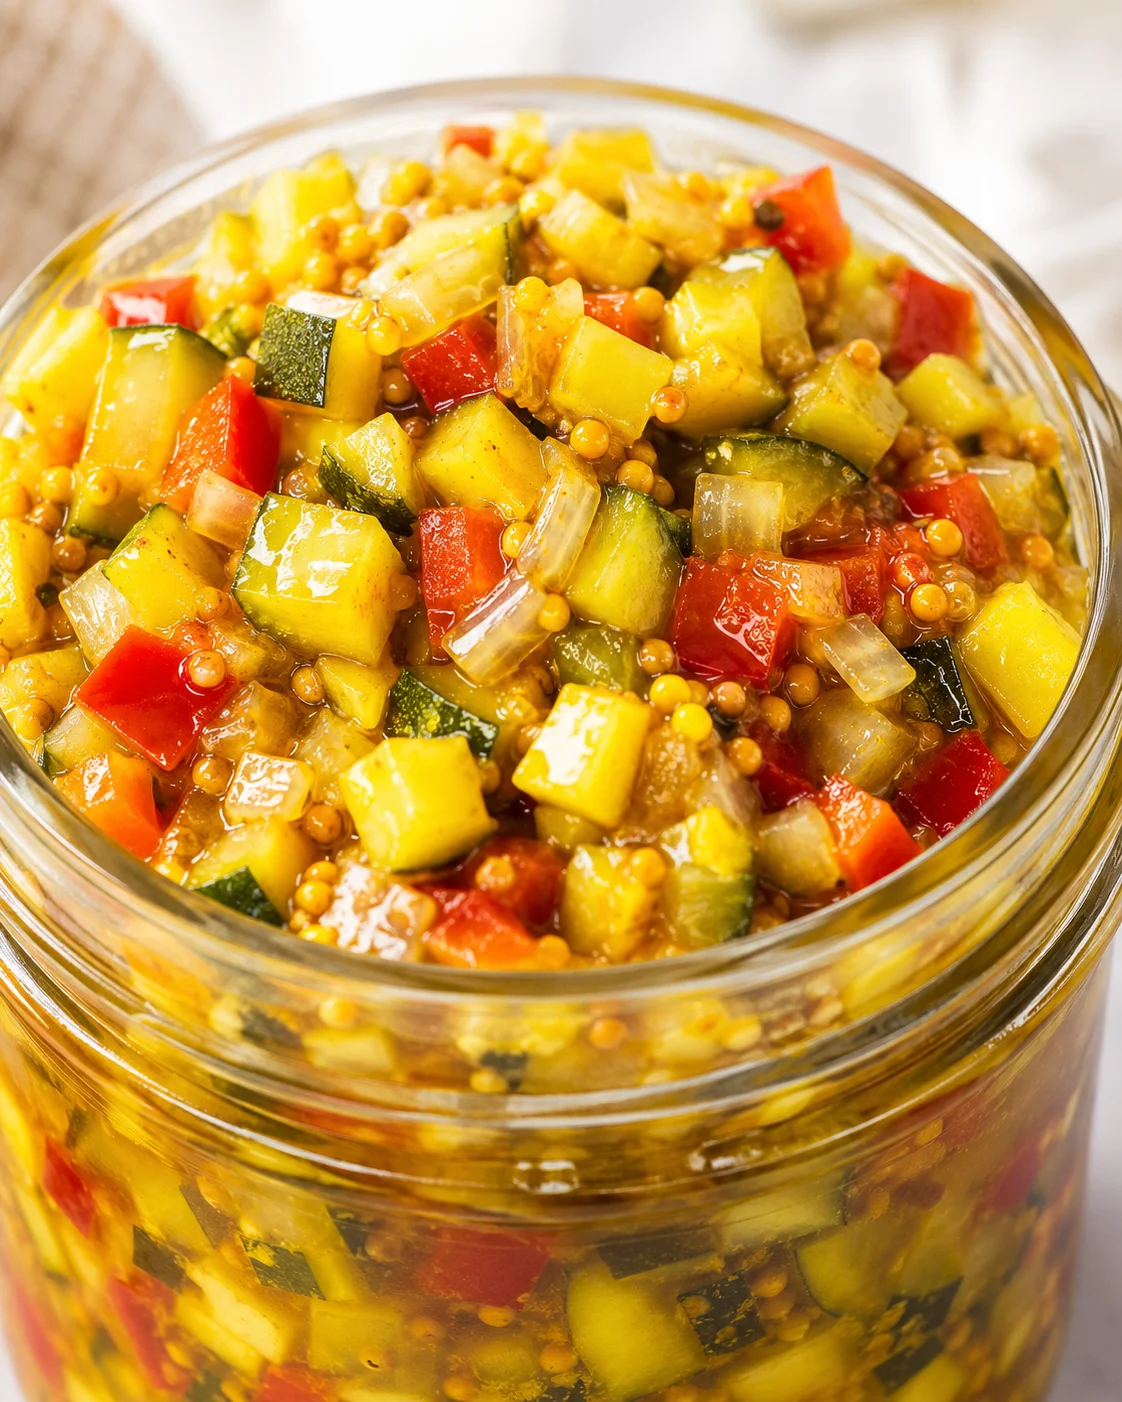
Zucchini Relish Recipe for a Tasty Burger Topping
This zucchini relish recipe is a go-to in our household. It’s perfect on burgers and hot dogs, but also fantastic stirred into potato salad, tuna salad, or egg salad for a little extra zing.
When summer squash season hits, especially zucchini, you might find yourself wondering how to use up all that bounty. Zucchini is one of those crops that keeps filling the garden and your kitchen!
After you’ve cooked up your usual zucchini meals, try preserving some in this easy zucchini relish recipe. Canning this relish makes it shelf stable and ready to jazz up your meals all year round.
This is definitely one of our favorite ways to enjoy zucchini beyond the summer months.
Remember that classic Del Monte hamburger relish? This zucchini relish brings back that beloved sweet and tangy flavor, but with fresh, simple ingredients you might have grown yourself.
Of course, it shines on burgers, but I also love adding it to egg salad, potato salad, or even mixing a spoonful into meatloaf for an extra burst of flavor.
Want to fill your pantry with wholesome DIY goodies? Check out my newest book from National Geographic! Attainable Sustainable Pantry includes delicious recipes for your favorite condiments, snacks, and toppings, plus a full section on safe home food preservation. It’s everything you need to start ditching packaged foods and making homemade staples instead.
Ingredients
Zucchini — This is the star ingredient! Use fresh zucchini; if it’s a big one, scoop out the seeds with a spoon for the best texture.
Red bell peppers — They add sweetness and vibrant flavor. Don’t swap in green bell pepper here; you could try yellow or orange, but I haven’t tested those.
Onion — I usually grab yellow onions, but white or red will work just fine.
Salt — Salting the veggies and letting them rest overnight draws out excess moisture. After salting, you’ll rinse and drain them to remove most of the salt. Use canning salt, kosher salt, or sea salt—avoid iodized or anti-caking salts.
Jalapeño pepper — A little jalapeño adds mild heat and a nice pop of flavor. Not too spicy, I promise. If you want hotter, go ahead and add spicier peppers.
Vinegar — Either distilled white vinegar or apple cider vinegar work great, and I’ve used both successfully.
Sugar — I use organic granulated cane sugar, but any granulated sugar will do.
Seasonings — A dash of turmeric, mustard seeds, black pepper, and a pinch of nutmeg bring the whole dish together.
You can chop by hand or use a food processor—whatever works best for you.
Making this Recipe
Day 1: Chop the zucchini, onion, and peppers. You can either finely dice by hand or pulse in a food processor to about 1/8-inch pieces, but bigger chunks are perfectly fine if you like a chunkier texture.
Mix your chopped veggies with the salt in a big bowl and pop it in the fridge overnight. This step pulls out extra liquid so your relish stays thick and flavorful when cooked.
The next day, drain the salted vegetables and rinse well before adding the rest of your ingredients.
Day 2: Drain and rinse the veggies, then stir them into a large pot with the sugar, vinegar, and spices. Bring it up to a simmer over medium-high heat and cook for about 10 minutes, stirring often.
All ingredients go into one pot—easy prep!
If you want to store this zucchini relish recipe as a pantry item, you’ll need to process it with a proper water bath canner.
Fill your half-pint or pint jars leaving about a quarter inch of headspace at the top, then get ready to seal.
Hot Water Bath Canning this Zucchini Relish
Water bath canning makes this relish shelf stable, so you can enjoy your homemade zucchini goodness anytime without worrying about refrigeration.
A funnel is a great tool here to keep things neat when filling jars.
While the relish is still hot, ladle it into jars (pint or half-pint) using your funnel to avoid spills. Next, slide a bubble remover or a plastic knife around the jar’s sides to get rid of trapped air bubbles.
Wipe the rims clean with a damp cloth—this little step makes a big difference when sealing. Place the lids on, screw the bands on just until they’re finger tight, and use jar tongs to lower them into boiling water. Make sure the water covers the jars by about two inches. Top up the water if it’s too low.
Hot tip: Keep a pot or kettle boiling extra water on the side so you can add hot water to your canner and avoid cooling it down too much while processing.
Process the jars for 15 minutes if you’re below 6,000 feet in elevation, or 20 minutes if you’re above. Once time’s up, move the jars to a padded kitchen towel and let them cool completely—and listen for that satisfying tink! sound that means the lids sealed perfectly.
Storing Jars of Zucchini Relish
After cooling, check your jars: the lids should be slightly indented and feel firm when pressed. If any jars didn’t seal, just pop those in the fridge and use them up quickly—they won’t keep at room temperature.
Take off the bands once jars have cooled and wash the jars to keep them clean. Store the sealed jars in a cool, dark spot for best shelf life.
You’ll know your relish is safely preserved when you hear that classic tink! and the lids have a nice concave shape. Those jars are ready to brighten your meals all year long!
🍅 Safety First!
Canning is a fantastic way to keep your food fresh, but it does have some important safety points. All the recipes here have been tested and developed by a certified Master Food Preserver to ensure you get safe, delicious results.
- Understand the difference between water bath and pressure canning. Low-acid foods require pressure canning—this zucchini relish recipe is acidified and safe for water bath.
- Changing the ingredients, such as vinegar or sugar amounts, can affect acidity and safety, so stick to the recipe.
- Use the correct jars and new lids—never reuse single-use lids excluding special hard-plastic ones like Tattler or Harvest Right.
- For detailed guidance on safe canning, the National Center for Home Food Preservation is an excellent resource.
A jar of homemade zucchini relish also makes a lovely gift! Download these free printable canning labels, complete with a sweet reminder to get that jar back.
★ Did you try this zucchini relish recipe? Don’t forget to leave your star rating below! ★
When garden zucchinis pile up and you’re looking for a smart way to preserve that bounty, this zucchini relish recipe is a real winner. Sweet, tangy, and with just a touch of spice, it recreates that nostalgic hamburger relish flavor we all love, using fresh garden-picked veggies. Prepare a batch in late summer, and you’ll have a vibrant, multipurpose condiment ready for burgers, hot dogs, potato or egg salad, tuna salad, sandwiches, or even stirred into meatloaf for an extra zing.
This recipe takes two days: the first day is prep and an overnight salting step to pull out moisture. The next day, you rinse, cook, and either refrigerate for quick use or can it to make it shelf stable. It yields 3 to 4 pints and is tested safe at pH 3.0 for water bath canning when done exactly as directed.
Here’s what you’ll find inside this post:
- A straightforward ingredient list featuring zucchini, red bell pepper, onion, vinegar, and sugar;
- Step-by-step instructions to prep, salt, rinse, cook, and jar;
- Simple, clear canning guidance with processing times for a water bath canner;
- Useful storage tips, safety reminders, and tricks to get perfect seals and great texture;
- Ideas for variations if you want to tweak heat levels or skip canning for a fridge batch.
Keep reading for exact ingredient amounts, required equipment, and detailed how-tos so you can enjoy this zucchini relish recipe fresh or preserved for later.
Why This Relish Shines
This zucchini relish recipe is a practical, delicious way to preserve summer squash when your garden is overflowing. It captures that familiar sweet and tangy relish flavor using simple, fresh ingredients, making it perfect for burgers, hot dogs, potato and egg salads, tuna salad, or even a flavor boost in meatloaf. Plus, it’s safe for water bath canning, turning your summer harvest into a year-round pantry staple.
Ingredients and Canning Tools
- 4 cups zucchini chopped
- 2 cups onion finely chopped
- 1 red bell pepper seeded and diced
- 1 jalapeño pepper chopped
- 1 1/2 teaspoons sea salt
- 1 1/2 cups sugar
- 1 1/2 cups apple cider vinegar or distilled white vinegar
- 1 1/2 teaspoons ground turmeric
- 2 teaspoons mustard seeds
- 1/2 teaspoon black pepper
- Pinch nutmeg
Day-by-Day Instructions
- If using a large zucchini, scoop out seeds with a spoon.
- Roughly chop or pulse 4 cups zucchini, 2 cups onion, 1 seeded red bell pepper, and 1 jalapeño to about 1/8–1/4-inch pieces.
- Mix the chopped vegetables with 1½ teaspoons sea or kosher salt in a large bowl.
- Refrigerate the salted vegetables overnight to draw out moisture.
- Next day, drain the vegetables in a colander, rinse thoroughly, and drain again.
- Transfer the drained vegetables to a large pot.
- Add 1½ cups sugar, 1½ cups vinegar (apple cider or distilled white), 1½ teaspoons ground turmeric, 2 teaspoons mustard seeds, ½ teaspoon black pepper, and a pinch of nutmeg to the pot.
-
Bring the mixture to a boil over medium-high heat, then reduce to a simmer and cook about 10 minutes, stirring often.
- While the relish cooks, wash pint or half-pint jars and inspect rims for chips; keep jars hot in simmering water and warm lids per manufacturer instructions.
- Use jar lifters to remove hot jars from the water and drain well.
- Ladle hot relish into jars using a funnel, leaving 1/2-inch headspace.
- Remove air bubbles by sliding a bubble remover or plastic utensil around the inside edge of each jar.
- Wipe jar rims clean with a damp cloth.
- Place lids on jars and screw bands on until just finger tight.
- Lower jars into boiling water so water covers jars by 2 inches; return the canner to a boil and start timing.
- Process jars in a rolling boil for 15 minutes (below 6,000 ft) or 20 minutes (above 6,000 ft).
- Carefully remove jars and set them upright on a towel-lined surface to cool undisturbed.
- After jars have cooled, check seals by pressing the center of each lid; refrigerate any jars that did not seal.
- Remove screw bands and wash cooled jars to clean off residue.
Pro Tips for Best Results
- Salting overnight is key—it pulls moisture from veggies so the relish won’t be runny. Make sure to rinse them well before cooking.
- Use non-iodized salt like kosher, sea, or canning salt. Iodized or anti-caking salts can throw off flavor and texture.
- Fill jars while the relish is hot to minimize trapped air and help the seal.
- Wipe jar rims clean before sealing—tiny bits of food can keep lids from sealing properly.

- Always use new lids, and don’t boil or overheat them beyond the manufacturer’s instructions, as this can damage the sealing compound.
- Keep some boiling water handy to top off your canner and prevent temperature drops while processing.
- If a jar doesn’t seal, refrigerate and use it up within a few weeks rather than storing at room temperature.
Customize Flavor and Heat
- Vinegar options: Swap distilled white vinegar and apple cider vinegar as you like—they both work well in this zucchini relish recipe.
- Heat level: Leave out the jalapeño for a milder taste or add hotter peppers if you crave some extra spice.
- Bell pepper color: Red bell peppers provide the classic sweetness and color. Yellow or orange peppers should work, but green changes the flavor and is not recommended.
- Fridge batch: If you prefer not to can, just cook and cool the relish and store in sterilized jars in the fridge. It should last a few weeks. For long-term storage, follow the water bath canning method exactly.
- Serving ideas: Beyond burgers, stir this relish into tuna, potato, or egg salads, or mix a few spoonfuls into meatloaf or sandwiches.
Storing and Shelf Life
Properly processed and sealed jars can be stored in your pantry, away from light and heat, for up to a year. Once jars have cooled, it’s best to remove the screw bands and clean the jars to help spot any failed seals.
After opening, keep the relish refrigerated and enjoy within 4–8 weeks for the best flavor and freshness. Any jars that didn’t seal should go straight into the fridge and used first.
If you don’t want to can, freezing the cooked relish in freezer-safe containers works too—store for up to 6 months and thaw slowly in the fridge before use.
Canning Safety and Common Questions
- Is this zucchini relish recipe safe for water bath canning? Yes! It’s tested at pH 3.0, so water bath canning is safe when you follow the recipe exactly. Don’t change vinegar or sugar amounts without testing, or safety can be compromised.
- Can I use different vinegars? Both distilled white vinegar and apple cider vinegar have been used successfully in this recipe.
- Can I swap green bell pepper for red? Red gives necessary sweetness and color, so green isn’t a good substitute here and will change the flavor.
- What if a jar doesn’t seal? Keep unsealed jars in the fridge and use them first. You can also reprocess them with new lids if desired.
- How long do sealed jars last? Store them in a cool, dark place and use within a year for optimal quality.
- What basic canning equipment do I need? Clean pint or half-pint jars, canning lids and screw bands (new lids every time!), a large pot or water bath canner, jar lifter, ladle, funnel, and a bubble remover or plastic knife.
- Can I skip the overnight salting? It’s a really helpful step to prevent watery relish and improve texture. Skipping it will result in more liquid and a different texture.