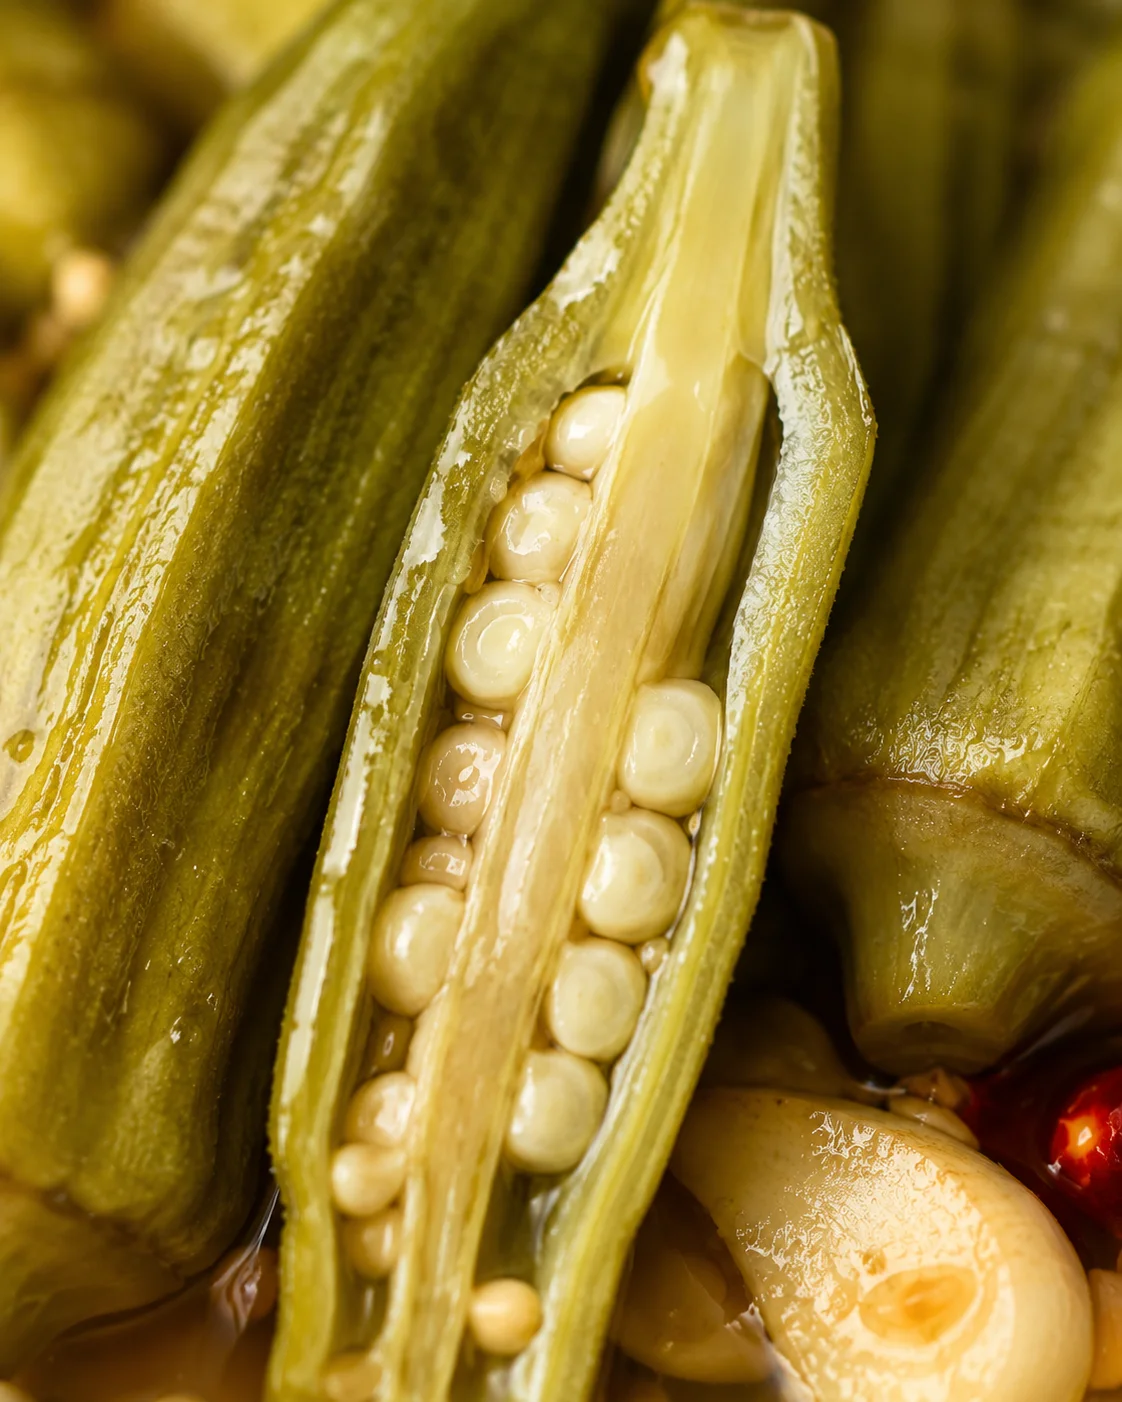
Easy Crisp Pickled Okra

Discover the secret to making crispy pickled okra with just one special ingredient! This recipe is perfect for small batches and uses a water bath method, so there’s no need for a pressure canner—making preserving pickled okra doable for every home cook.
SAVE THIS RECIPE
I’ll send this recipe right to your inbox so you can save it and come back whenever your craving hits!
Have you ever tried making pickled okra but ended up with soggy, sad little pods? Me too, until I discovered the one trick that keeps them nice and crispy. I picked this up from my mom years ago, and now I’m excited to share it with you.
That magic fix? Pickle Crisp. It’s a tiny sprinkle that makes a huge difference!
You’re welcome!
If you’re all about crunchy, tangy snacks that brighten your day, then these pickled okra will be your new favorite. I’ll walk you through how this simple ingredient—Ball Pickle Crisp, which is food‑grade calcium chloride—keeps your okra perfectly crisp. Plus, I’ll share an easy water‑bath canning method so you can safely preserve this small batch without needing a bulky pressure canner.
Get ready for a user-friendly, photo-filled guide that includes exact jar sizes, equipment tips, and expert advice to ensure your okra stays firm and full of flavor. If canning isn’t your thing, no worries—I’ll also share a quick refrigerator pickle option for tasty okra ready in a snap.
This process takes about 45 minutes of hands-on prep and 10 minutes in the water bath, yielding about 5 to 6 half-pint jars or 3 pints total. The pickles taste great after just 24 hours, but if you can hold out, they really shine with a week of rest.
Scroll down to the printable recipe for precise measurements and step-by-step instructions to achieve your own batch of crispy pickled okra. Trust me, you’re going to love it!
Why You’ll Love These Pickles
This pickled okra recipe is a winner because it nails big flavor and a satisfying crunch, all without complicated steps. Whether you’re brand new to canning or a veteran food preserver, this approach is straightforward, reliable, and downright delicious.
- Crunchy every time: The secret weapon is Pickle Crisp (calcium chloride). A pinch in every jar keeps your okra snappy—no messy lime soaking needed.
- No pressure canner necessary: Just use a water bath for 10 minutes with half-pints or 15 minutes for quarts. Perfect for home cooks without fancy gear.
- Flexible timing options: In a hurry? Skip the water bath to make quick refrigerator pickles—ready to eat in 24 hours. Want to gift or store long term? Water bath can your jars to last for months.
- Simple pantry staples: You’ll use fresh okra, 5% acidity vinegar, water, pickling salt, garlic, and whatever chiles or spices you love. Easy ingredients that you likely have on hand.
- Endless flavor variety: Go garlicky, spicy, dill-heavy, or add a hint of turmeric—the basic method welcomes your favorite twist.
- Perfect for garden-fresh or farmer’s market okra: Small, fresh pods hold their crunch beautifully and produce stunning, shelf-stable jars you can enjoy year-round.
- Great for parties and gifts: Set out small jars on a charcuterie board or give them as homemade gifts—everyone loves a crunchy, thoughtful treat.
- Low waste recipe: This small batch makes just enough for your family, about 5–6 half-pints or roughly 3 pints, so you won’t have leftover pickles going to waste.
Remember to always use 5% acidity vinegar to safely preserve your pickles. If you’d rather skip Pickle Crisp, you still get tasty okra pickles, just with a softer texture. But if crispy pickled okra is what you want, don’t skip this small, powerful step. Get ready for tangy, crisp, fun-to-eat pickled okra!
Ingredients, Including Pickle Crisp
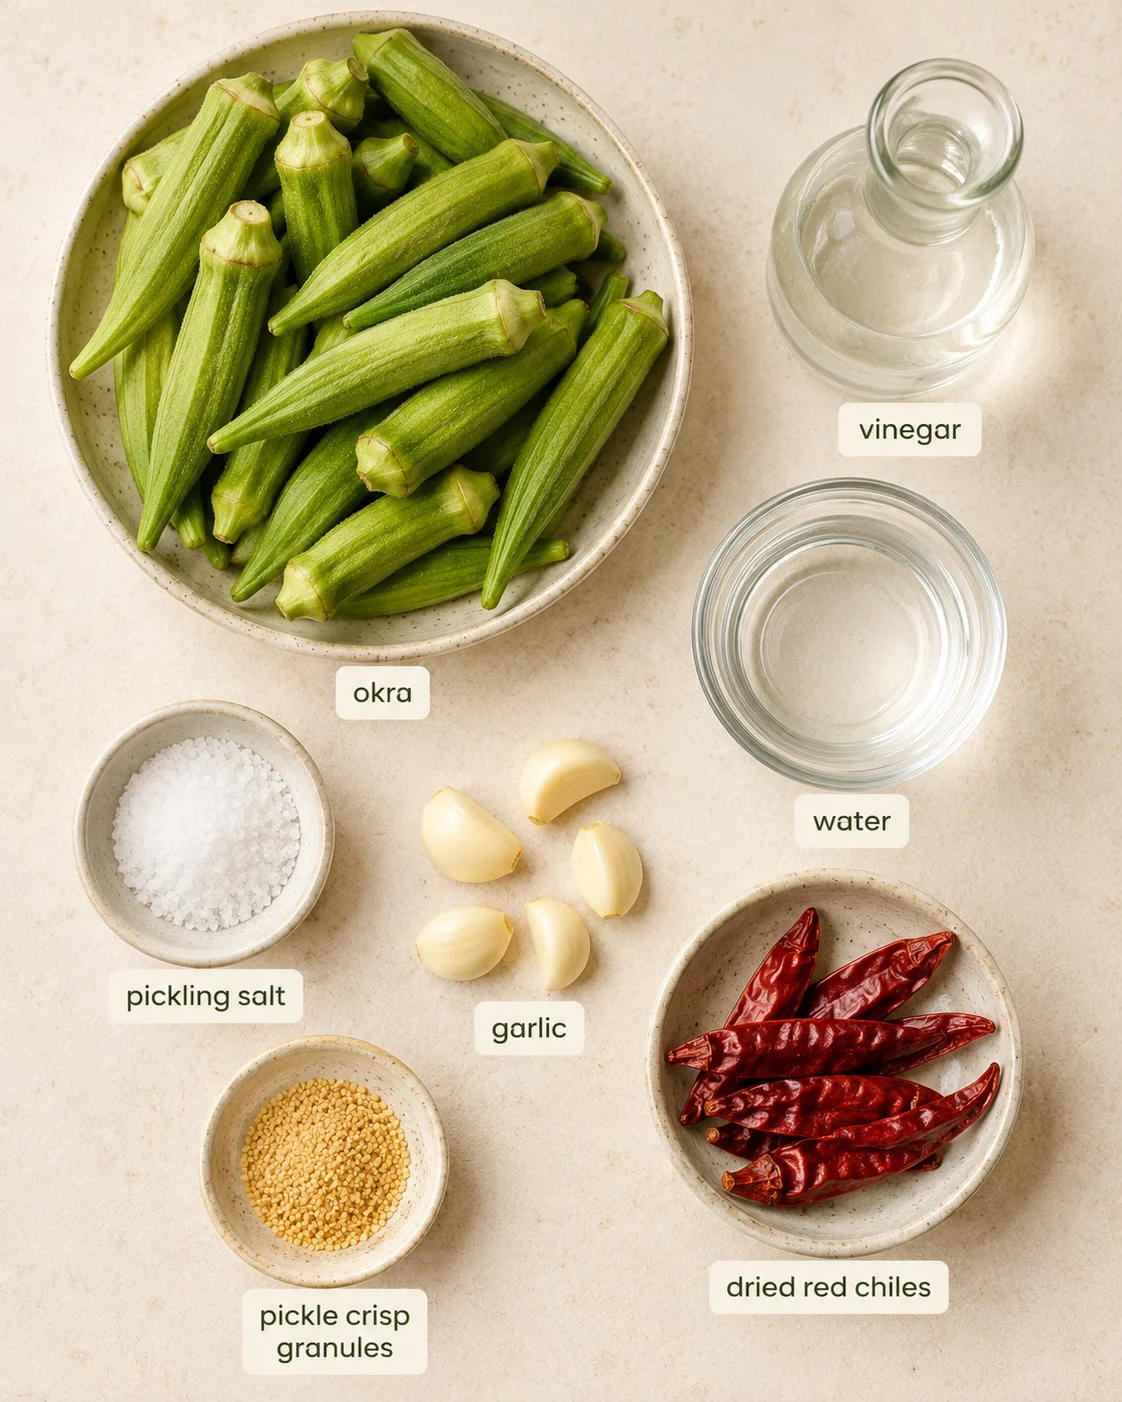
- 2 pounds fresh okra (about 2 ½ to 4 inches long)
- 2 cups 5% acidity vinegar (apple cider or distilled white)
- 2 cups water
- 2 tablespoons pickling salt
- 6 large garlic cloves, halved or 6 teaspoons chopped garlic
- 6 small dried red chili peppers (like Arbol or Thai) or 3 teaspoons crushed red pepper flakes (optional)
- ¾ to 1 teaspoon Ball Pickle Crisp (calcium chloride granules) (optional)
- 6 half-pint or 3 pint jars, washed and sterilized
Step-by-Step Water Bath Method
- Fill a large pot with enough water to cover your jars by 1 inch and bring to a boil.
- Sterilize jars by boiling them in the pot for 10 minutes, then drain them on a clean kitchen towel.
- Wash okra and lay on kitchen towels to dry until there are no puddles of water.
- Combine vinegar, water, and pickling salt in a medium saucepan and heat over medium until it reaches a rolling boil.
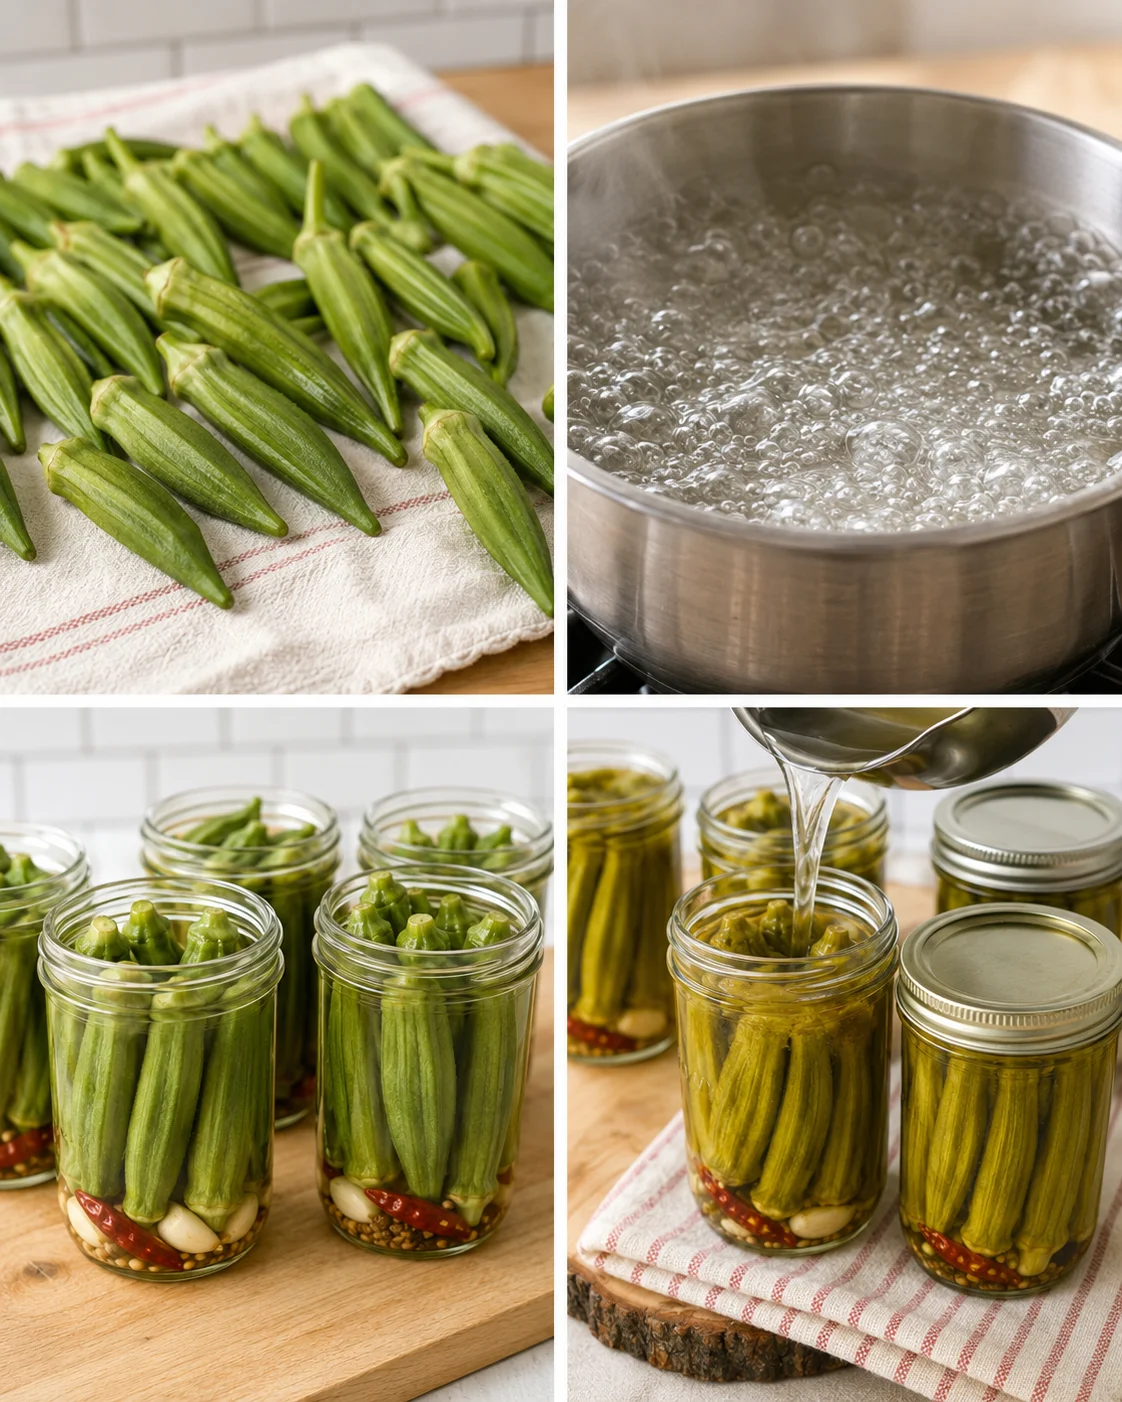
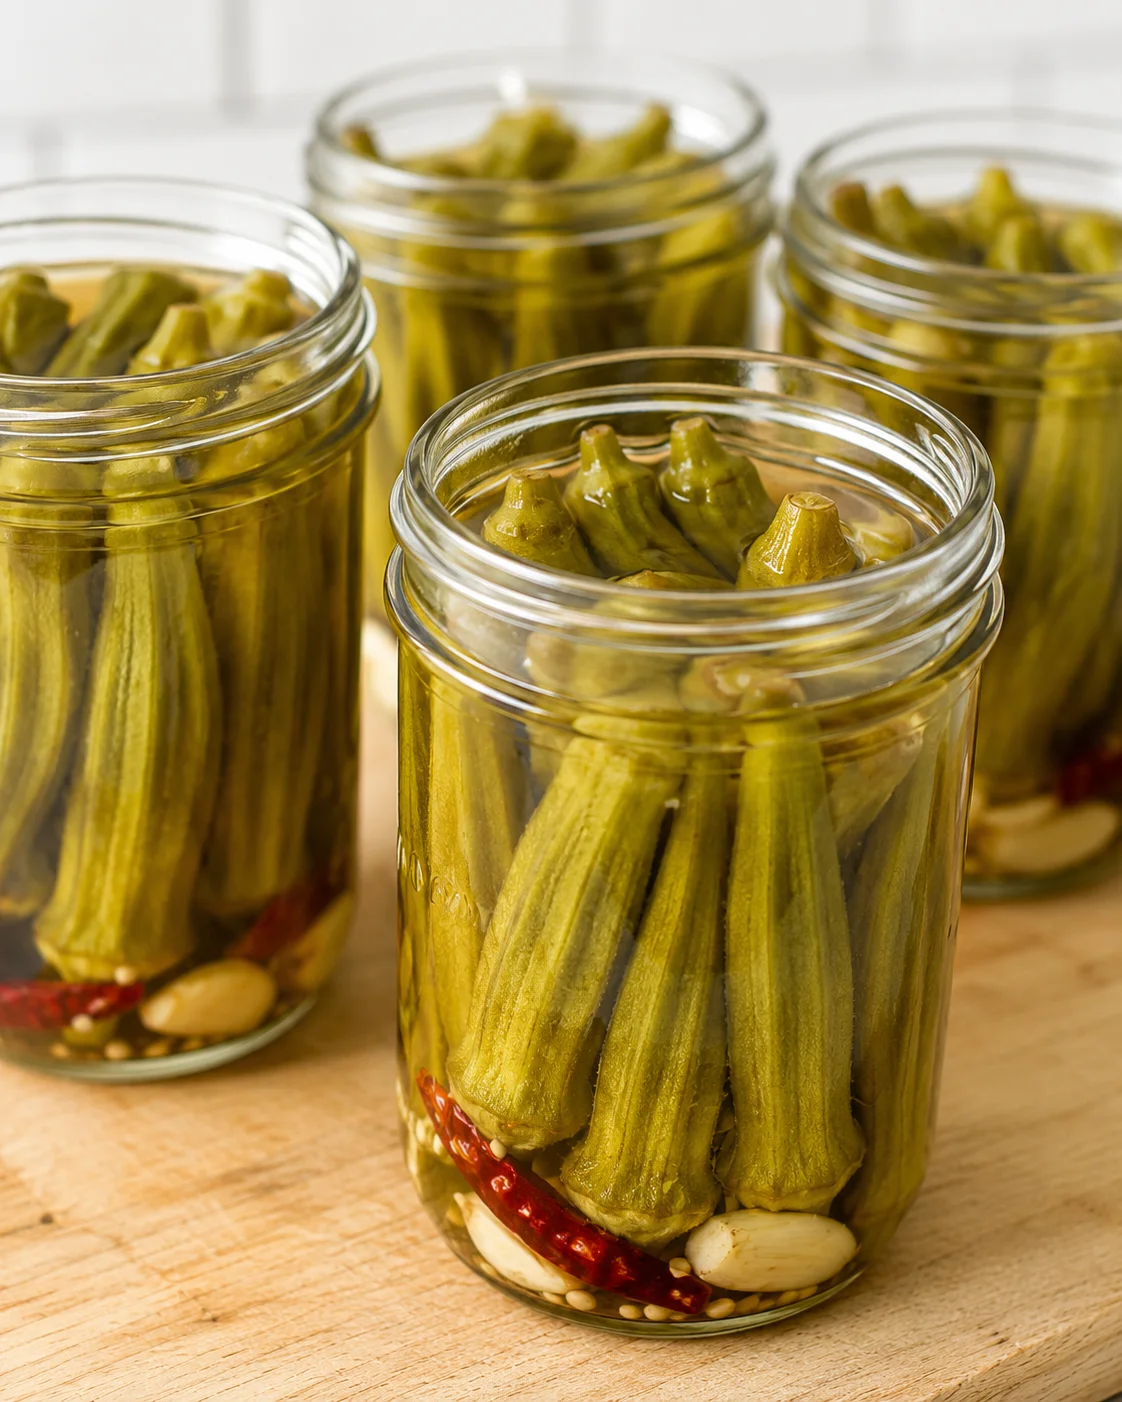
- Place two garlic halves and one dried chili (or 1 tsp chopped garlic and 1/2 tsp red pepper flakes) into each jar and sprinkle a tiny pinch of Ball Pickle Crisp (about slightly less than 1/8 tsp for half-pints) into each jar.
- Pack okra tightly into jars, alternating tips up and down and placing smaller pods at the top.
- Set jars on a towel or cutting board and slowly pour the boiling brine over the okra, leaving about 1/4 inch headspace.
- Slide a table knife or canning tool along the jar sides to release trapped air bubbles.
-
Wipe jar rims, fit lids, and screw on bands just until snug.
- Using jar lifter tongs and a water bath rack, carefully lower the jars into the boiling water so they are covered by at least 1 inch of water.
- Cover the pot, return the water to a boil, and process half-pint and pint jars for 10 minutes (process quarts for 15 minutes).
- Carefully remove jars with the jar lifter and place them on a towel to cool; listen for the sealing “ping.”
- Let jars sit at room temperature; they can be eaten after 24 hours but develop best after about 1 week.
- Optional quick-refrigerator method: if skipping the water bath, pour the hot brine over okra, let jars sit at room temperature for 24 hours, then refrigerate.
Expert Tips for Best Crunch
- Save time by using pre-peeled, refrigerated chopped garlic instead of fresh chopping.
- Speed up boiling water by starting with hot tap water and putting a lid on your pot.
- Start heating your boiling water first — it takes the longest and saves time overall.
- Reuse the same pot and water to sterilize jars and then process them, topping off water as needed so jars stay covered by an inch.
Instead of moving a huge pot full of hot water, set the pot on your stove and add water to it in small batches to sterilize or water bath process your jars safely.
I prefer adding garlic and spices straight into each jar’s bottom rather than the brine. This way, you control the flavor precisely in every jar.
Make sure you pick vinegar labeled 5% acidity for safe pickling. I love apple cider vinegar for its mild taste, but distilled white vinegar works great too.
My go-to way to enjoy crispy pickled okra? Alongside a pulled pork sandwich or served in mini Mason jars on a party board. They’re a fun, crunchy snack that’s always a hit!
Have questions or want to share your results? Drop a comment under the printable recipe! And if you love this recipe, please give it a five-star rating—I appreciate your support!
Flavor Swaps and Add-Ins
If you want to mix things up, here are some simple swaps and tweaks to make your pickled okra just the way you like it:
- For spicy lovers: Double the crushed red pepper flakes to 1 teaspoon or add 3 dried hot peppers for extra heat.
- Smooth out sharp vinegar flavors: Add ½ teaspoon granulated sugar per pint jar for a subtle mellow sweetness.
- Can’t find dried whole red chiles? Use crushed red pepper flakes from your spice aisle instead. For dried whole peppers, check the international foods aisle.
- Other tasty seasonings: Try pickling spice blends, whole peppercorns, mustard or dill seeds, or a pinch of turmeric for a unique twist on flavor.
Storage and Make-Ahead Options
You have two options for storing your crispy pickled okra: fully water-bath canned jars or quick refrigerator pickles. Here’s how to keep them fresh and tasty:
- Unopened water-bath jars: Store in a cool, dark pantry. Properly sealed jars keep their best quality for up to a year. Always check the seal before use.
- Refrigerator method: If you skipped the water bath, let jars rest at room temp for 24 hours before refrigerating. These keep well for up to one month.
- After opening: Refrigerate opened jars and use within one month for peak flavor and crunch.
- Make-ahead tips: Both canned and quick pickles can be made in advance. Flavor improves after about a week. Canned jars make great gifts when prepared early.
- Serving and reheating: Pickled okra is best served cold or at room temp. If you want them warm, remove okra from the jar and heat gently in a saucepan. Never heat sealed jars in microwave or oven.
- When to toss: Discard any jars with broken seals, bulging lids, leaks, off smells, visible mold, or unusual cloudiness or fizzing. Safety first!
Common Questions About Pickling
- Is Pickle Crisp really necessary?
It’s optional but highly recommended! It keeps okra crunchy and avoids the mess and fuss of using lime. For quick refrigerator pickles, you can skip it. - How much Pickle Crisp should I use?
Use just a pinch—slightly less than 1/8 teaspoon per half-pint and less than 1/4 teaspoon per pint. Follow package instructions too. - What kind of vinegar should I use?
Always go for 5% acidity vinegar for safe canning. Both apple cider and distilled white vinegar work perfectly here. - Can I use frozen okra?
Fresh okra is best for keeping that crisp texture. Frozen okra releases water and tends to get mushy when pickled. - How long before I can eat my pickled okra?
They’re good after 24 hours but taste best after sitting a week. If you don’t do the water bath, wait 24 hours and keep refrigerated. - Are water-bath canned jars shelf-stable?
Yes! When filled properly and processed for 10 minutes (15 for quarts), they’re shelf-stable. Store in a cool, dark place and enjoy within a year. - What if a jar doesn’t seal?
If your jar stays unsealed, refrigerate it and eat within one month. Don’t store unsealed jars at room temperature. - Why did my pickled okra turn out soft?
Common causes include using older or large okra pods, skipping calcium chloride, or packing bruised pods. Pack okra alternating tips up and down and avoid overcooking. - Can I change the flavorings?
Absolutely! Try different chiles, dried herbs, spices, or add ½ teaspoon sugar per pint to smooth flavors. See my Flavor Variations section for ideas. - Any safety tips for water-bath canning?
Always sterilize jars, fill water to cover jars by an inch, remove air bubbles before sealing, don’t overtighten bands, and use proper jar lifters. When in doubt about a jar’s safety, throw it out.